Archives
NIM archives provide a solution for logging and tracking all facility archives and project backups. Archives are logged as a global entity for the studio and multiple jobs can be attached to a single archive. All media items are given a unique archive ID which can be used as a reference to the actual object. Archives include tracking information to follow the history of possession.
Archives share Media Type definitions with NIM Media. Media types can be defined by using the Admin > Media Types panel found in the Main Menu. Information about adding Media Types can be found in the Admin Settings section of the documentation.
To access Archives click on the Studio > Archives section of the Main Menu.
Archive ID
When creating a new Archive item, a unique Archive ID will be automatically generated. All Archive items are prefixed with the letter A followed by the year and item number.
The Archive ID format is as follows: A_<year>_<itemNumber>
For example:
Archive ID: A_2021_00001
When changing the year on an exiting item, the item number will be automatically updated to be the last number in the selected year.
Tip
When tracking physical items, quickly identify them by attaching a label with the Archive ID.
Archive UI
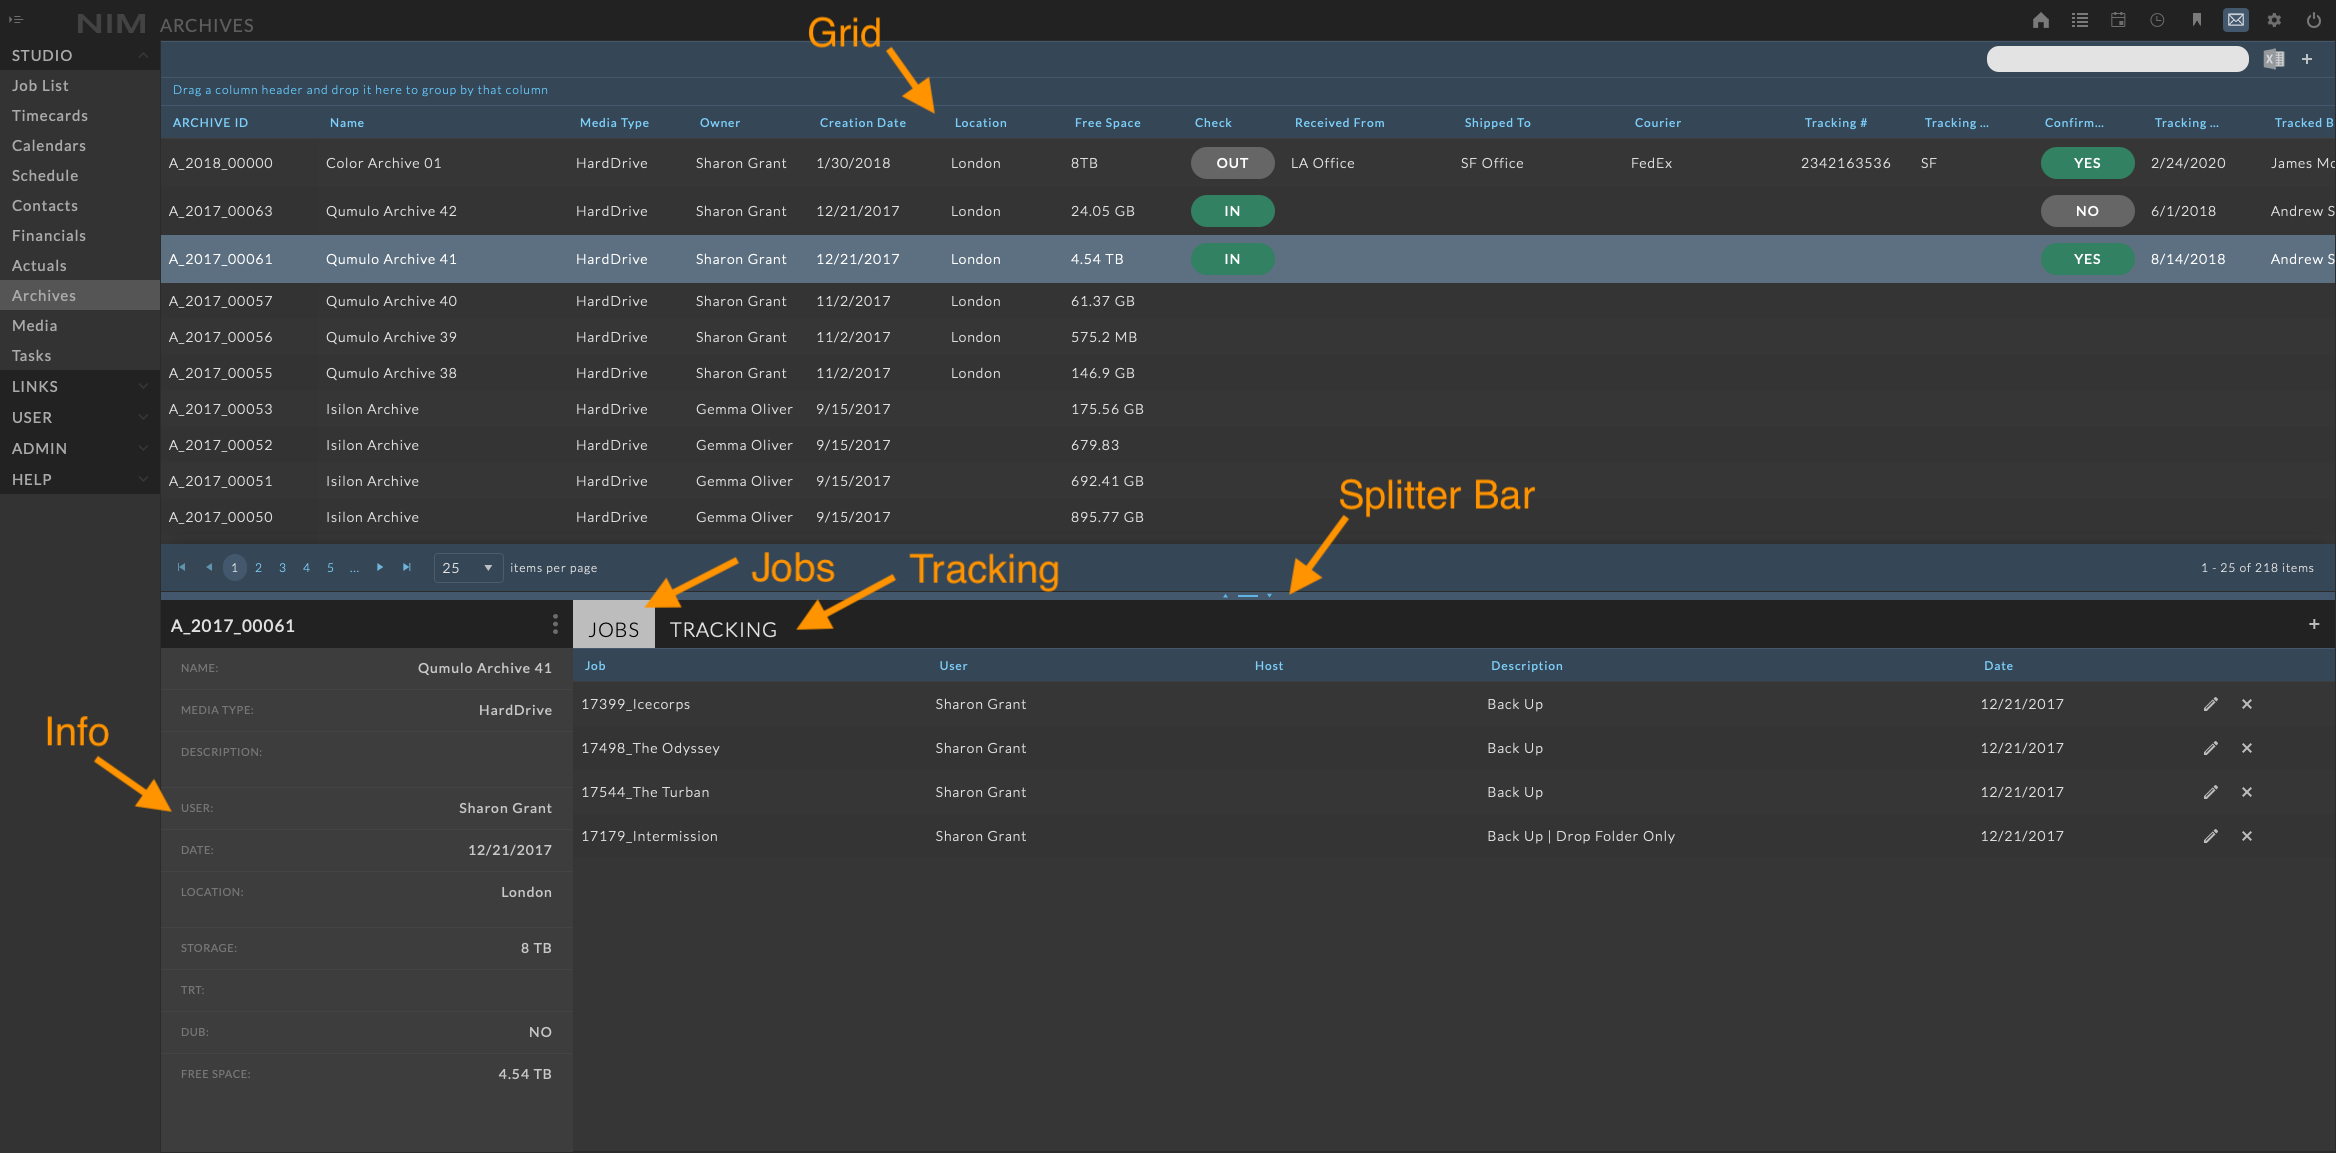
The Archives panel is loaded with four sections with a splitter bar between the Archive Grid and Archive Info panels:
Archive Grid - Displays all archives in a searchable, exportable grid
Archive Info - Displays the details of the selected archive
Archive Jobs - Displays the attached job information for the selected archive
Archive Tracking - Displays the tracking information for the selected archive
Splitter Bar - Allows for resizing of the Archive UI
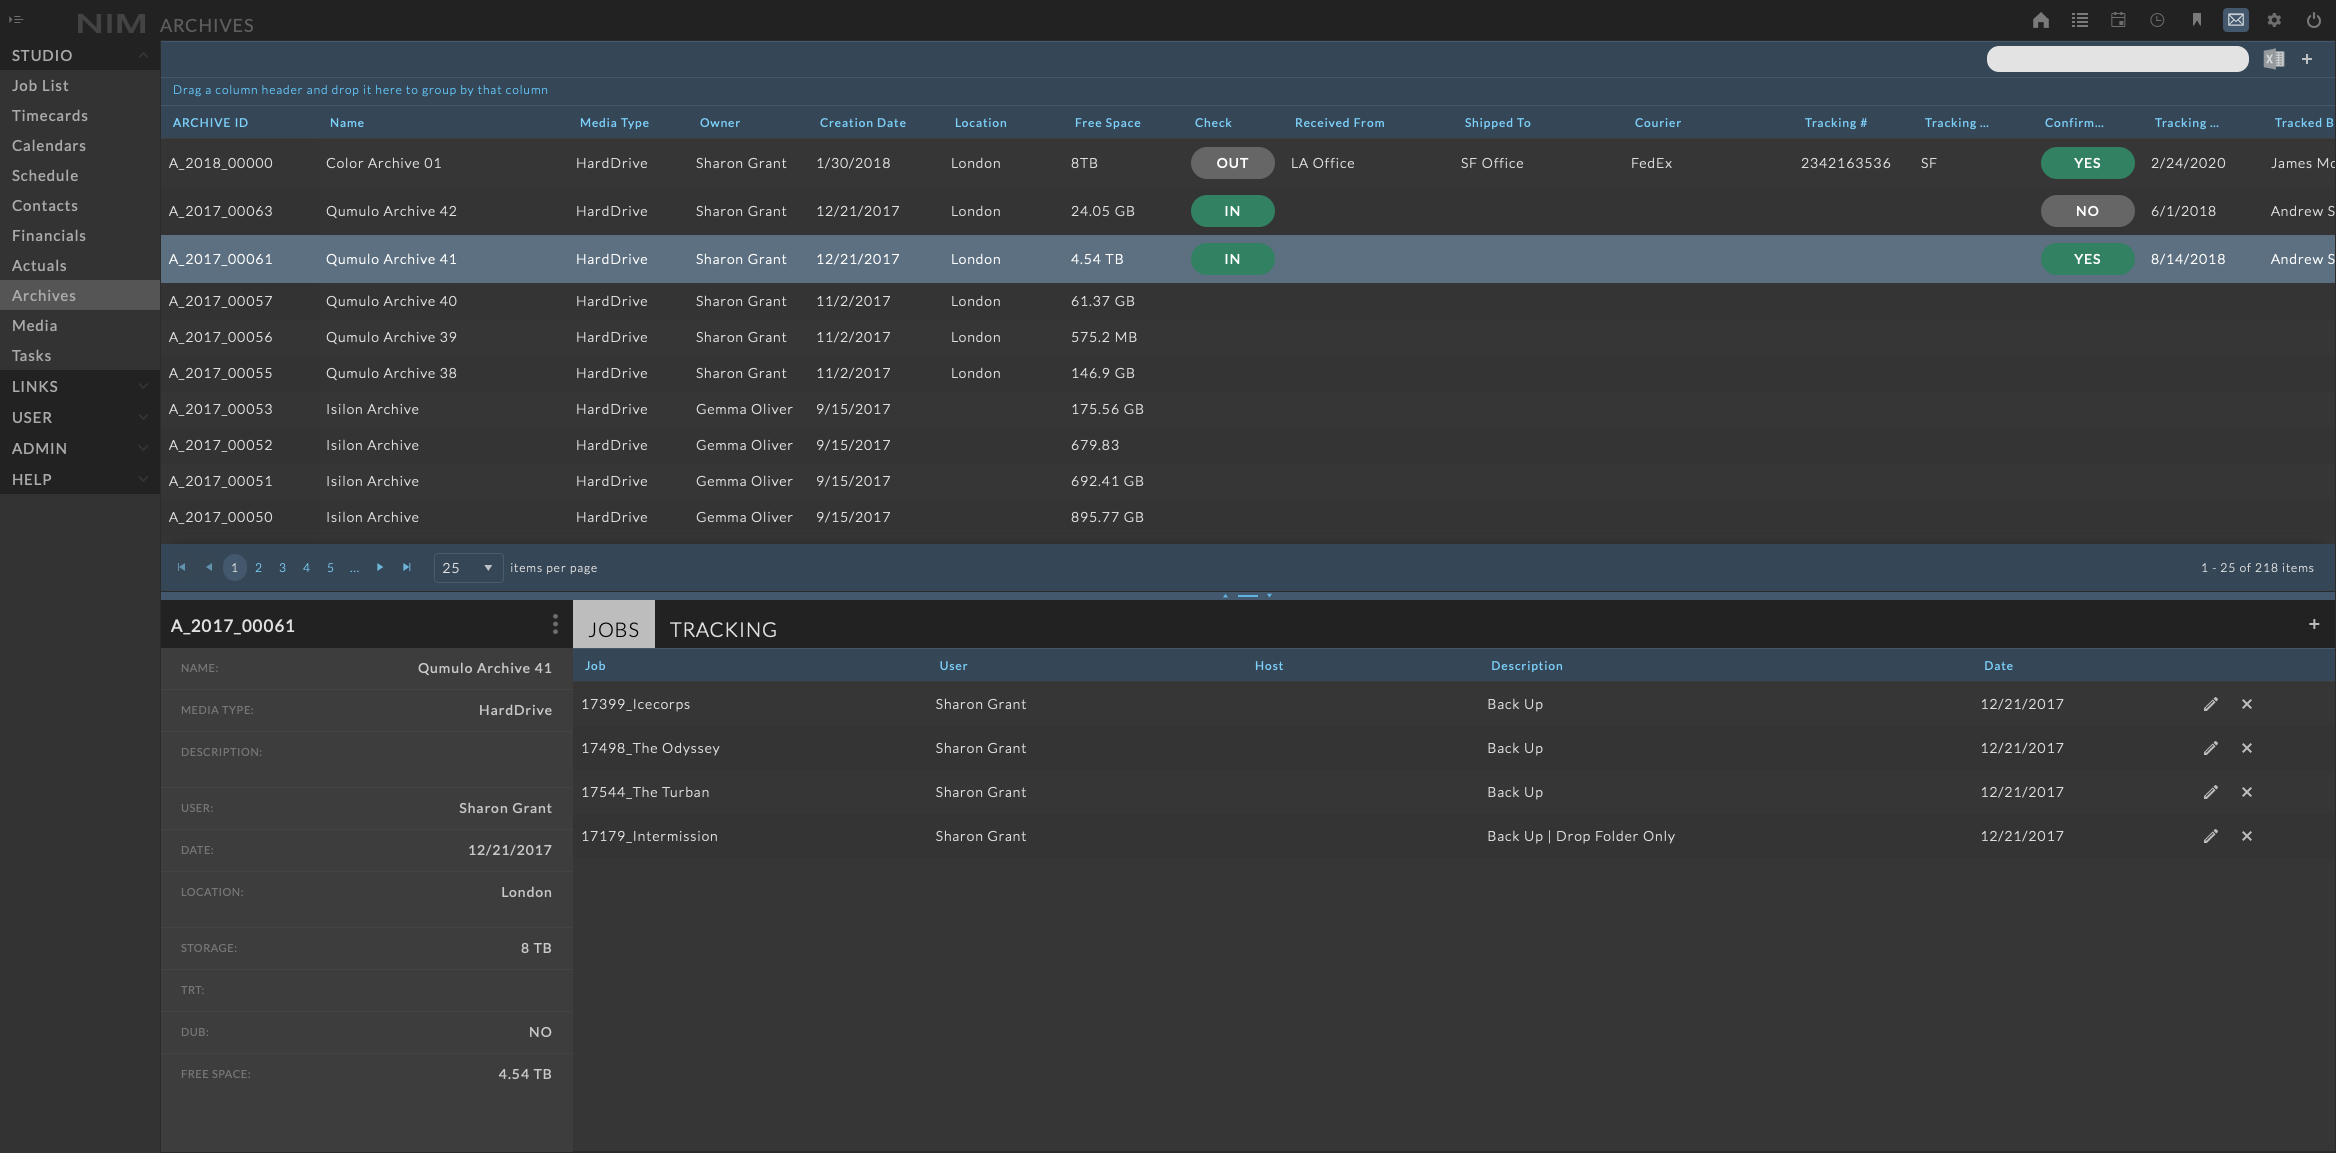
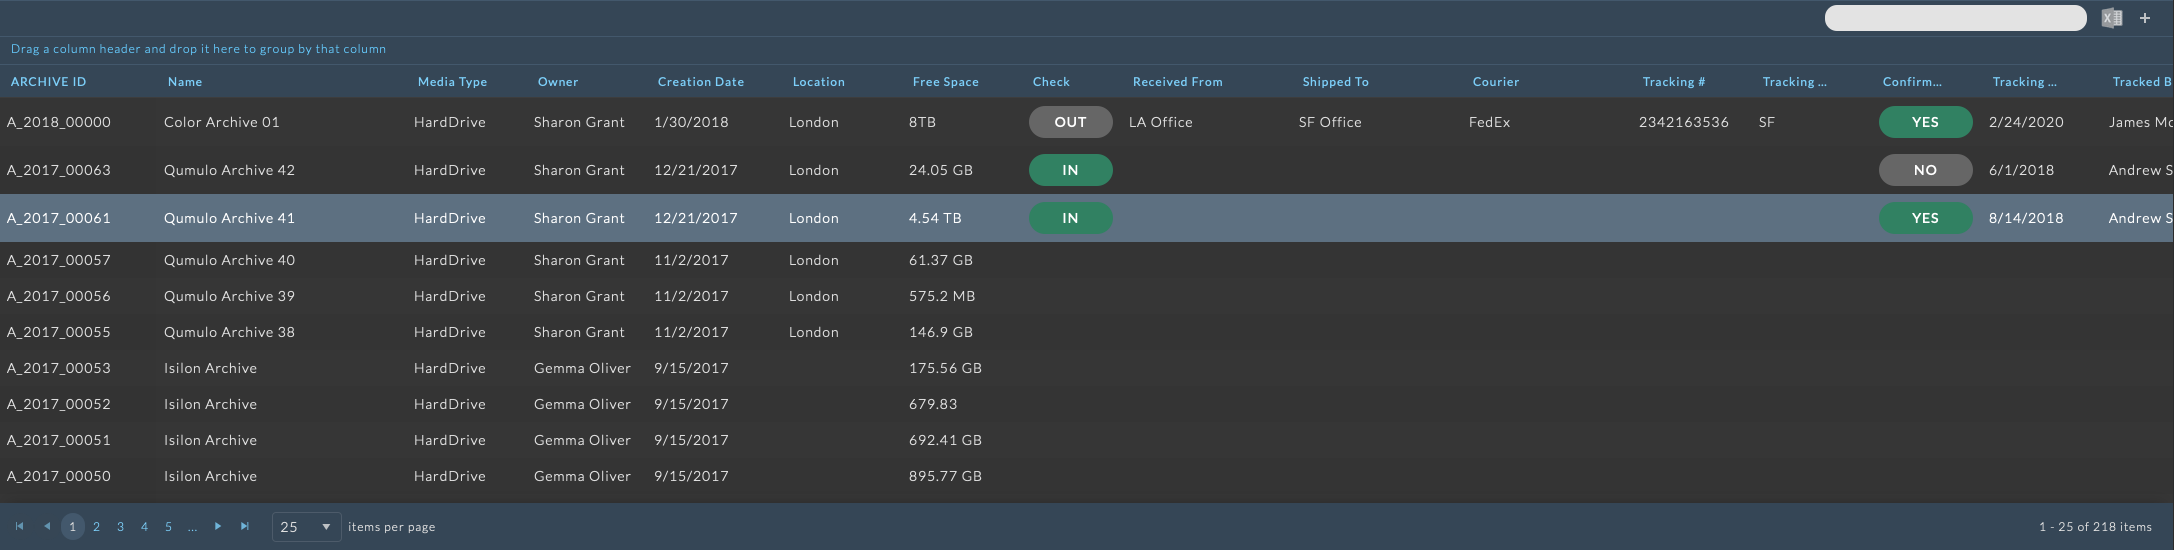
Archive Grid
The Archive grid displays all individual archive items logged in NIM.
Search
Users can quick search for archives by archive name, media type, or owner by using the search input at the top right of the archive grid toolbar.
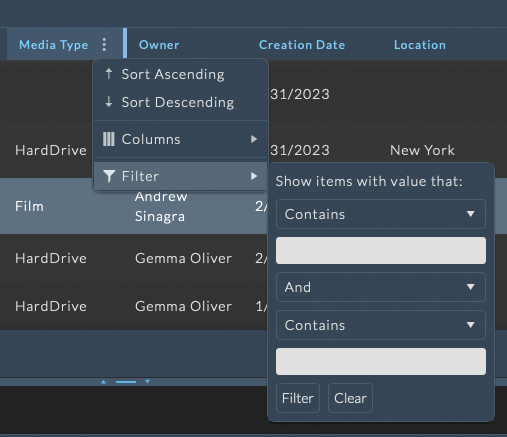
Additionally, each column can be individually filtered using the column menu options. Column menus provide more complex filtering options to further refine the search criteria.
The archive grid contains functionality to group archive items by information in any column. To group archives, drag and drop a column header to the bar labeled Drag a column header and drop it here to group by that column.

Export to Excel
The archive grid can be exported to Excel using the Export to Excel button at the top right of the archive grid toolbar. Any filters that have been applied to the grid will be respected in the export.
Add Archive
To add a new archive item, click the  button at the top right of the Archive Grid.
A new Archive item will be created and appear in the Archive Info panel where you can enter the details and click Save to confirm your changes. Click the Cancel button to return to the view mode without saving the new item.
Load Archive
To see the details of an existing Archive item, click on the item in the Archive Grid and the corresponding Archive details will be loaded in the Archive Info panel.
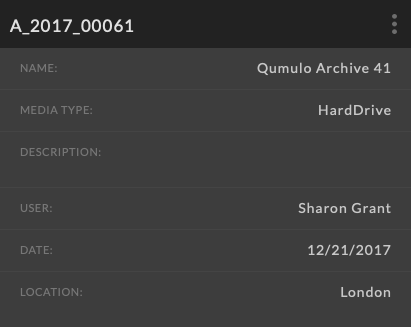
Archive Info
The Archive Info panel displays all information pertaining to the archive.
Edit Archive
To edit an archive, click on a row from the grid to load the archive info panel. Click on the ellipsis menu in the archive info panel and choose Edit. Make the necessary changes and click the Save button at the bottom of the info panel to save your changes. Click the Cancel button to return to the view mode without saving changes.
Delete Archive
Delete an archive entry by selecting the archive from the grid, clicking the ellipsis menu in the archive info panel, and selecting Delete. You will be prompted to confirm deletion of the archive.
Archive Details include:
ID |
|
Year |
|
Name |
|
Media Type |
|
Description |
|
User |
|
Date |
|
Location |
|
Storage |
|
TRT |
|
Dub |
|
Free Space |
|
Archive Jobs
Jobs associated with an archive can be tracked using the Archive Jobs panel and multiple jobs can be attached to a single archive. The job details displayed is the information associated with the archive currently shown in the archive Info panel.

Add Jobs
To add a new job to an archive, click the  button at the top right of the Archive Jobs panel.
A new job item is added to the panel.
Edit Jobs
To edit the job information click the  button at the right of the job row. The selected row will become editable inline. Make the necessary changes and click the
  button to save the changes. Choose cancel to return to the view mode without making changes.

Options include:
Job |
|
User |
|
Host |
|
Description |
|
Date |
|
Delete Jobs
Delete a job entry from an archive by selecting the job row from the Archive Tracking panel, and clicking the  at the right of the selected row. You will be prompted to confirm deletion of the job.
Archive Tracking
The location of Archives can be tracked using the Archive Tracking panel. The tracking details displayed is the information associated with the archive currently shown in the archive Info panel.
Add Tracking
To add new tracking information click the button at the top right of the Archive Tracking panel.
A new Tracking item is added to the panel and is automatically set as checked “IN”.
Edit Tracking
To edit the tracking information click the button at the right of the tracking info row. The selected row will become editable inline. Make the necessary changes and click the button to save the changes. Choose cancel to return to the view mode without making changes.
Options include:
Check - (IN / OUT) |
|
Tracked By |
|
Recieved From |
|
Shipped To |
|
Courier |
|
Tracking # |
|
Confirmed |
|
Date |
|
Delete Tracking
Delete a tracking entry by selecting the tracking frow from the Archive Tracking panel, and clicking the at the right of the selected row. You will be prompted to confirm deletion of the tracking.
Splitter Bar
The splitter bar allows for resizing of the Media UI by adjusting the division between the top section grid and the lower info and tracking. The splitter bar can be adjusted by clicking and dragging the bar between the two sections.
Clicking on the arrows on either side of the splitter bar will move the splitter bar to the maximum or minimum position. For example, clicking on the left arrow will adjust the top section to the minimum size, and the right section will be adjusted to the maximum size.