Elements
Elements are generic entities that may be associated with an asset, shot, task or render. Elements can be of any user defined type from the list of element types created in the administrative section of NIM. Elements contain the path to a file or sequence of files, the start, end and frame handles, the creator, creation date/time and can be marked as published for filtering purposes.
Views
Elements can be accessed via multiple views including asset, shot, and task info panels as well as through renders. When viewing elements from the asset, shot, or task view, all elements logged to the object as well as all elements logged to children will be displayed.
For example:
When accessing elements via a shot, if a user has logged elements directly to a shot and the shot contains 3 tasks which all have renders with associated elements, the elements logged to the shot and all elements logged to the renders will be displayed.
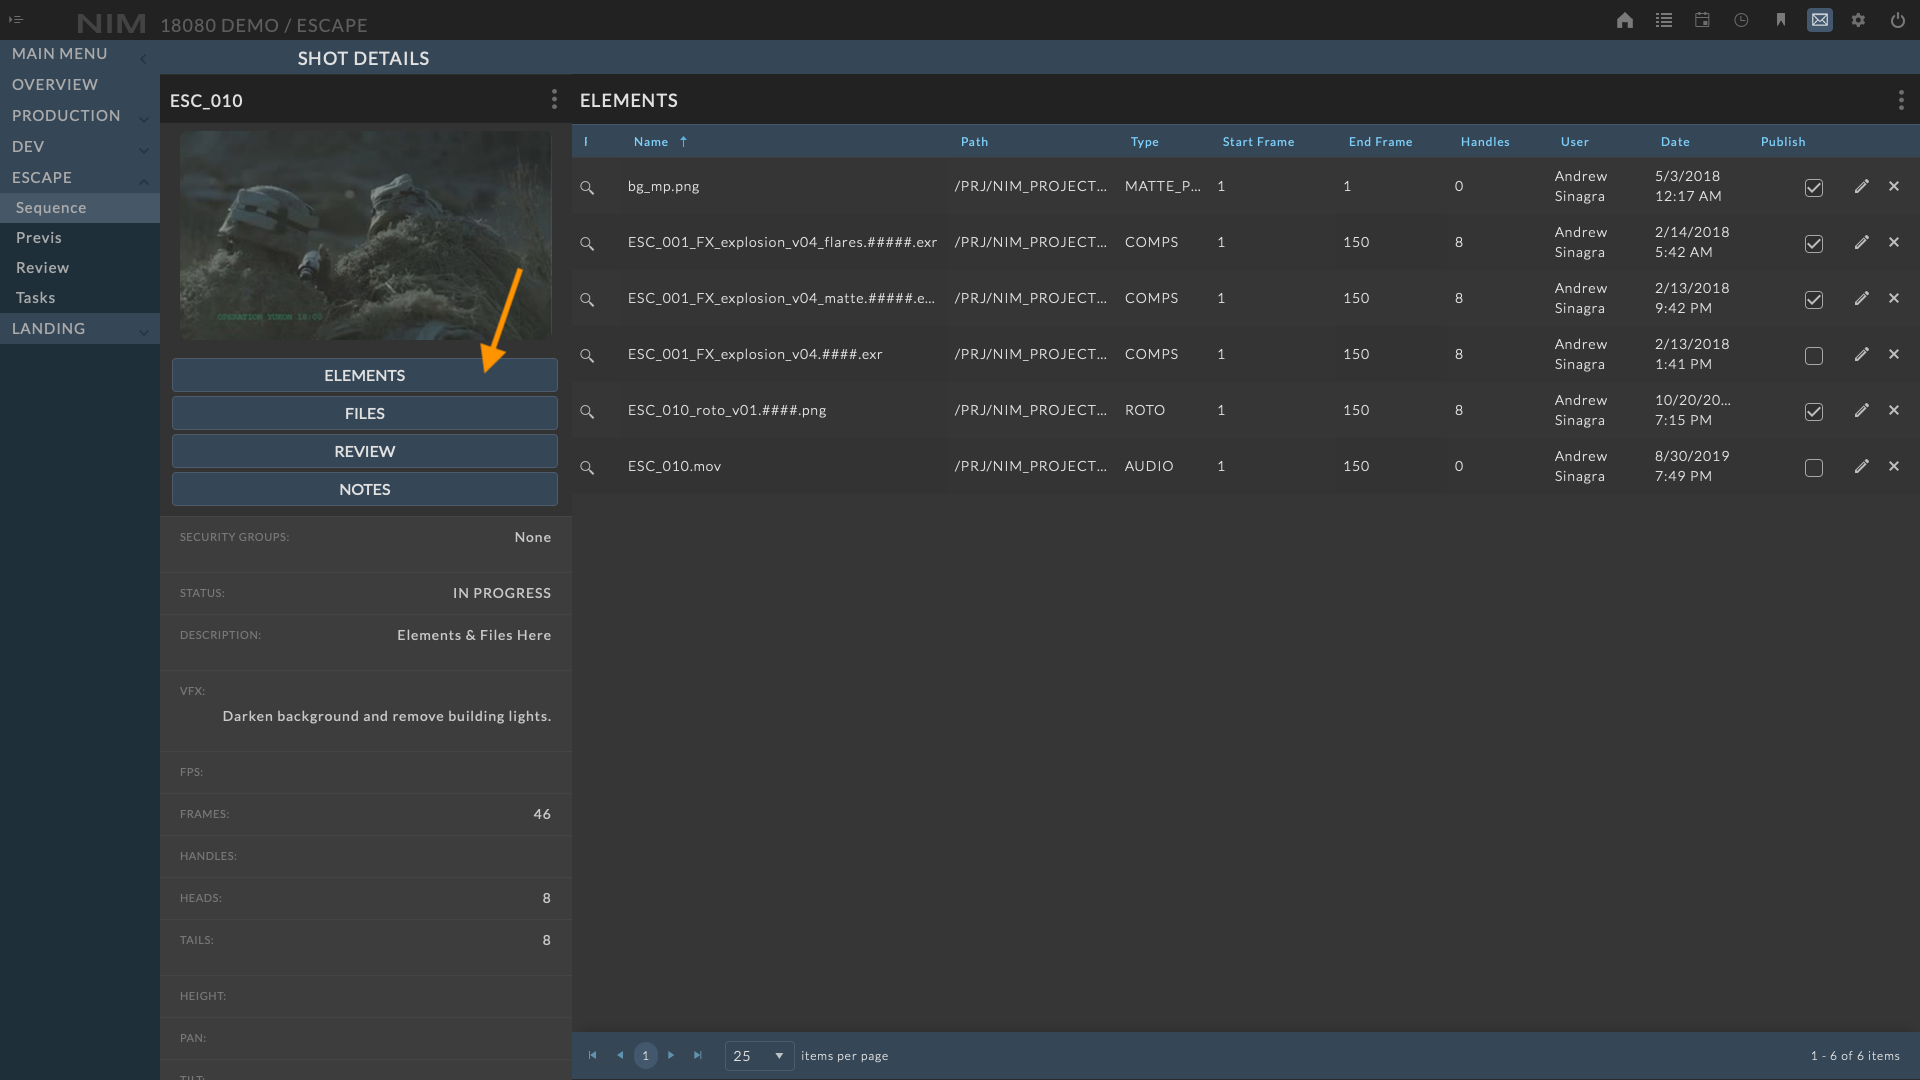
Asset & Shot Elements
Asset and shot elements list all elements associated directly with the object as well as all children of the object. To access all elements associated with an asset or shot, load the corresponding info panel and click on the ELEMENTS button. This will slide the info panel to the left revealing the element details panel. For more information on adding and editing elements, please refer the Element Details section of the documentation.
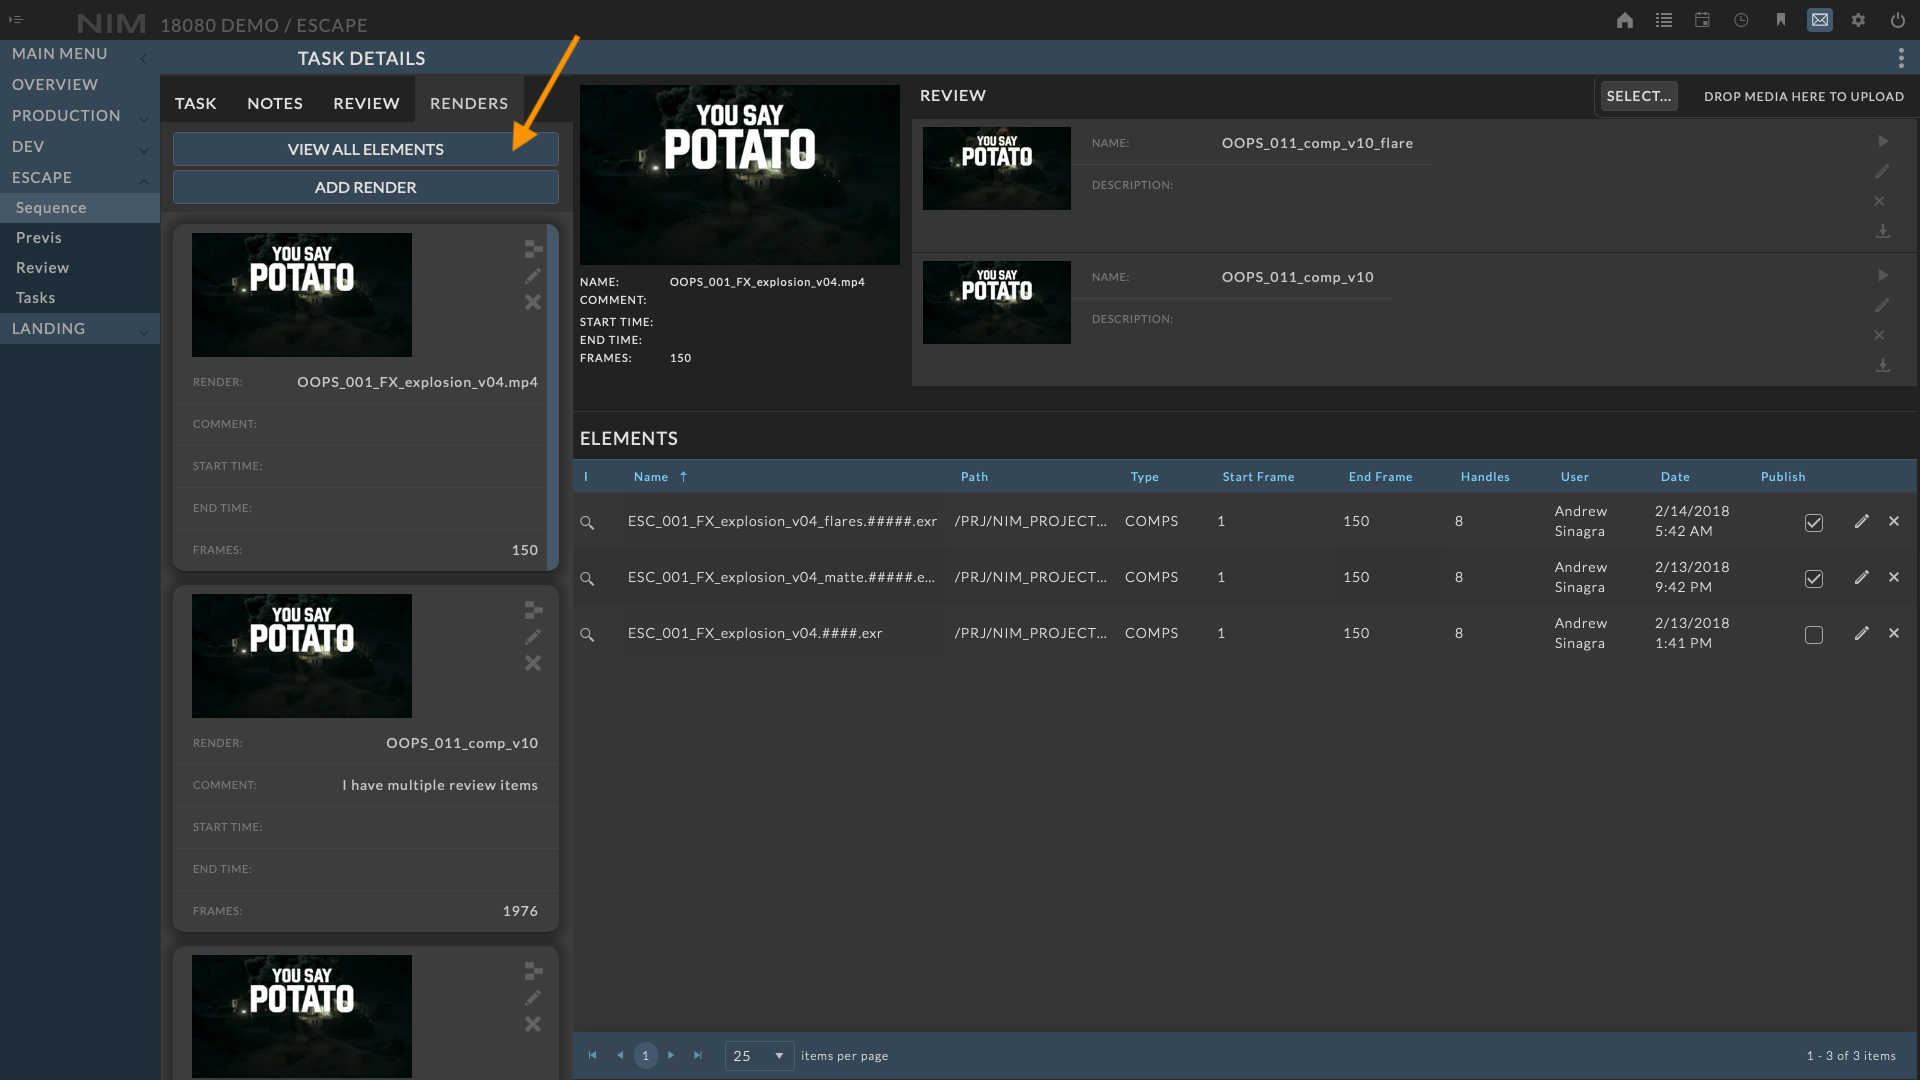
Task Elements
Task elements contain all elements associated with renders that have been added to the task. To access all elements associated with a task, load the task info panel from any available location and click the VIEW ALL ELEMENTS button. This will slide the info panel to the left revealing the element details panel. For more information on adding and editing elements, please refer the Element Details section of the documentation.
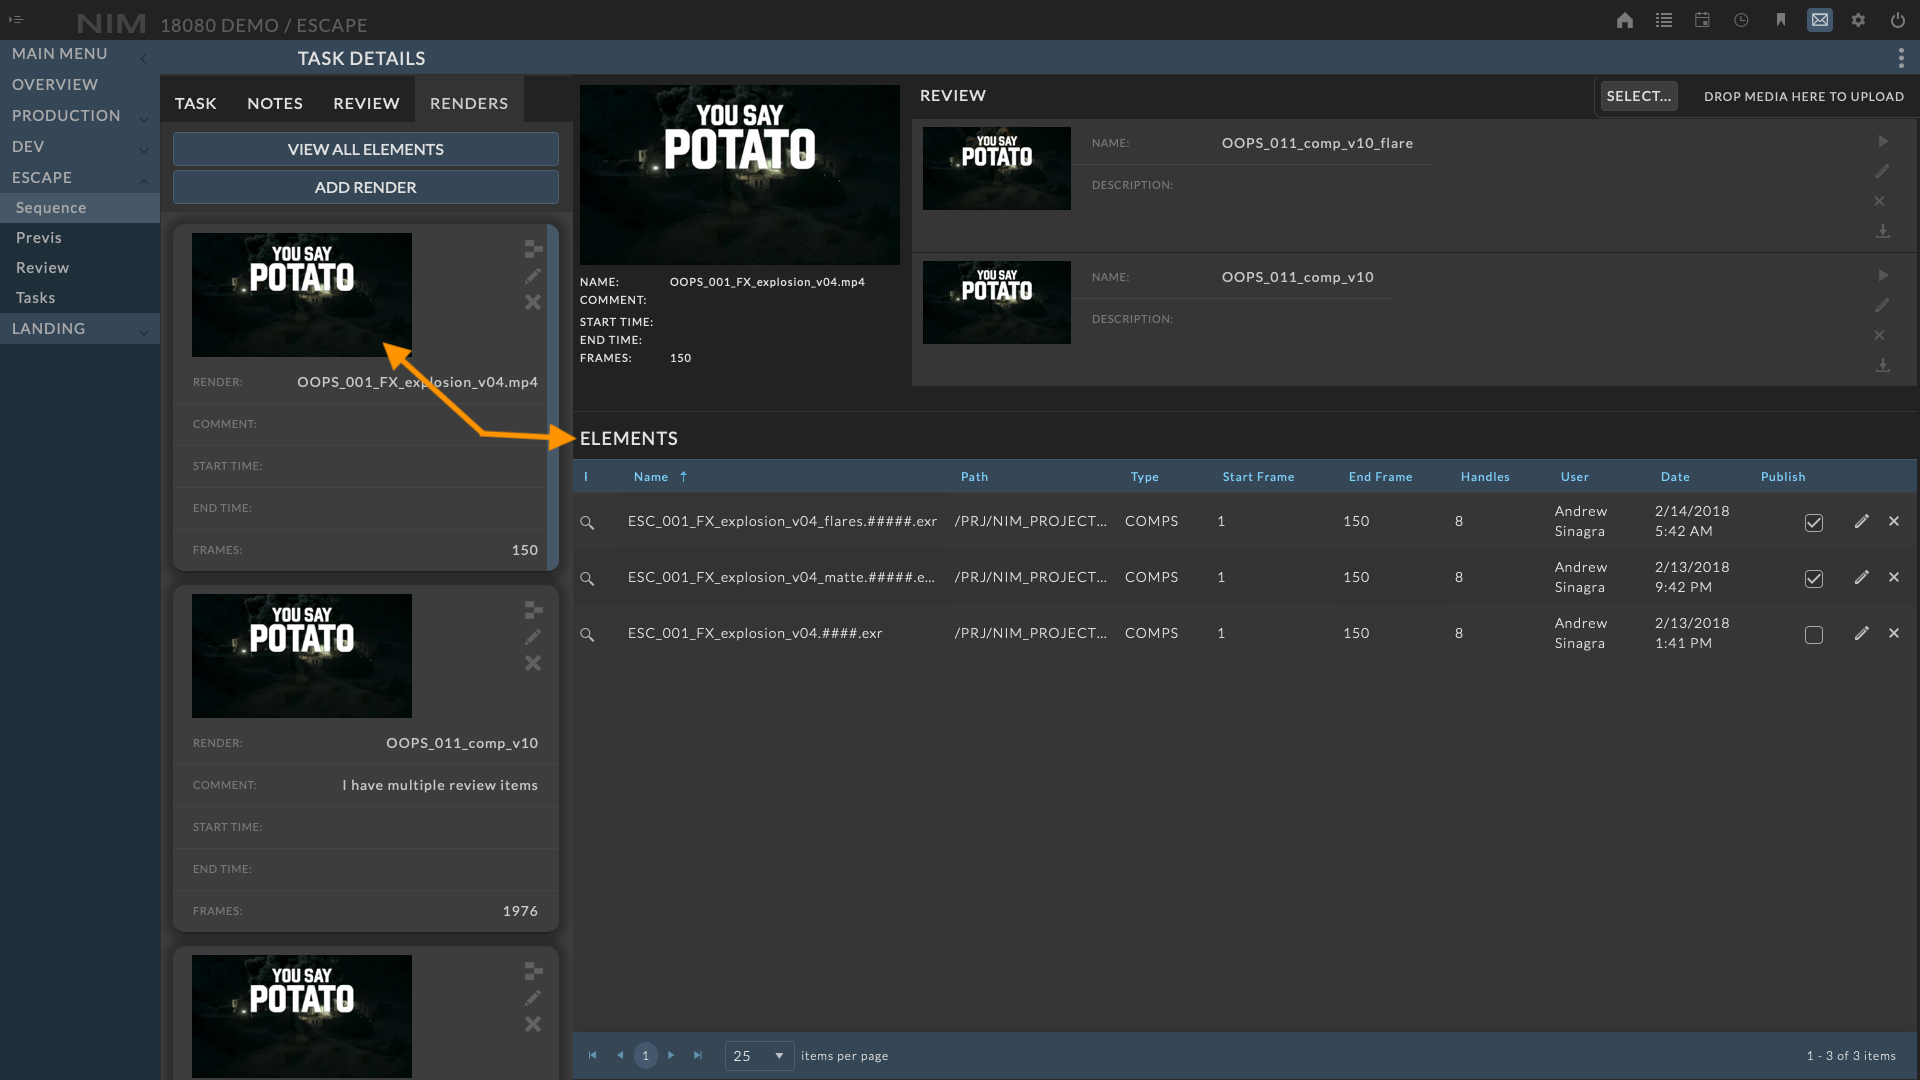
Render Elements
Elements can be logged directly to renders. Render elements are typically linked to render passes of a render job. However, these can be used in any manner that fits your pipeline.
For example:
All versions of a render could be attached to a single render item, with each element being a unique version.
To access the elements of a render, select the render from the task info panel’s Render tab. This will slide the info panel to the left revealing the render details panel containing the corresponding element information. Please refer to the Renders section of the documentation for further information on render elements.
Tip
When using Thinkbox Software® Deadline® pipeline integration tools, or a post render script from any render manager calling the NIM API, a render job can automatically log a render and each render layer of can be added as an element to the render. Additionally, proxy movies of the renders can be uploaded as review items and associated with the render.
Details
Add Element
To add a new element, click the ellipsis menu at the top right of the toolbar and choose Add Element.
The new element dialog will appear and you can enter the details.
When done click the Update button at the bottom of the dialog to save your changes.
Click the Cancel button to return to the view mode without saving the new element.
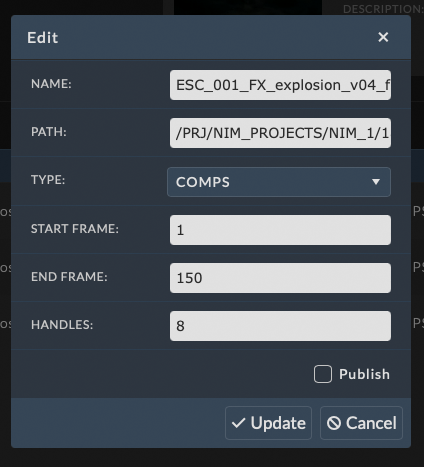
Element Info
To edit the element information, click the  button at the right of the element row. Make the necessary changes and click the Save button at the bottom of the dialog to save your changes. Click the Cancel button to return to the view mode without saving changes.
Available element information includes:
Name |
The file name of the element. For sequences of files, the convention of name.####.ext can be used. |
Path |
The path to the file not including the file name. |
Type |
The associated element type. Element types are defined in the Admin > Elements section of NIM. |
Start Frame |
The start frame of the element, if applicable. |
End Frame |
The end frame of the element, if applicable. |
Handles |
The number of handles the element contains, if applicable. |
Publish |
Individual elements can be flagged as published by checking the checkbox in the publish column. |
To delete an element, click the  in element row you wish to delete.
Application Links
If Application Links have been set and enabled in Admin > Elements - Options, the first column in the grid will be a link to open the corresponding file with the application defined by the link. Click the  button to open the link. For more information on configuring application links, please refer to the Element Options section of the documentation.