Task Creation
There are three options for creating a new task dependent upon the view you are in.
Single Task Creation |
Adds a single task via the toolbar of the Task Grid and Task Timeline |
Drag and Drop |
Adds a single task via the Task Assignment panel in the Asset or Shot List View |
Workflows |
Adds multiple pre-assigned tasks via the Task Assignment panel from the Asset or Shot List View |
Single Task
Individual tasks can be created using the toolbar in the Task Grid or Task Timeline. This is useful for when you only need to add a single task to an asset or a shot.
Task Grid View
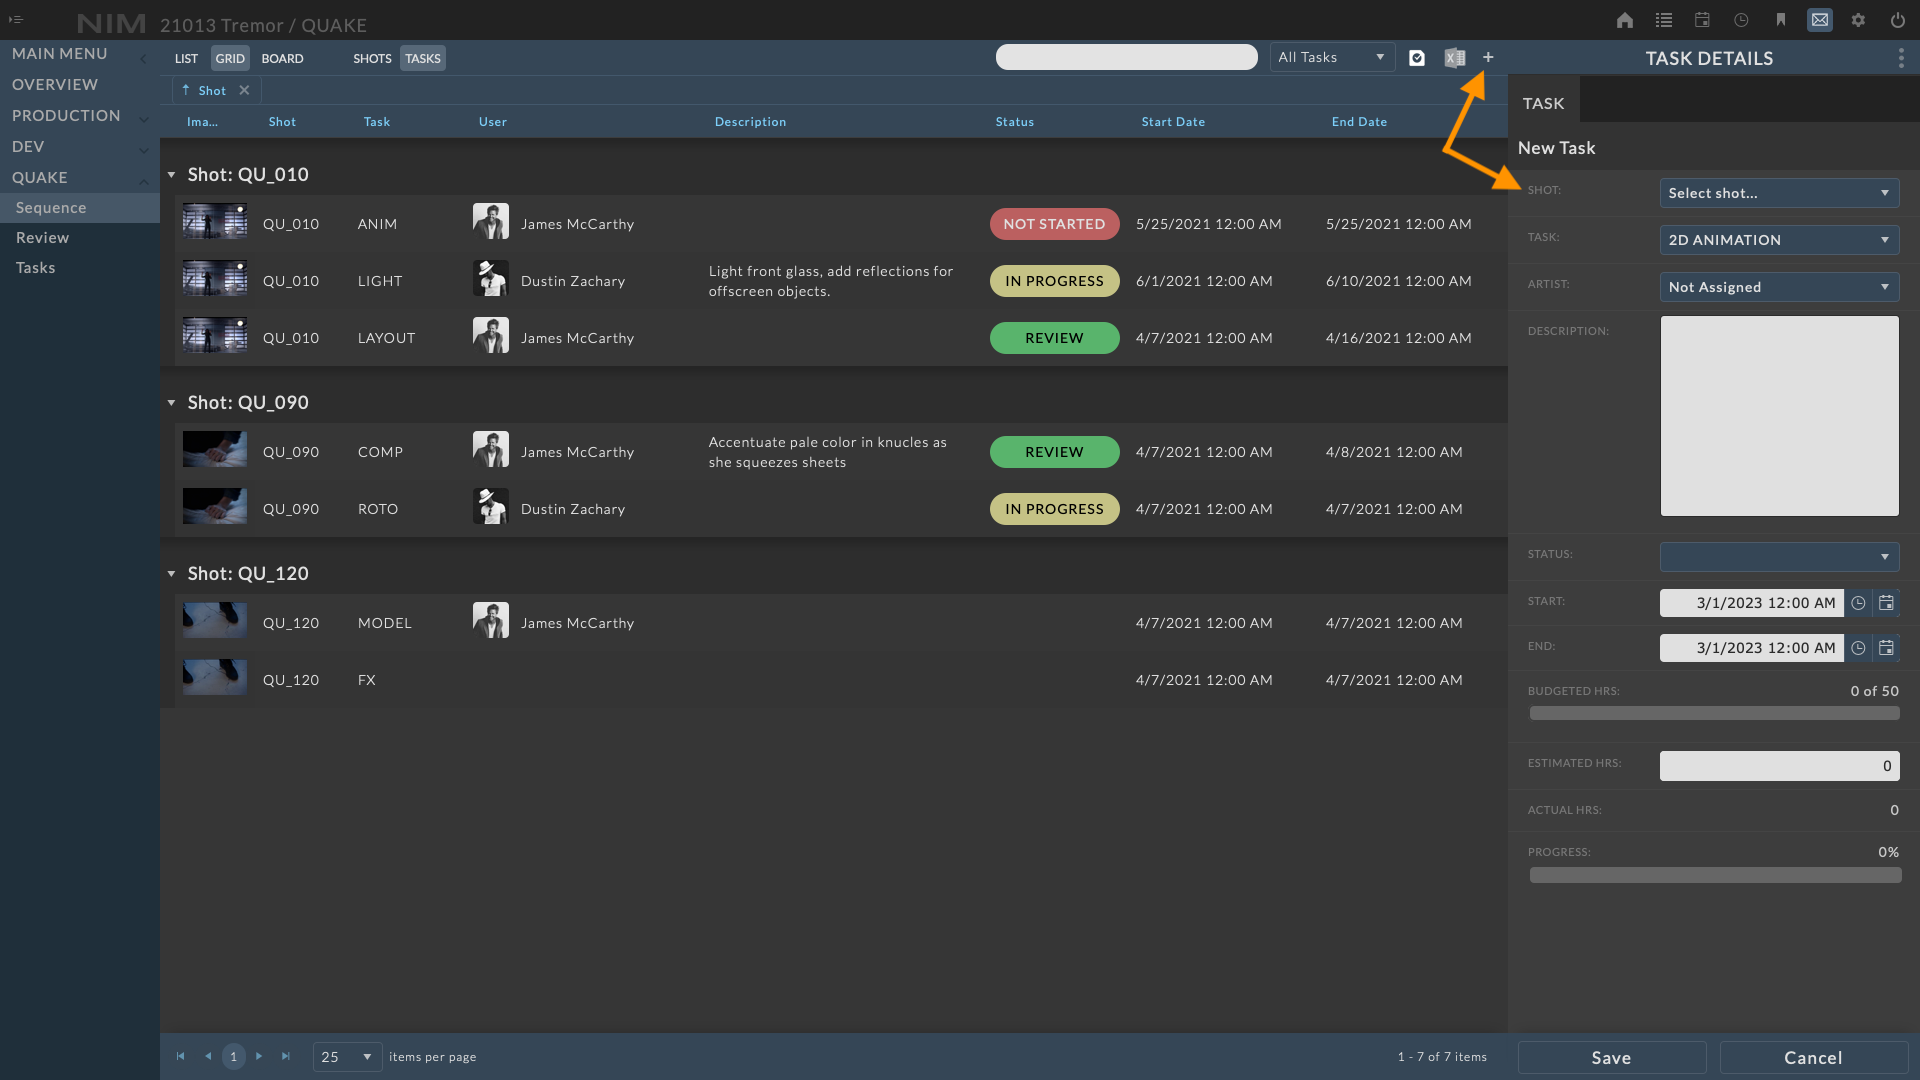
New tasks can be created from the Tasks Grid using the  button. When creating a new task from the Tasks Grid, an additional field will appear to select the parent object for the new task.
Task Timeline
To create a new task from the timeline, first choose the object you wish to add the task to by selecting it from the tree view. Then click on the at the far left of the toolbar. A dialog will appear allowing you to edit the new task details.
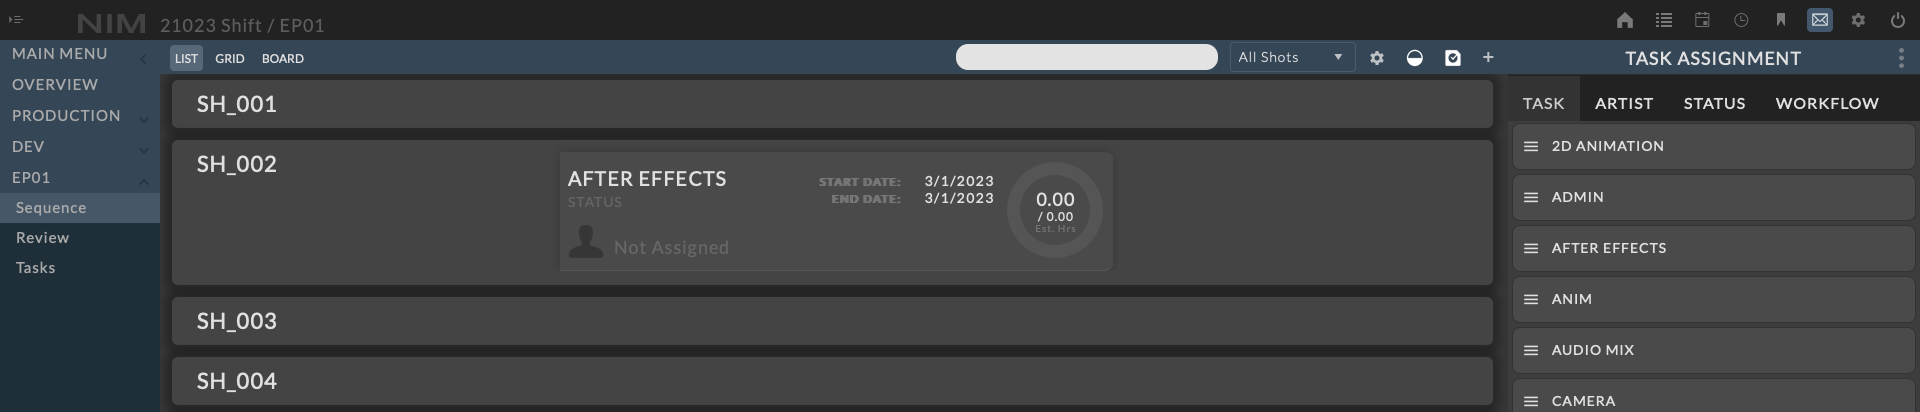
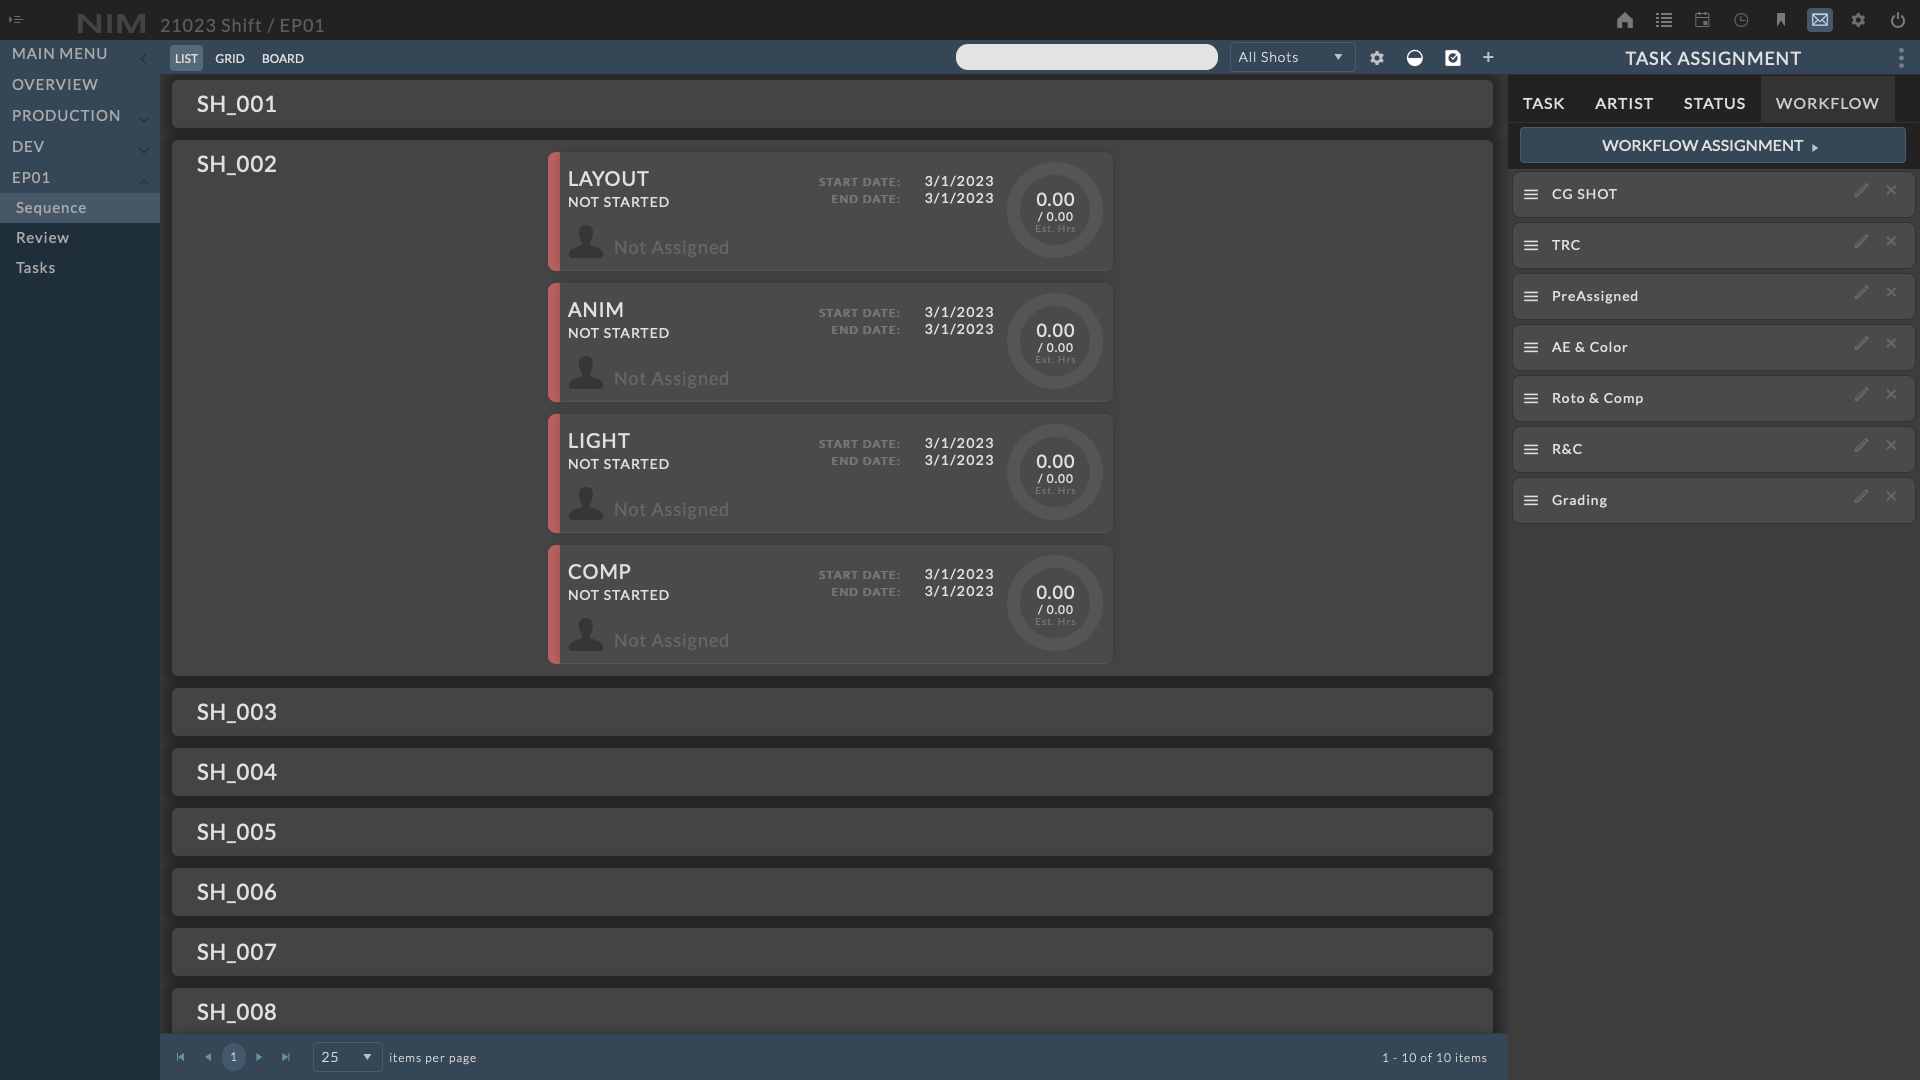
Task Assignment
The task assignment panel is available from the asset or shot list and task grid views. This panel allows users to drag and drop task based items. The items available are dependent upon the view the panel is being accessed from.
Available options include:
Tasks |
|
Artists |
|
Status |
|
Workflows |
|
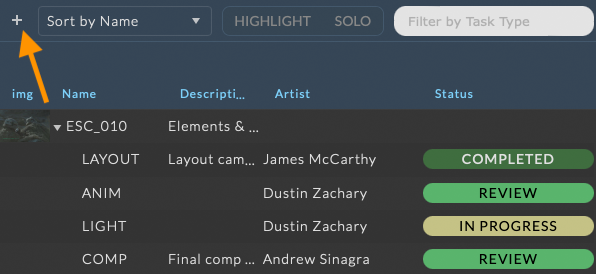
To access the Task Assignment panel, click the  in the toolbar of the List or Grid views.

Add a Task
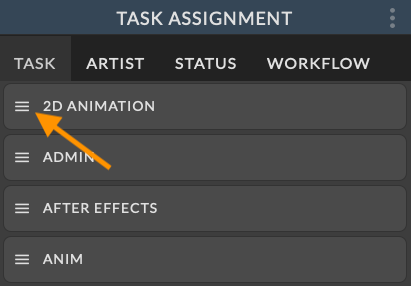
When first accessing the Task Assignment panel, the Task tab will be selected.
To add a new task from the Task Assignment panel, click and hold on the task’s drag handle.
When the cursor is over the drag handle, the row will be highlighted.
Click and drag any of the tasks in the list over the target object. While holding a task over the target, the droppable area will be highlighted.
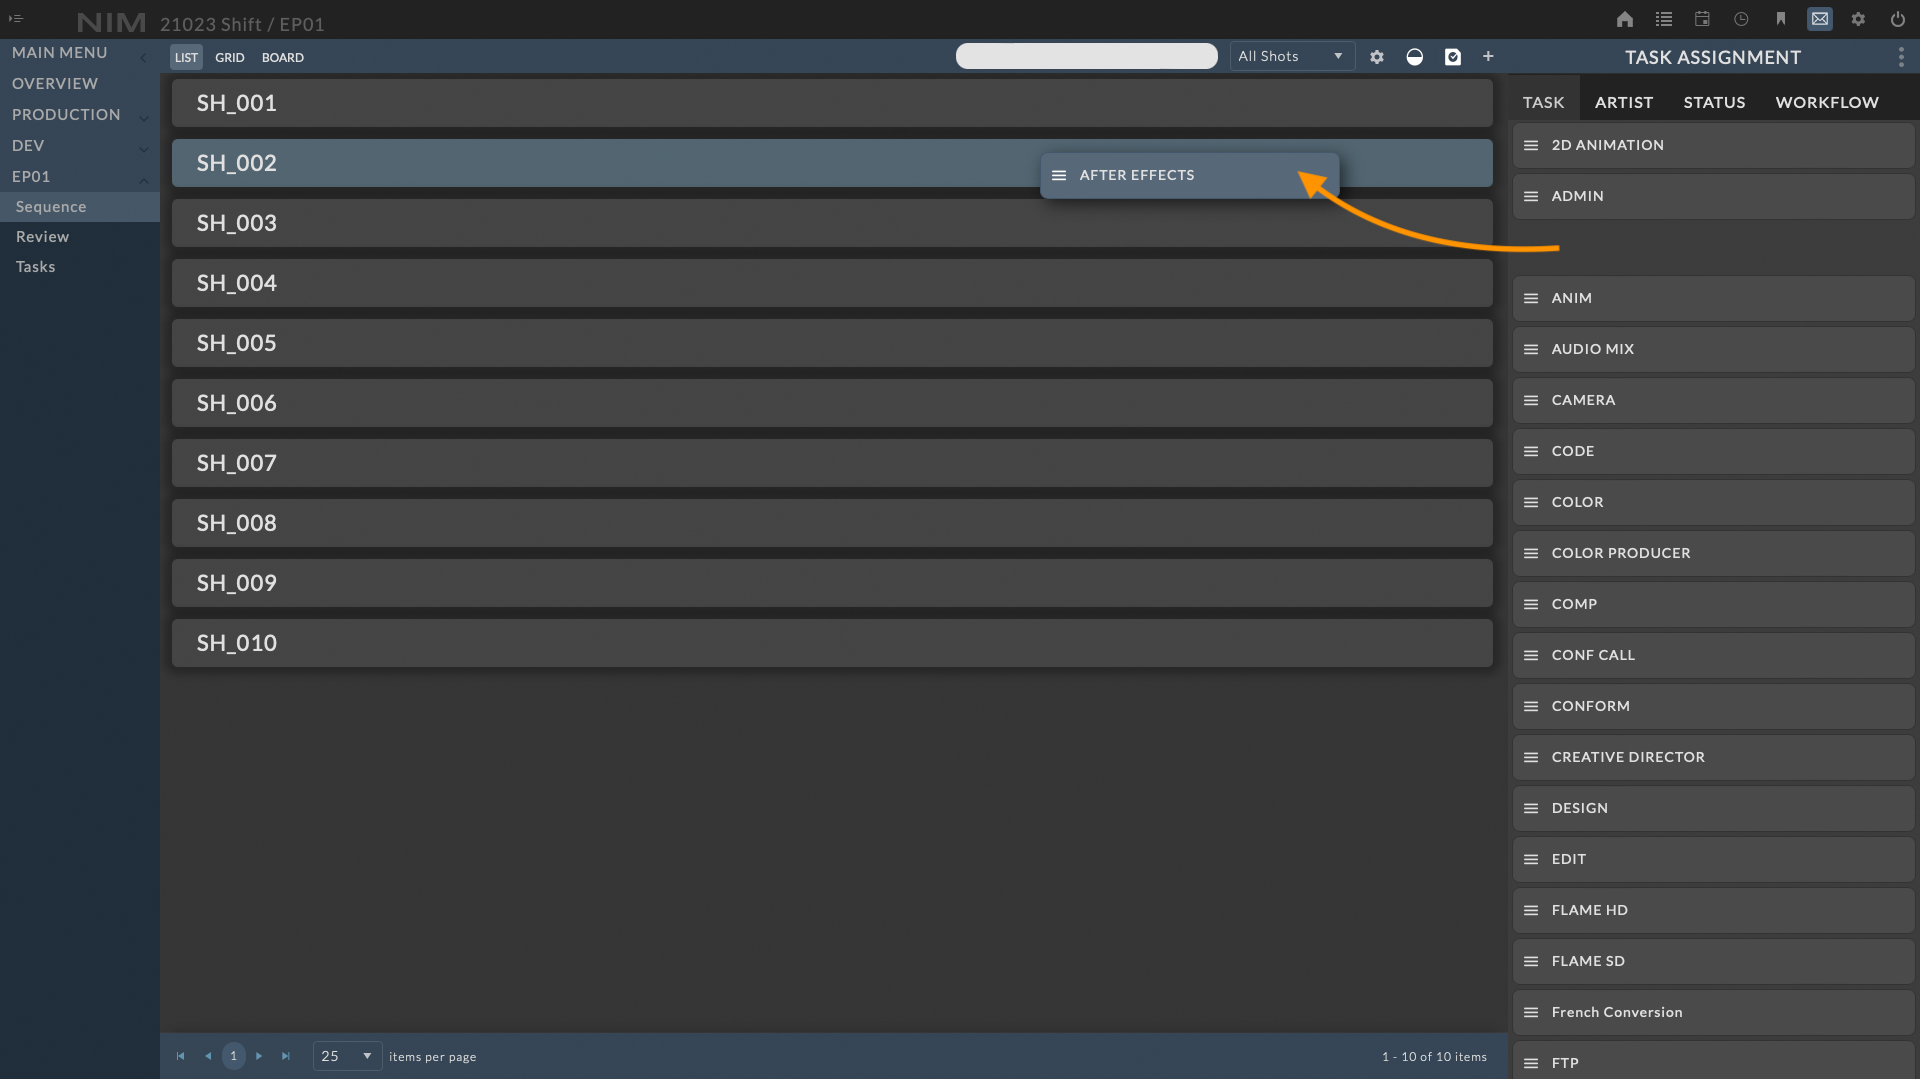
Release the task’s drag handle and a new task will appear on the target object. To cancel a drag action, press the “Escape” key prior to releasing the drag handle.
Assign User
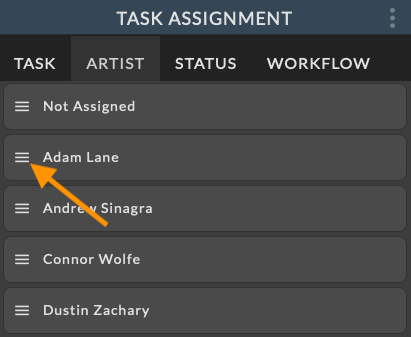
Users can be assigned to tasks via drag and drop using the Task Assignment panel. Select the “Artist” tab to access the list of available users. The list of users will be the members that have been assigned to the job’s crew.
To assign a user to a task, click and hold on the user’s drag handle.
When the cursor is over the drag handle, the row will be highlighted.
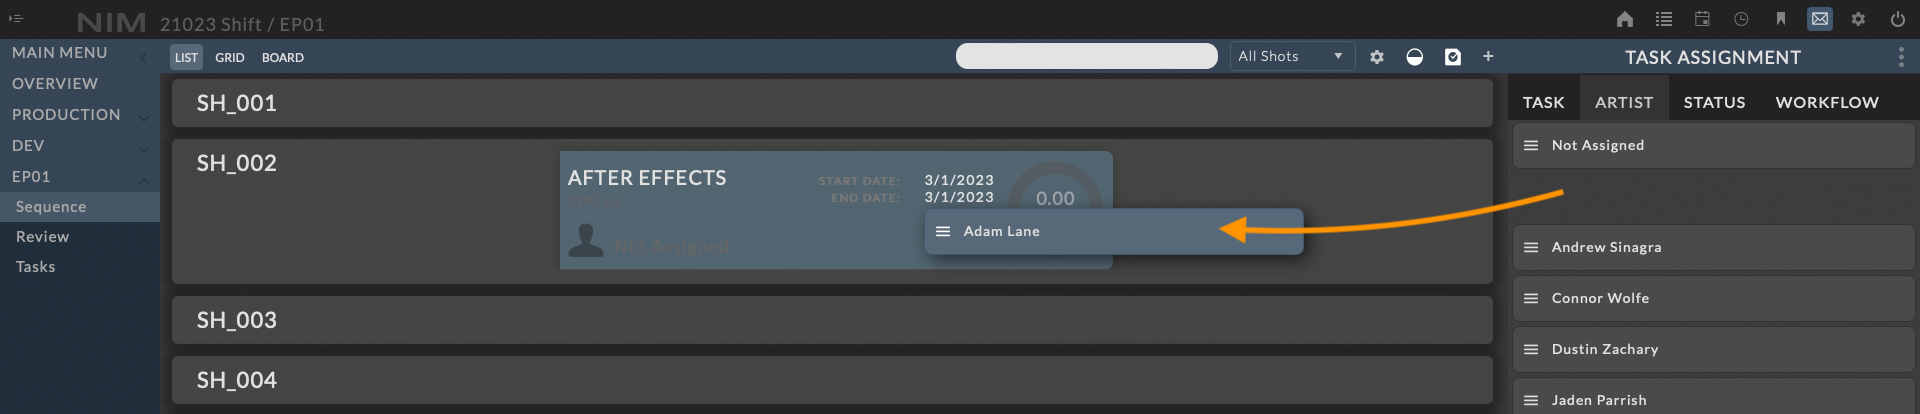
List View
In the list view, click and drag a user from the Artist list over the task they should be assigned to. While holding a user over the task, the target task will be highlighted.
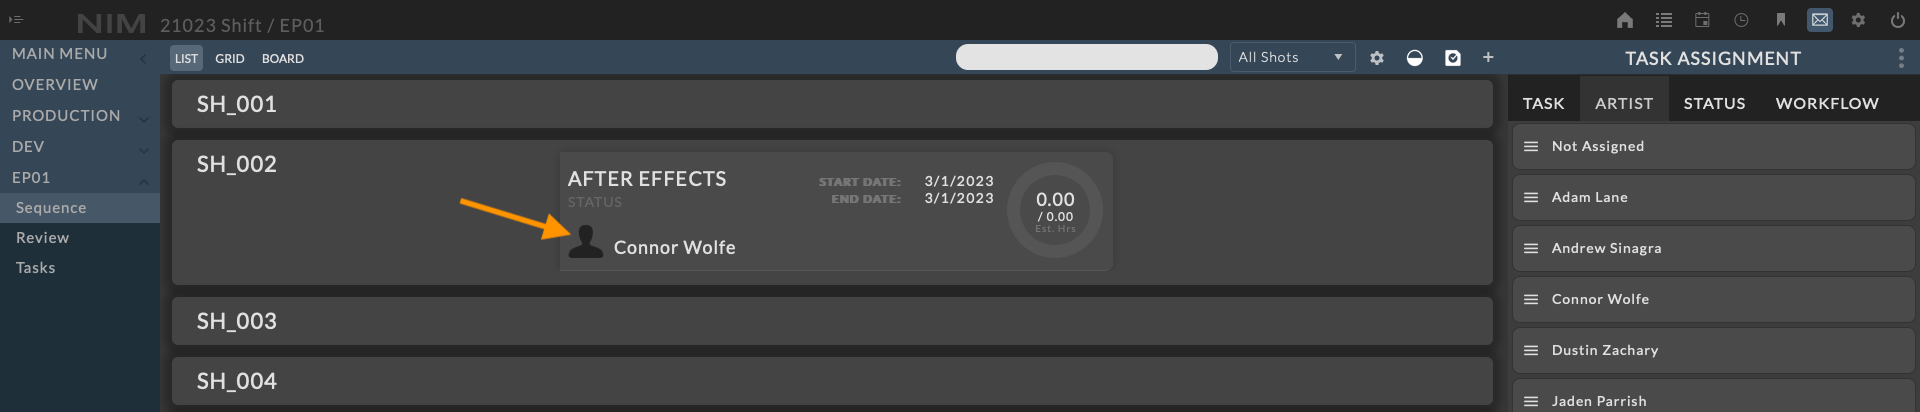
Release the user’s drag handle and the user will be assigned to the task. The user’s name and icon will now appear on the task. To cancel a drag action, press the “Escape” key prior to releasing the drag handle.
Grid View
In the grid view, click and drag a user from the Artist list over the task they should be assigned to. While holding a user over the task, the target task will be highlighted.

Release the user’s drag handle and the user will be assigned to the task. The user’s name will now appear on the task row. To cancel a drag action, press the “Escape” key prior to releasing the drag handle.

Set Status
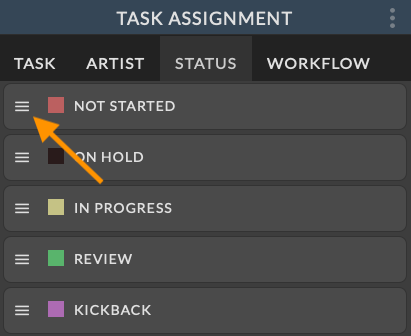
The task status can be updated via drag and drop using the Task Assignment panel. Select the “Status” tab to access the list of available task statuses.
To assign a new status to a task, click and hold on the status’ drag handle.
When the cursor is over the drag handle, the row will be highlighted.
List View
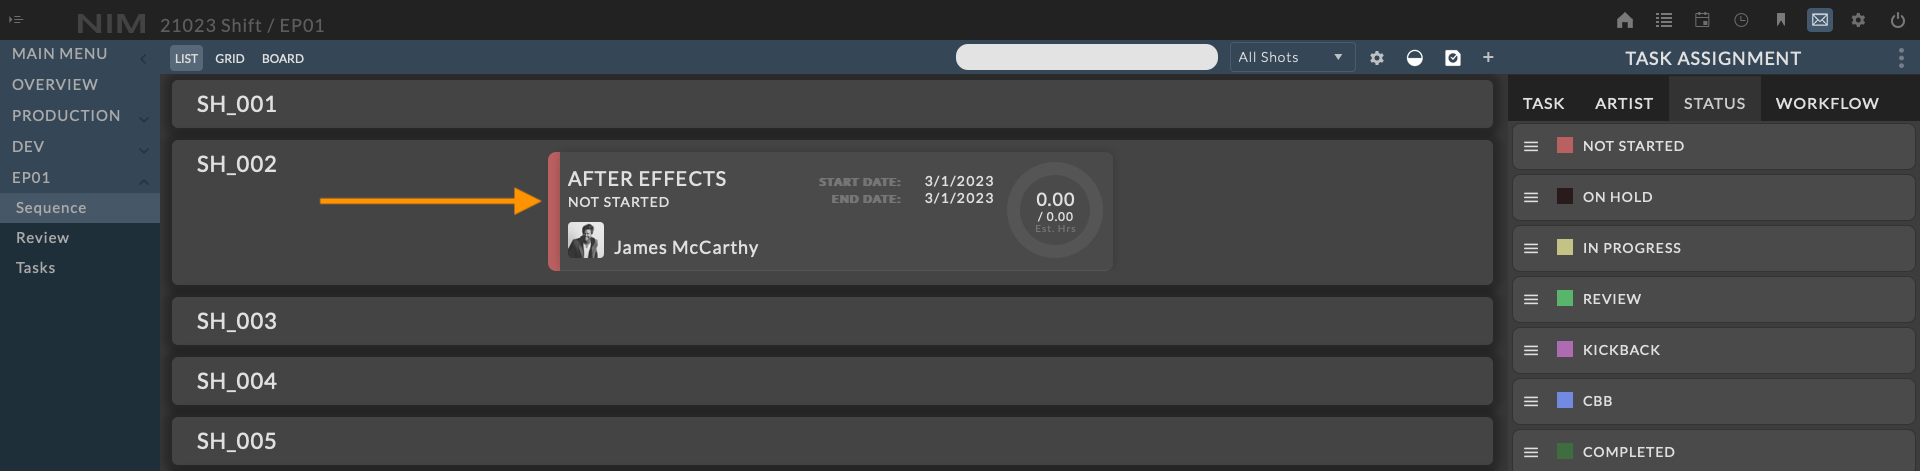
In the list view, click and drag a status from the Status list over the task they should be assigned to. While holding a status over the task, the target task will be highlighted.
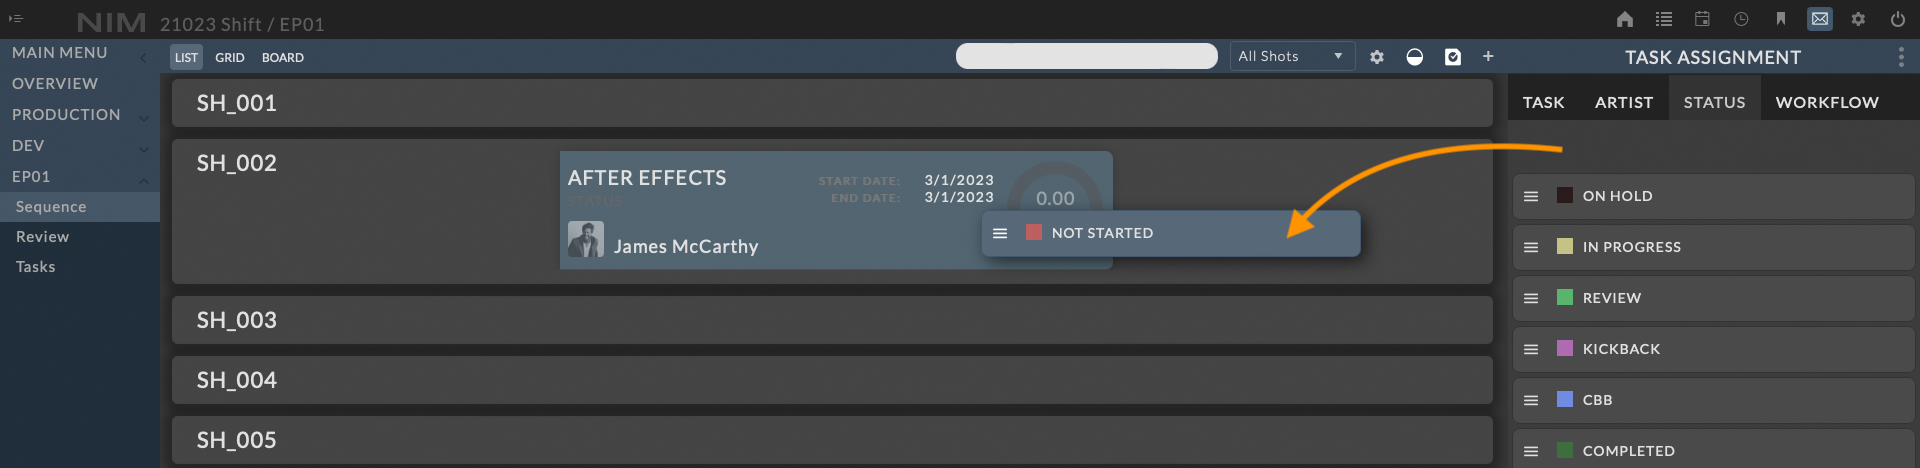
Release the status’ drag handle and the task will be updated with the new status. The task will now be displayed with a task status color bar on the left as well as the current task status. To cancel a drag action, press the “Escape” key prior to releasing the drag handle.
Grid View
In the grid view, click and drag a status from the Status list over the task they should be assigned to. While holding a status over the task, the target task will be highlighted.

Release the status’ drag handle and the task will be updated with the new status. The task status column will display the new status and the cell will be highlighted with the task status color. To cancel a drag action, press the “Escape” key prior to releasing the drag handle.

Workflows
Workflows are groups of preassigned tasks that can be created and added to assets and shots from the assignment panel. Dragging a workflow onto an object will add all of the tasks with their preassigned users, status, description, and estimated hours all at once.

Add Workflow
To add a workflows to an object, use the Task Assignment panel from the asset or list view.
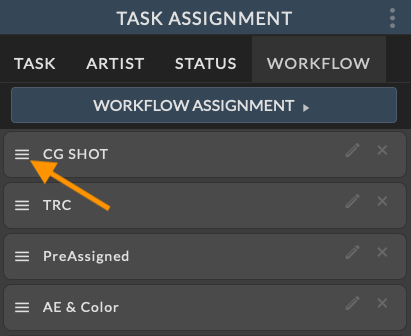
Select the “Workflow” tab from the Task Assignment panel to access your saved workflows.
To add a new workflow, click and hold on the workflow’s drag handle.
When the cursor is over the drag handle, the row will be highlighted.
Click and drag any of the workflows in the list over the target object. While holding a workflow over the target, the droppable area will be highlighted.

Release the workflow’s drag handle and a new workflow will appear on the target object. To cancel a drag action, press the “Escape” key prior to releasing the drag handle.
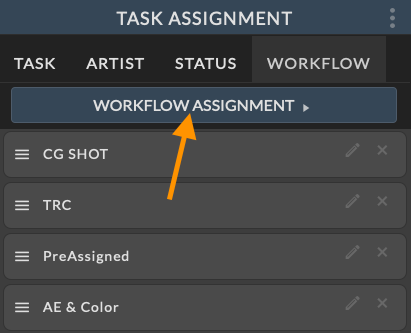
To add workflows to multiple objects simultaneously use the Workflow Assignment panel available by clicking the Workflow Assignment button at the top of the Workflow tab.
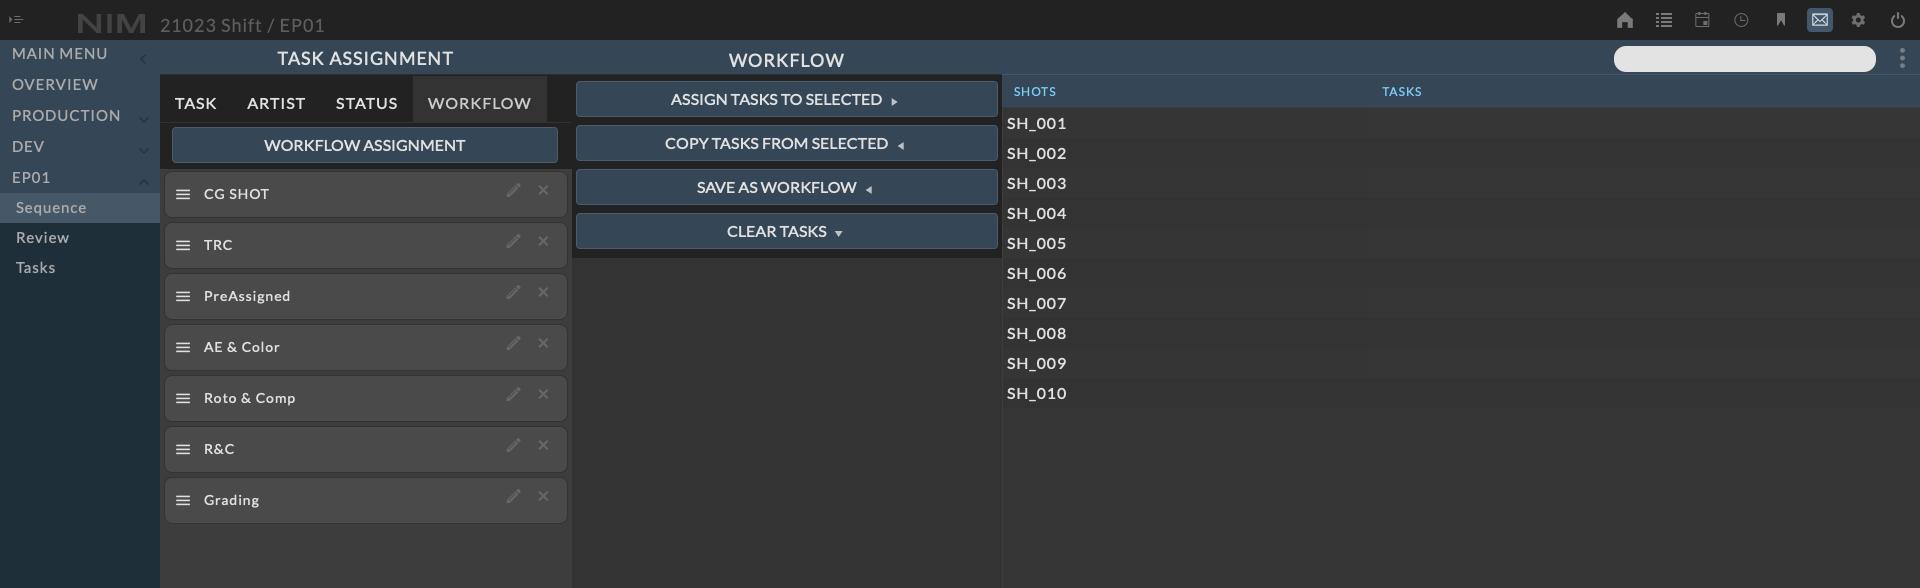
This will slide the Task Assignment panel to the left of the view revealing the Workflow Assignment area.
Creating Workflows
Workflows are created in the Workflow Assignment area. To access the Workflow Assignment panel, click on the “Workflow” tab and then click the WORKFLOW ASSIGNMENT button. This will slide the Task Assignment panel to the left of the view revealing the Workflow Assignment area.
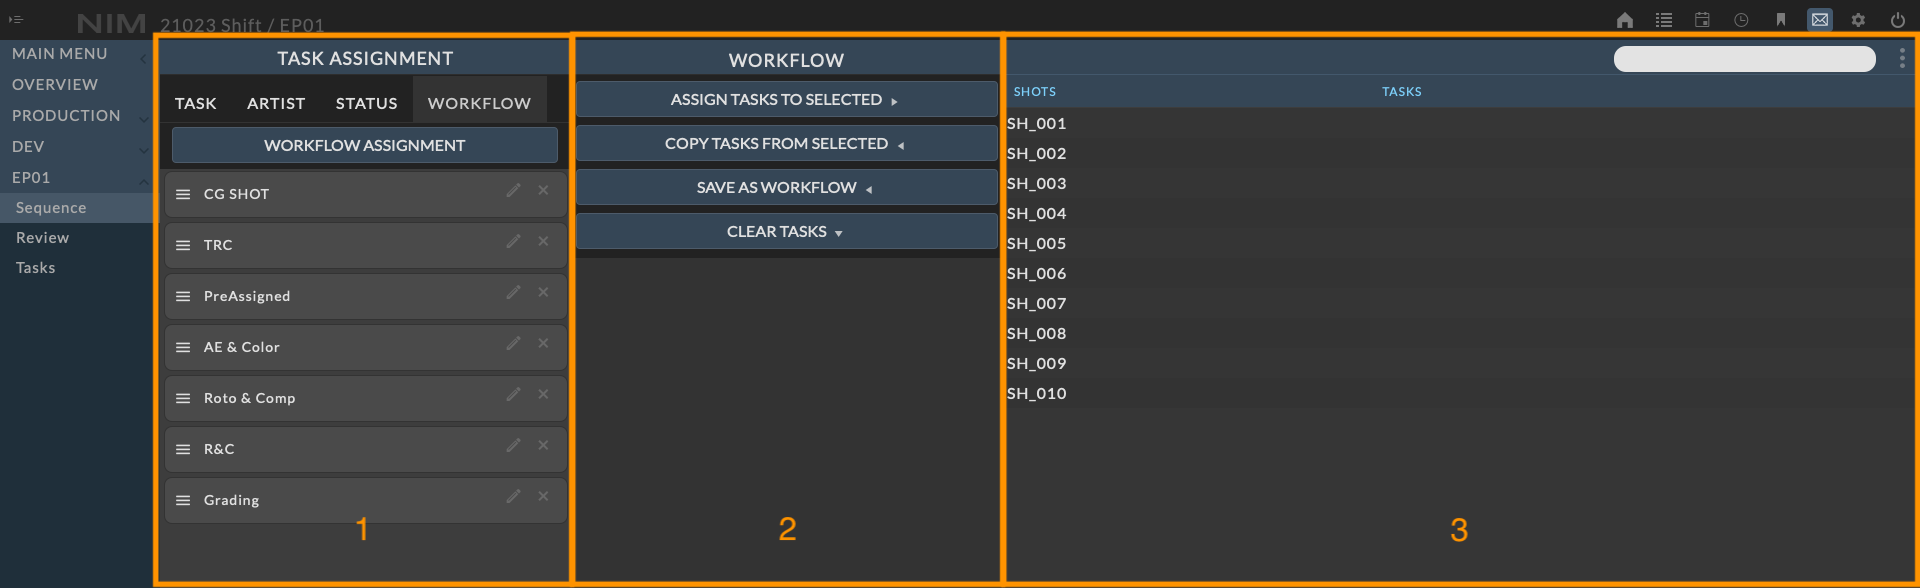
The Workflow Assignment area consists of three sections.
Task Assignment Panel (1) |
The Task Assignment panel is available to the left of the area to add new tasks, users, and statuses to new workflows. This is also where you would edit the name of new Workflows. |
Workflow Panel (2) |
The center panel is the space to build new workflows. Drag and drop tasks to this are to start creating a workflow. Workflows can be created and assigned to objects without being saved as a Workflow for onetime use. |
Target List (3) |
The target list contains all objects for the relative location. This includes all shots in a show or all assets in the job. |
Workflows are created by dragging tasks from the Tasks tab in the Task Assignment panel to the Workflow panel. Click and drag any of the tasks in the list over the center Workflow Panel. While holding a task over the target, the droppable area will be highlighted.
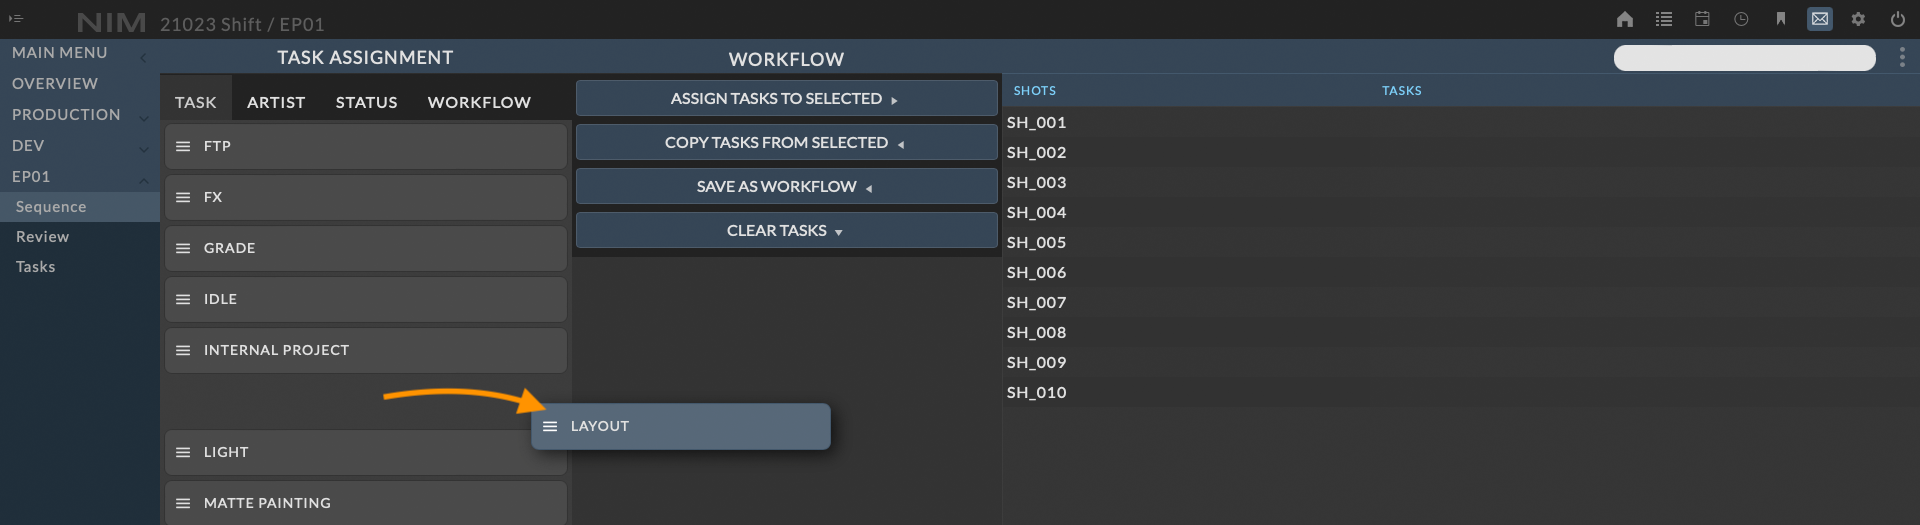
Release the task’s drag handle and a new task will appear in the Workflow Panel. To cancel a drag action, press the “Escape” key prior to releasing the drag handle.

Multiple tasks can be added to create the appropriate workflow.
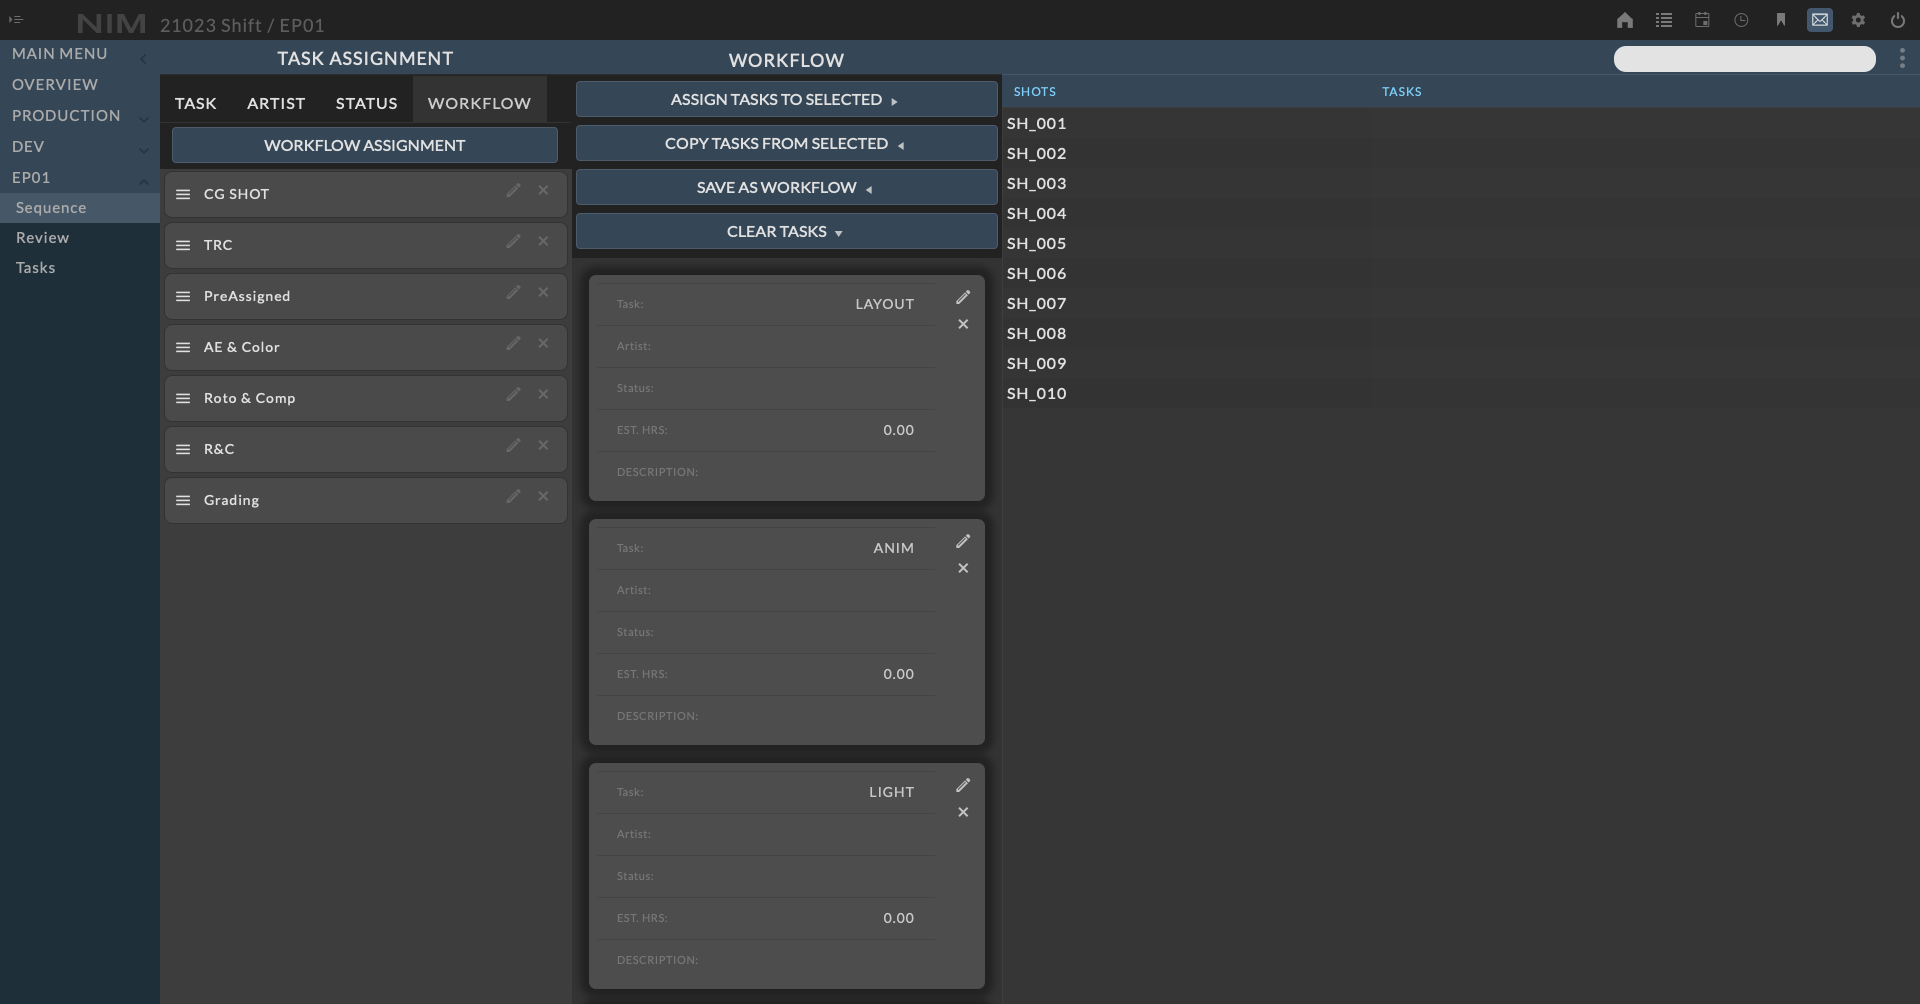
Tasks in workflows can additionally be predefined with artist, status, description and estimated hours.
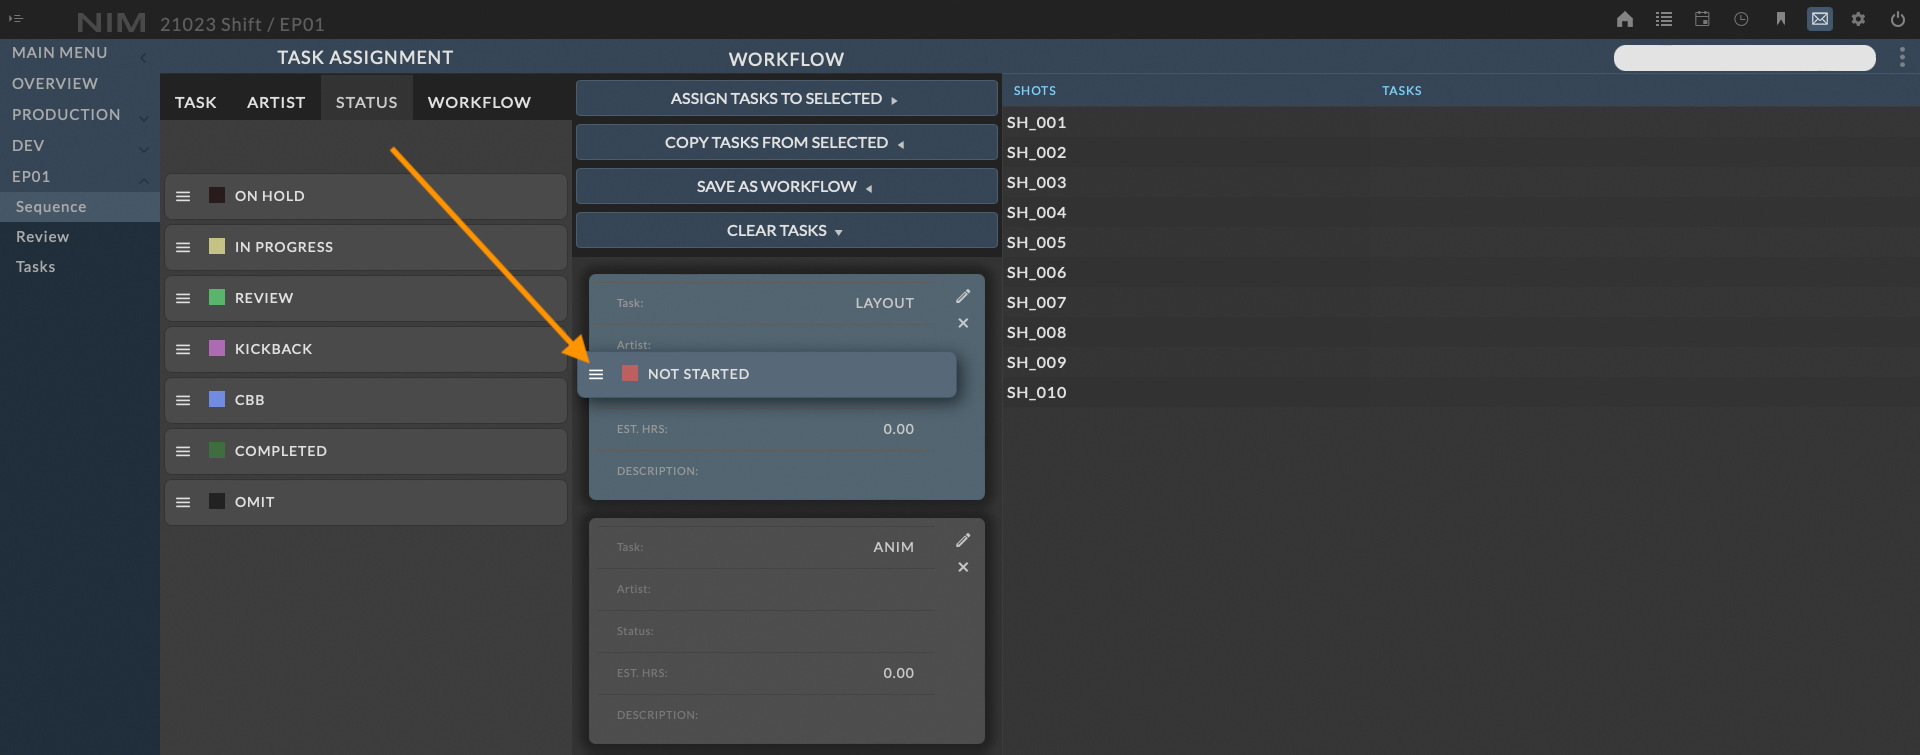
To add an artist or status to a task in the workflow panel, drag and drop artists and statuses from their respective tabs onto the task. When a new status is attached, the task will be displayed with a task status color bar on the left as well as the current task status.
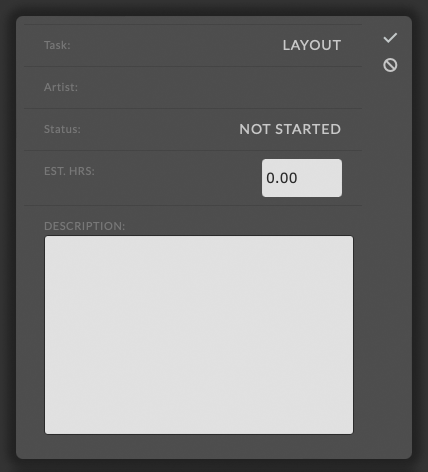
To edit the description or estimated hours for a task in the workflow panel, click on the  for the task you wish to edit. This will place the task in edit mode.
After making the necessary changes, click the check mark button to save.
All objects this task is added to will include the settings predefined on the task.
Click the cancel button to return to the view mode without saving changes.
Assigning Workflows to Multiple Objects
Once a Workflow is built, you can assign the Workflow to multiple assets or shots simultaneously.
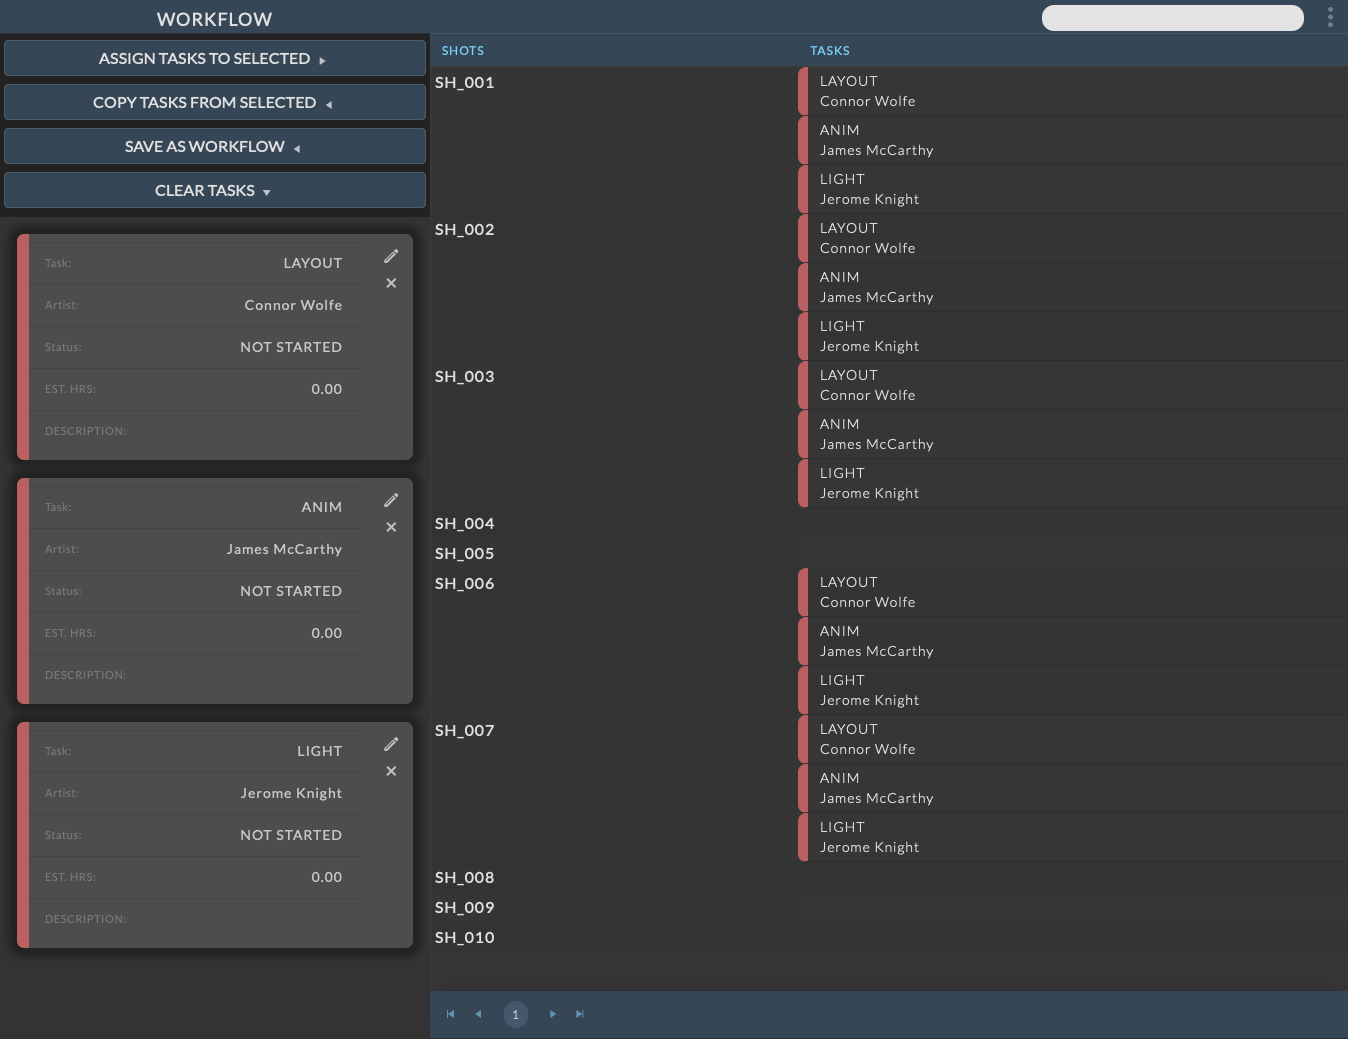
When assigning workflows to multiple shots, click to select the first shot from the shot list in the Workflow panel. The shot will be highlighted to indicate it’s selection. Shift-click a second shot to select all shots inbetween, or Ctrl-click / Command-click to add non-consecutive shots.
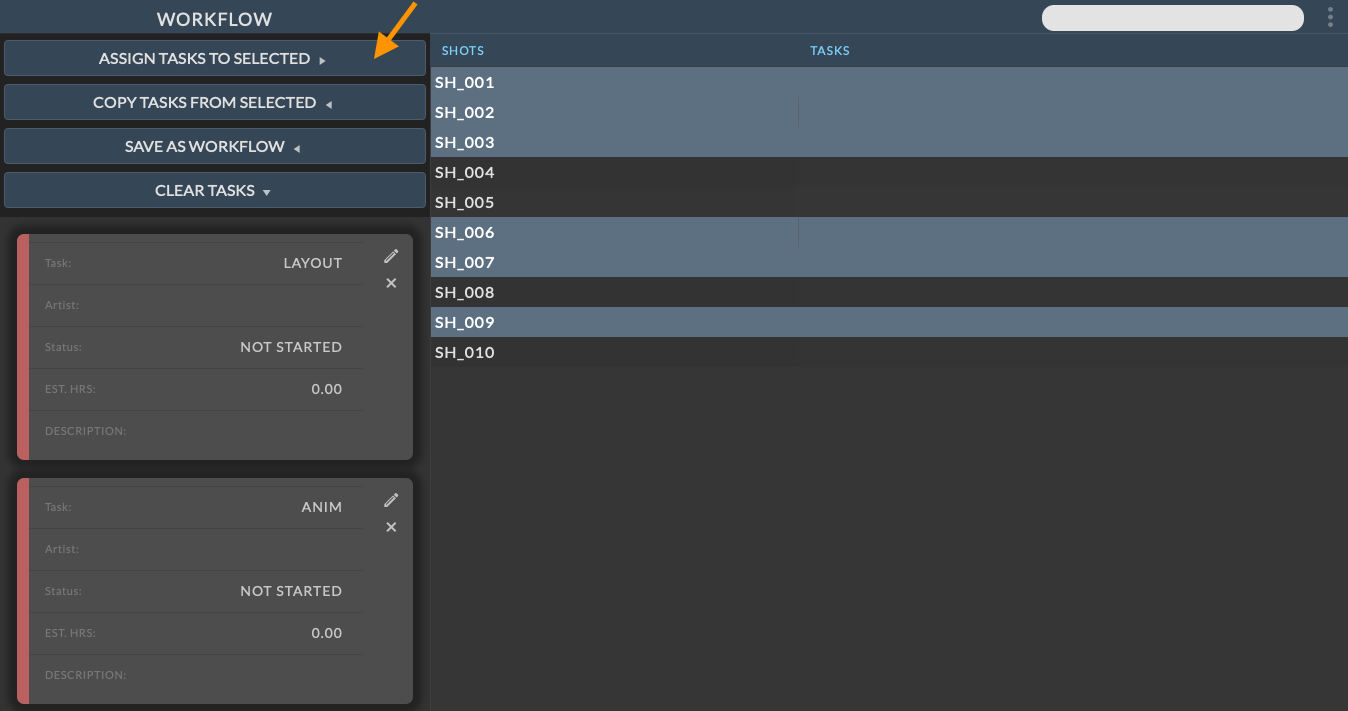
Once selected, click the ASSIGN TASKS TO SELECTED button to add the Workflow to each shot.
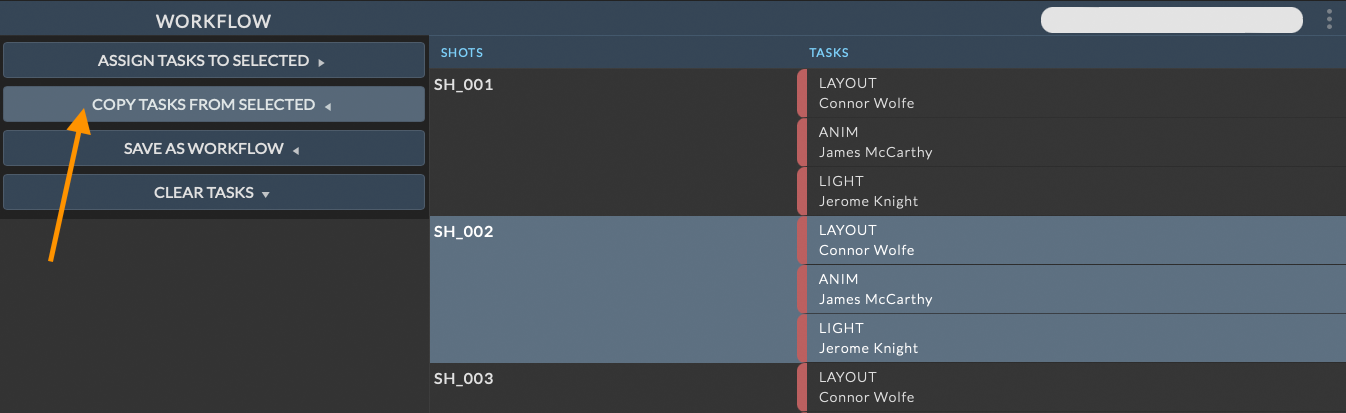
Copy Tasks From Selected
Rather than building a workflow from scratch, you can copy tasks from existing assets or shots. Select the shot from the Workflow shot list and click the COPY TASKS FROM SELECTED button. The selected object’s tasks will be placed in the Workflow panel.
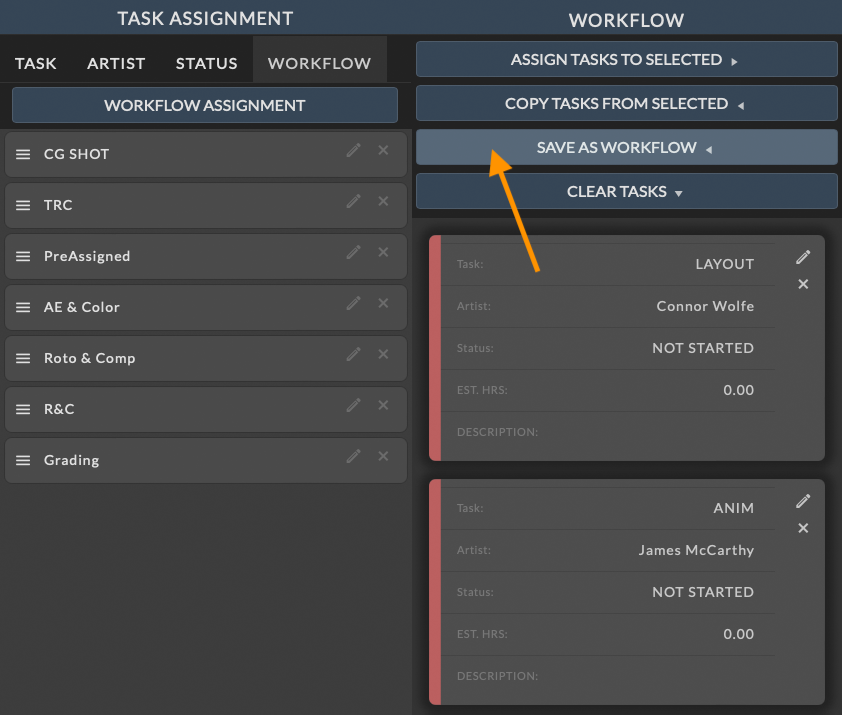
Save As Workflow
Workflows can be saved per user to be used in other jobs. To save a workflow click the SAVE AS WORKFLOW button. A new Workflow named “New Workflow” will be created in the Workflow tab of the Task Assignment panel.
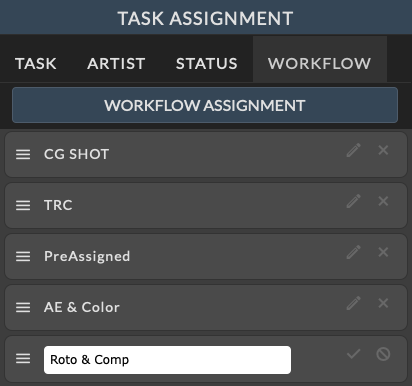
To edit the name of the workflow click the button at the right of the Workflow name.
Click the  at the right of the Workflow name when finished to save your changes.
Click the cancel button to return to the view mode without saving changes.
To delete a workflow click the  button at the right of the Workflow name.
Clear Tasks
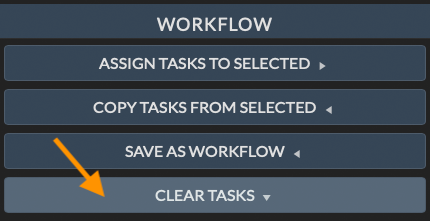
To clear all tasks from the Workflow panel, press the CLEAR TASKS button.
Additionally, to remove an individual task, click on the on the task in the Workflow panel to remove it from the active list.