Contact List
The full list of contacts can be accessed from the Studio > Contacts menu.
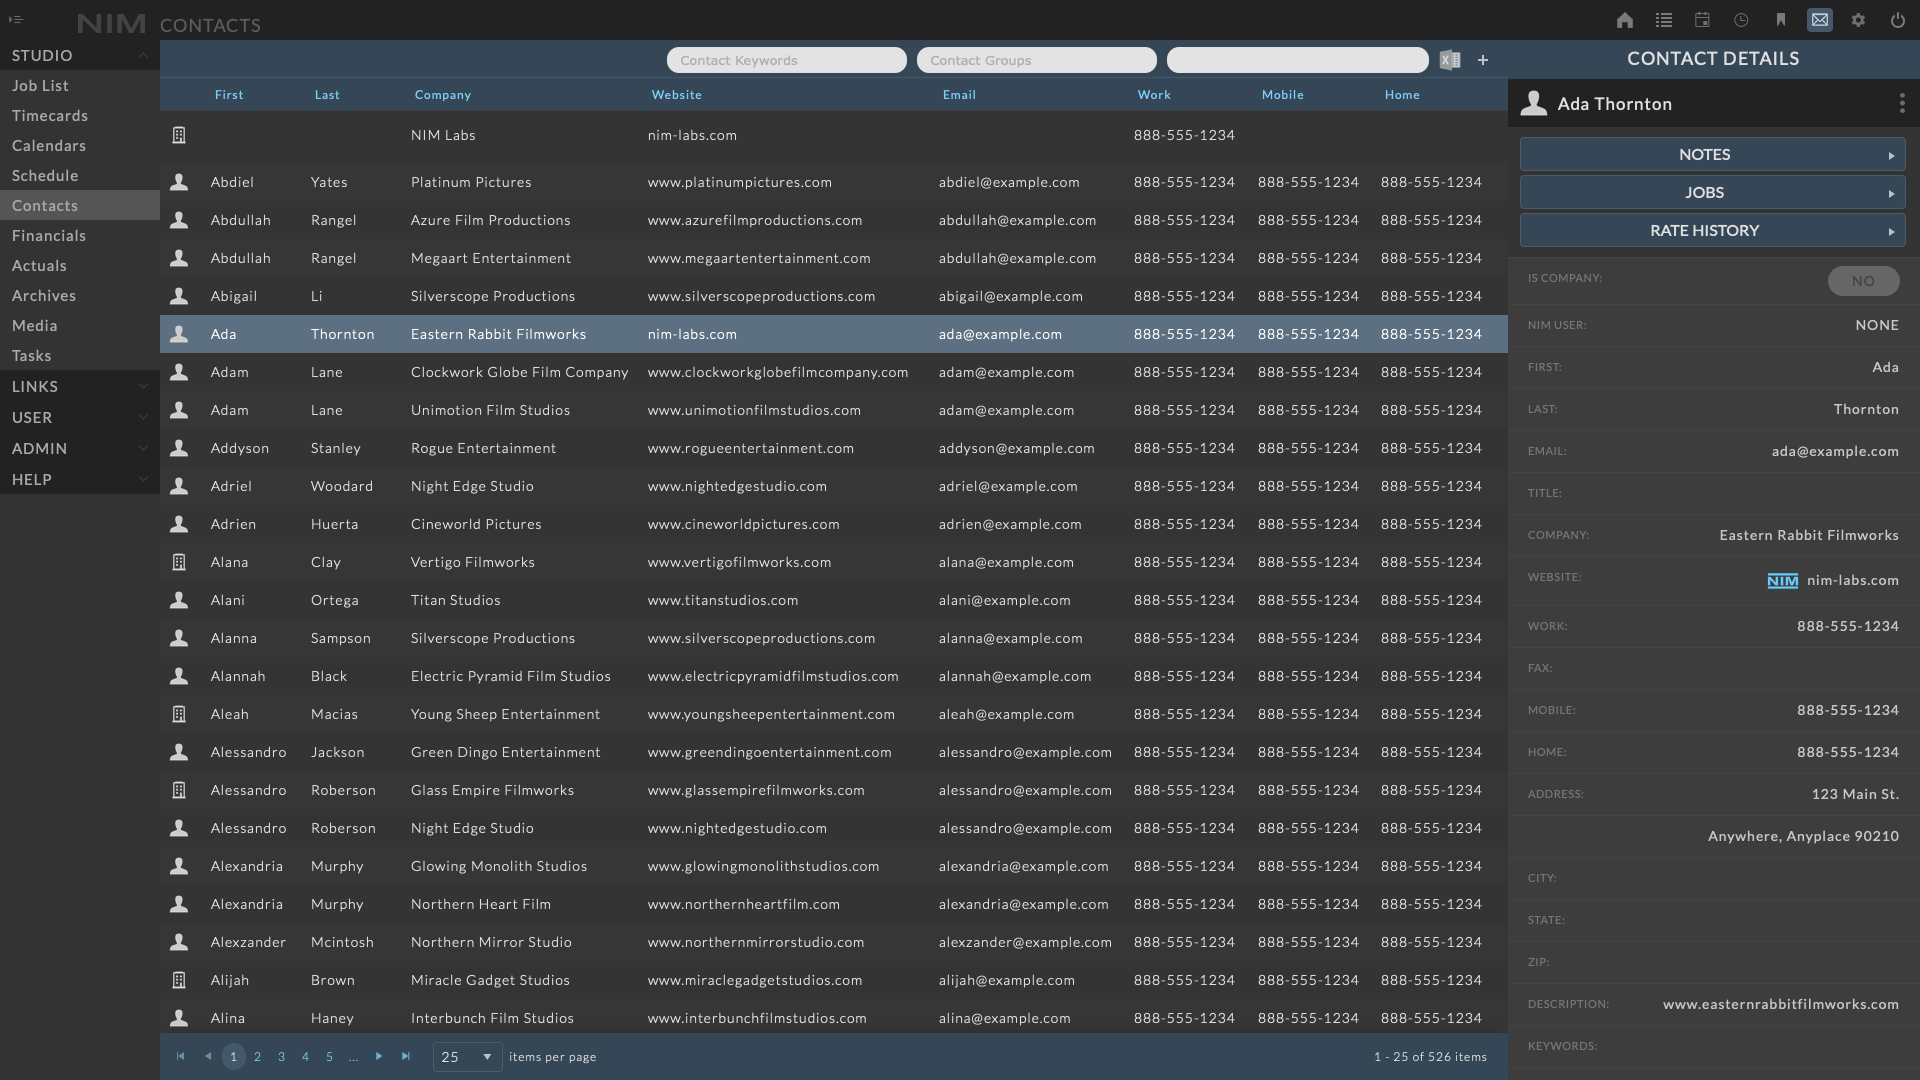
Working with Grids
Grids are a powerful tool for managing and working with large amounts of data. The grid UI offers various features to help you manage your data more effectively. For more details on working with grids, please refer to the Working with Grids section of the documentation..
Filters
The contacts list supports supports search and filter panel filtering.
Search

Using the search input, you can quickly search by first name, last name, company, or website.
To search for a contact, type the search criteria into the search bubble at the right of the contact list toolbar.
Filter Panel

The filter panel allows you to filter the job list by various criteria, enabling the ability to create complex filter structures and save and share them for future use.
To open the filter panel, click the Filter button at the right of the job list toolbar.
For more information on working with the filter panel, please refer to the Filter Panel section of the documentation.
Export to Excel
The contact grid can be exported to Excel using the Export to Excel ellipsis menu option. Any filters that have been applied to the grid will be respected in the export.
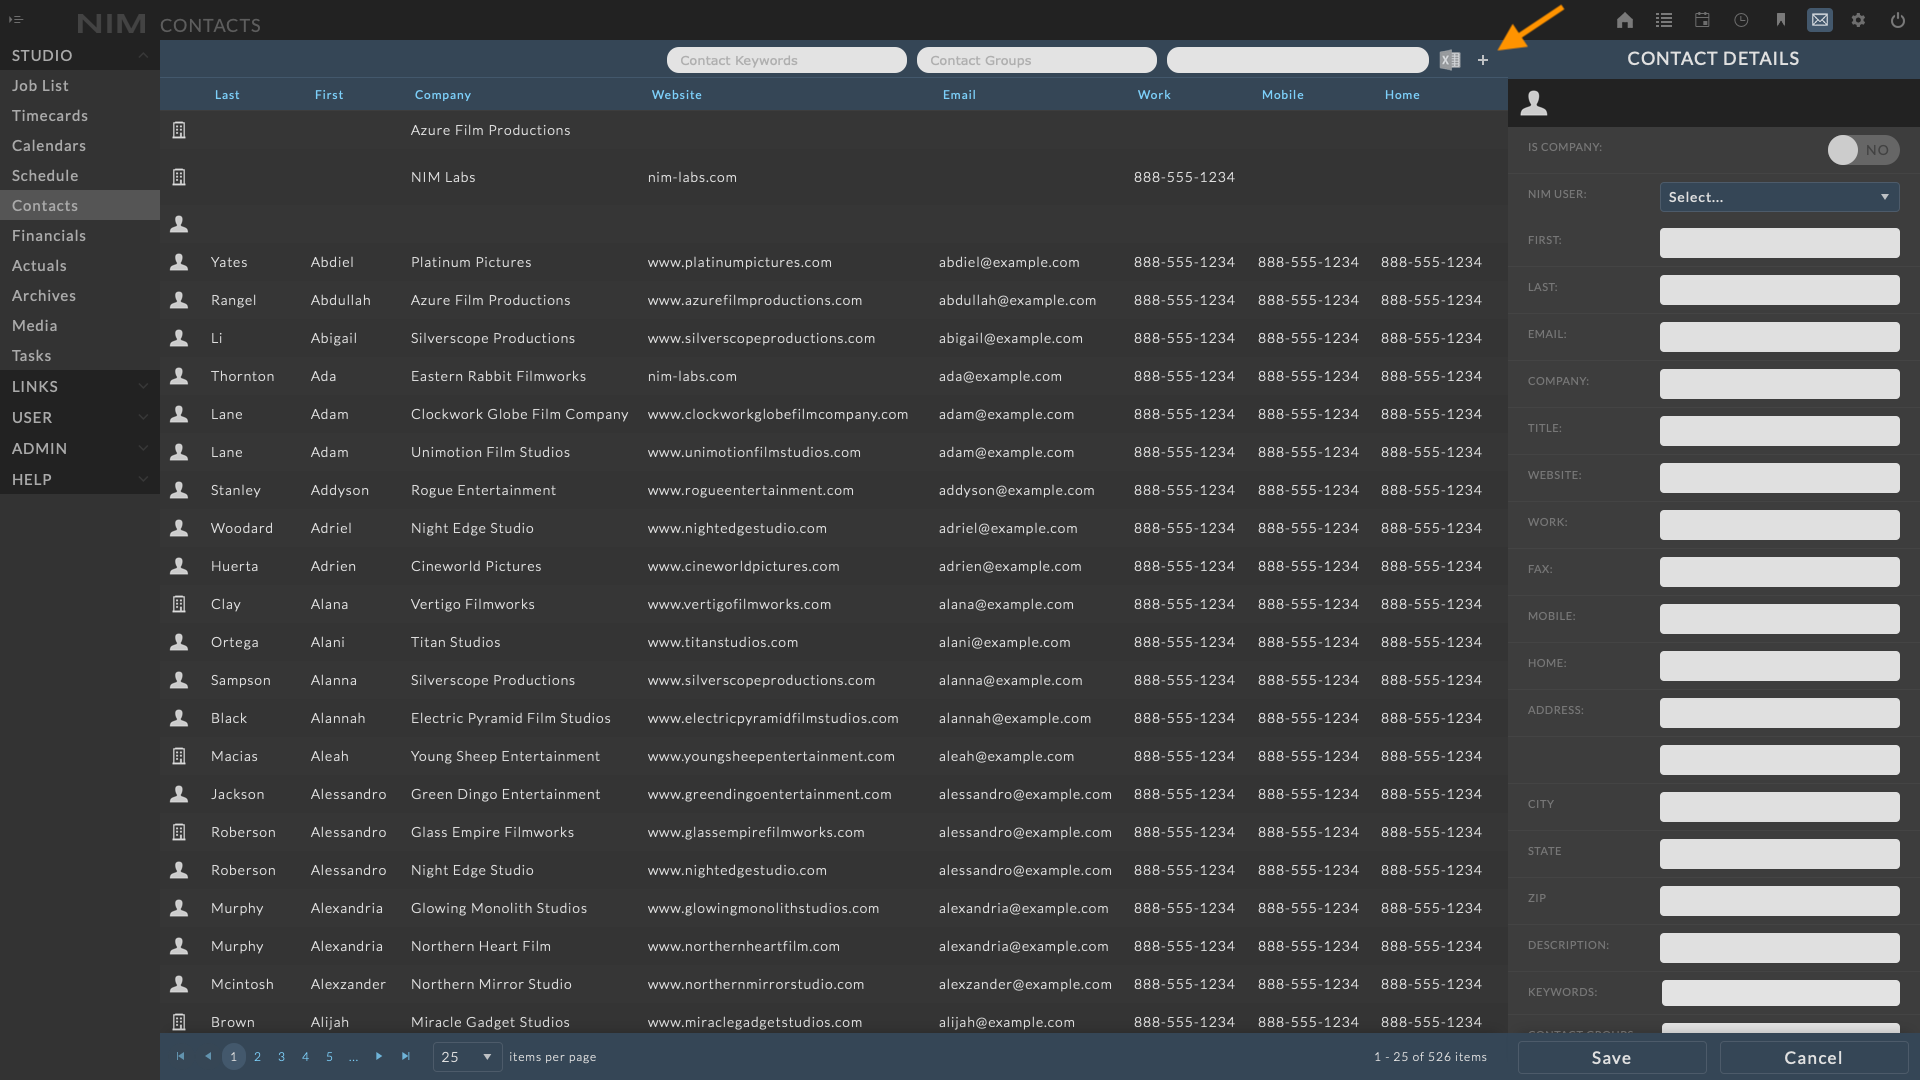
Add a Contact
To create a new contact, click the  button at the top right of the contact list window to add a new contact. The contact will be added to the contact list and the contact info panel will open. You can now enter information for the new contact.
When done click the Save button at the bottom of the info panel to save your changes.
Available fields include:
Is Company |
Setting this value to yes will create a company contact. Setting this value to no will create a person contact. Both company and person contacts can be linked to multiple other contacts, company or person. |
NIM User |
This field allows you to link an existing NIM user to the contact. Additionally contacts can be created from NIM users via the Admin > Users panel. Refer to the User Contacts section for more information. When a contact is linked to a NIM user, the first name, last name, and email fields will be populated with the NIM user information and can not be edited directly from the contact info panel. |
First |
The first name of the contact. If this contact if flagged as a person contact, the first and last name will be used as the contact name. |
Last |
The last name of the contact. If this contact if flagged as a person contact, the first and last name will be used as the contact name. |
The email address of the contact. |
|
Title |
The title of the contact. |
Company |
The company name of the contact. If this contact is flagged as a company contact, this field will be used as the contact name. |
Website |
The website of the contact. |
Work |
The work phone number of the contact. |
Fax |
The fax number of the contact. |
Mobile |
The mobile phone number of the contact. |
Home |
The home phone number of the contact. |
Address |
The street address of the contact. |
City |
The city of the contact. |
State |
The state of the contact. |
Zip |
The zip code of the contact. |
Description |
A description of the contact. |
Keywords |
Multiple contact keywords can be added as a tag on a contact. The contact keywords are defined in the Admin > Contacts - Keywords panel. |
Groups |
Multiple contact groups can be added as a tag on a contact. The contact groups are defined in the Admin > Contacts - Groups panel. |
Linked Contacts |
Multiple contacts can be linked to a single contact. This allows for a single contact to be associated with multiple contacts. For example, a company contact can be linked to multiple person contacts. |
Custom Fields |
If custom contact fields have been defined, they will appear at the bottom of the contact info panel. For more information on contact custom fields please refer to the Custom Fields section of the documentation. |
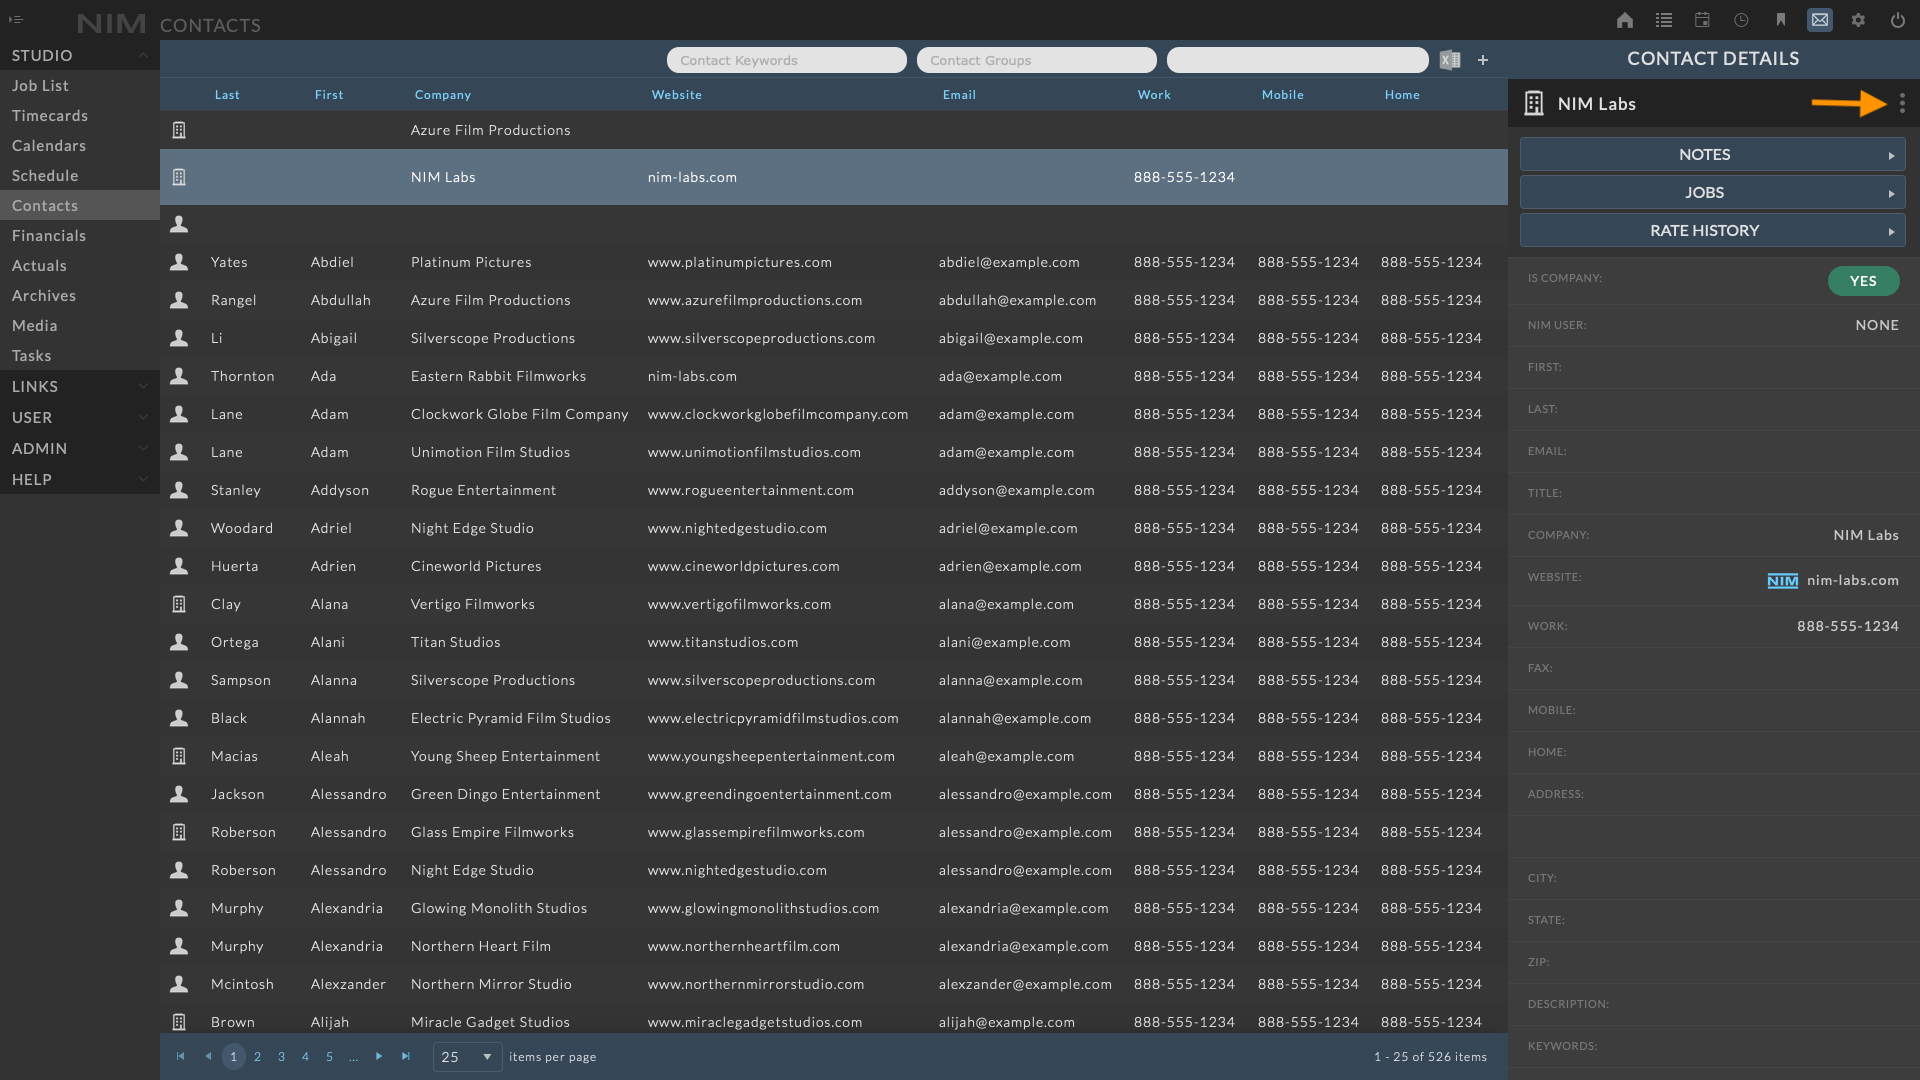
Edit a Contact
To edit a contact, click on the the row you wish to edit to open the contact info panel. Click on the ellipsis menu in the contact info panel and choose Edit. Make the necessary changes and click the Save button at the bottom of the info panel to save your changes. Click the Cancel button to return to the view mode without saving changes.
Linked Contacts
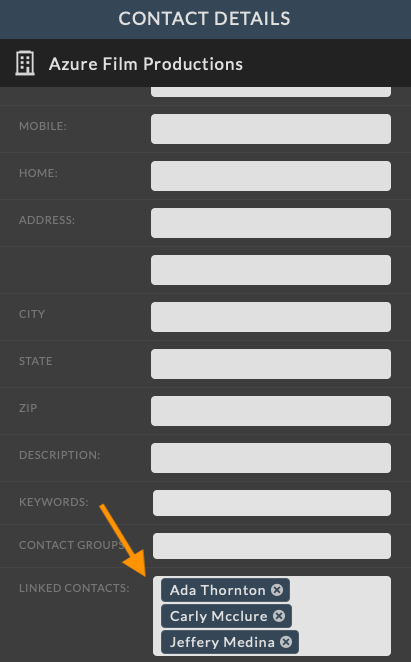
Multiple contacts can be linked to a single contact. This allows for a single contact to be associated with multiple contacts.
For example, a company contact can be linked to multiple person contacts or person contacts can be linked to multiple company contacts.
To link a contact, click on the contact row you wish to edit to open the contact info panel. Click on the ellipsis menu in the contact info panel and choose Edit. Scroll down to the Linked Contacts input. Select the contacts to link to the current contact from the dropdown list. The selected contacts will be added to the Linked Contacts section of the contact info panel.
Linked contacts can be removed by clicking the X next to the linked contact.
Note
When selecting a contact from a contact dropdown, all contacts that are linked to an existing contact on the current object (i.e. job or bid) will appear at the top of the contact dropdown menu for quick selection. For example, if you have a company contact named The Company and a contact named John Smith and you add The Company to a bid, John Smith will now appear as a selection at the top of the dropdown. This is because John Smith is linked to The Company.
Deleting Contacts
Delete a contact entry by selecting the contact from the grid, clicking the ellipsis menu in the contact panel, and selecting Delete. You will be prompted to confirm deletion of the contact.
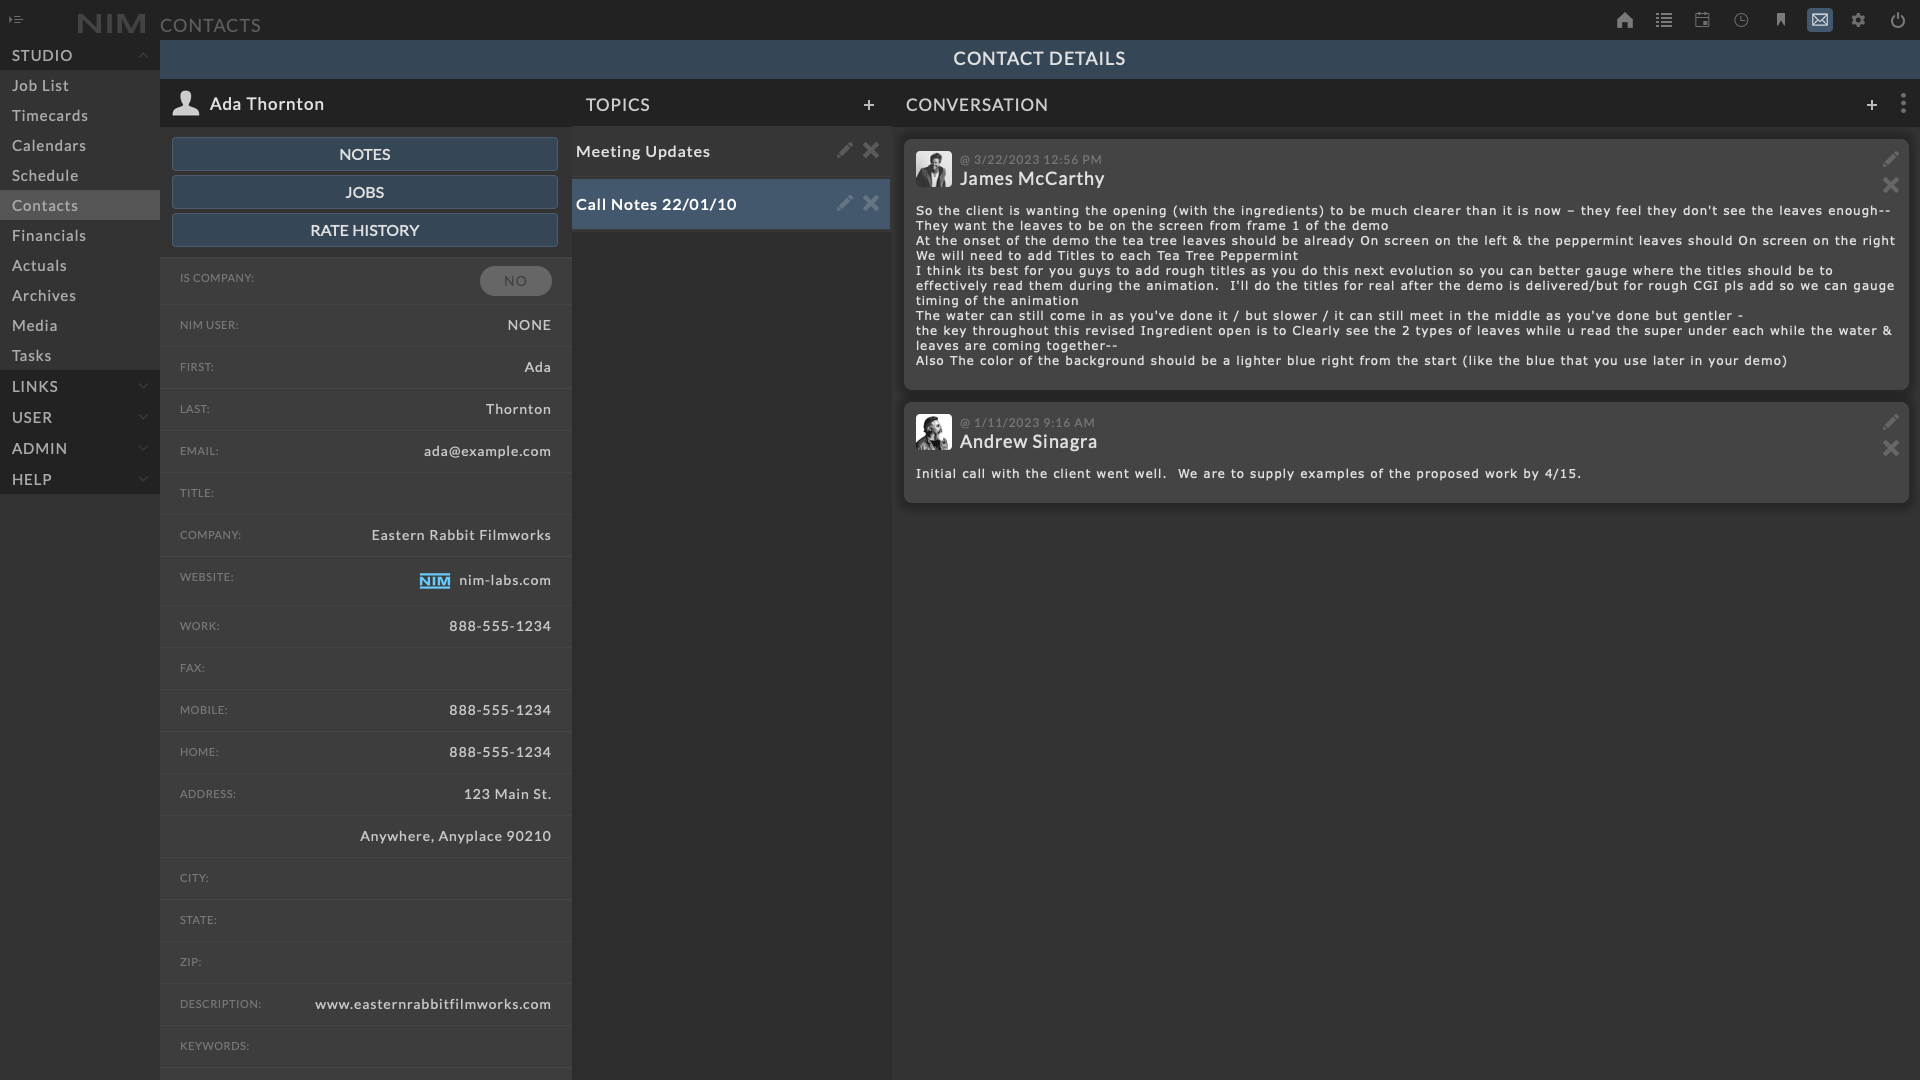
Contact Notes
Contact notes can be used to leave general notes on a contact. Contact notes are divided into groups via Topic and Conversations. Topics are a way to group notes within a conversation. Multiple topics can be created to group the conversations as needed.
Note
Contact notes are not associated with a specific job or bid. They are general notes that can be used to track conversations with a contact.
Add Note
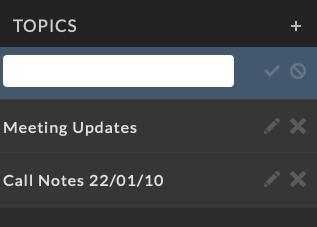
To add a note, you first need to create a Topic for the note.
Click the in the Topics column on the left to create a new topic.
Enter a name for the new topic and click the checkmark to save it.
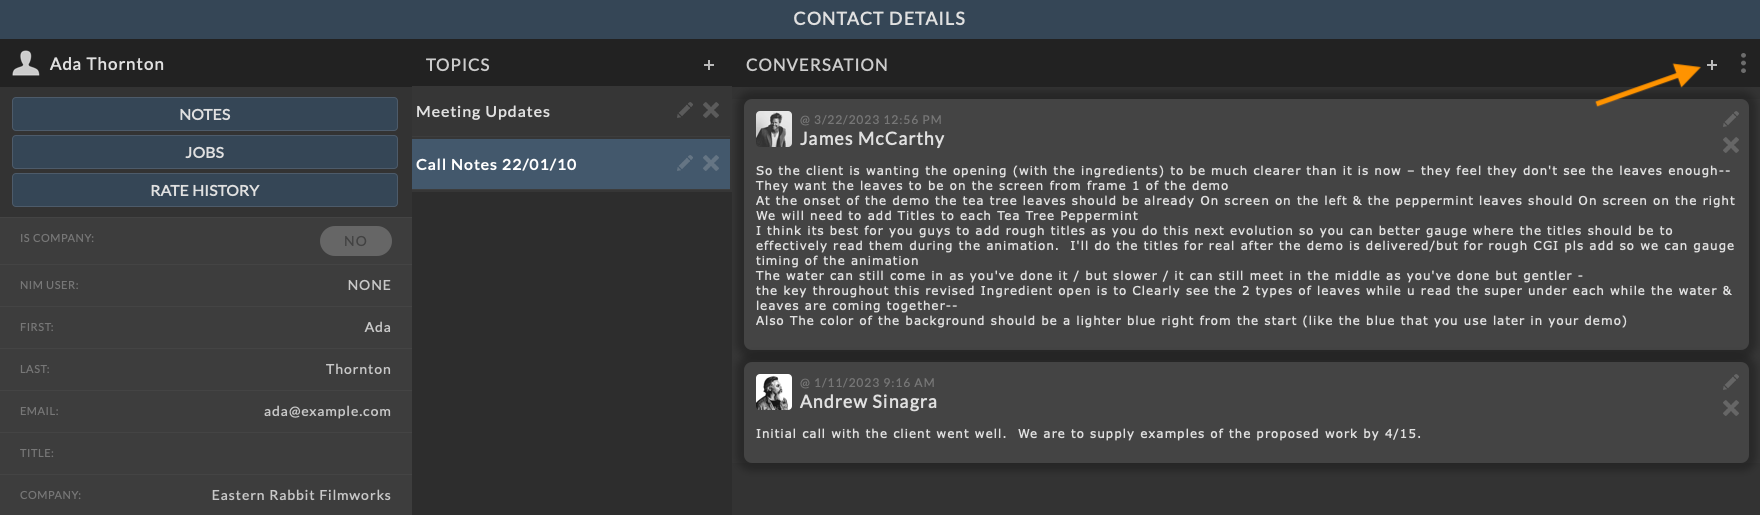
When a topic is selected, a appears on the right of the page, in the Conversation area. Clicking this button will create a new note in this topic. Text can be added and formatted in each note. Click the checkbox on the right to save the note. Click the Cancel button to return to the view mode without saving the note.
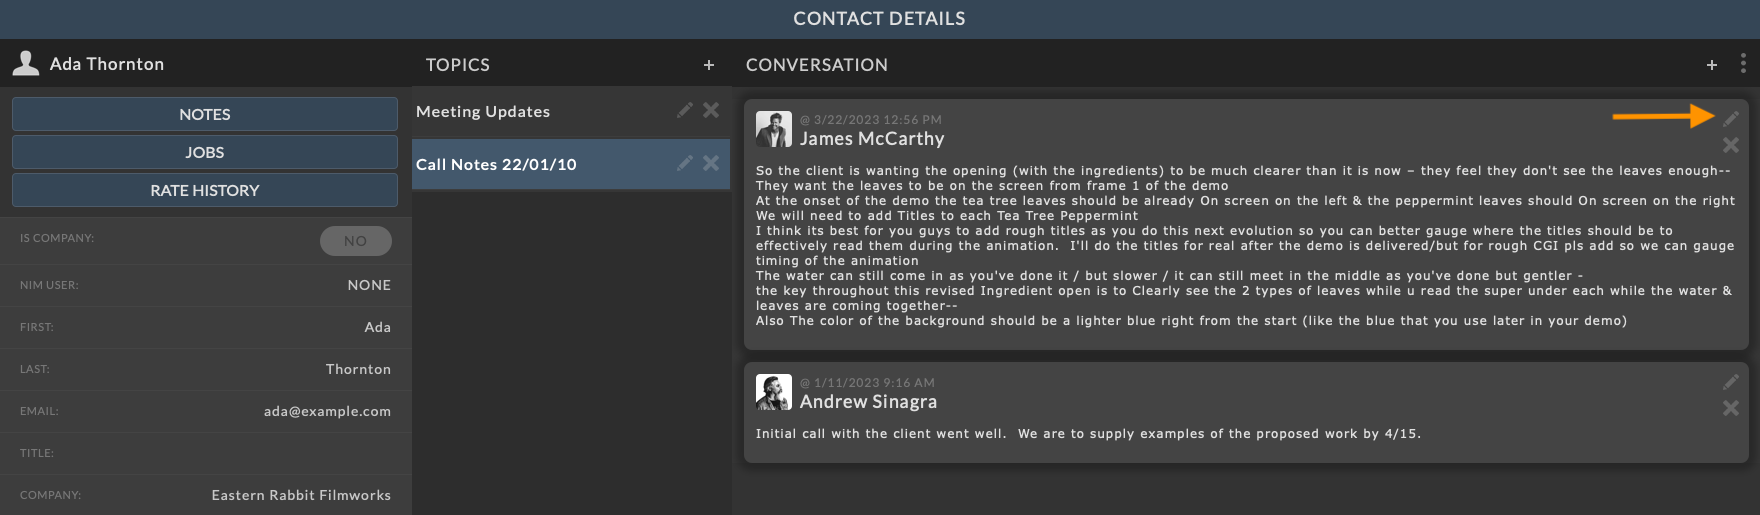
Edit Note
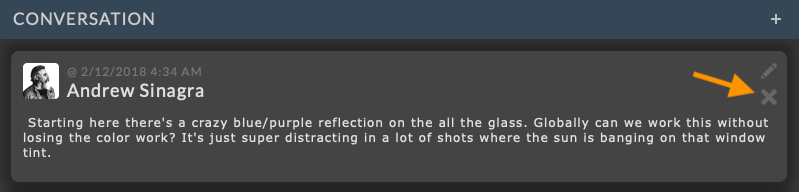
To edit a note, click the  button at the top right of the note. Make the necessary changes and click the check mark to save. Click the Cancel button to return without saving changes.
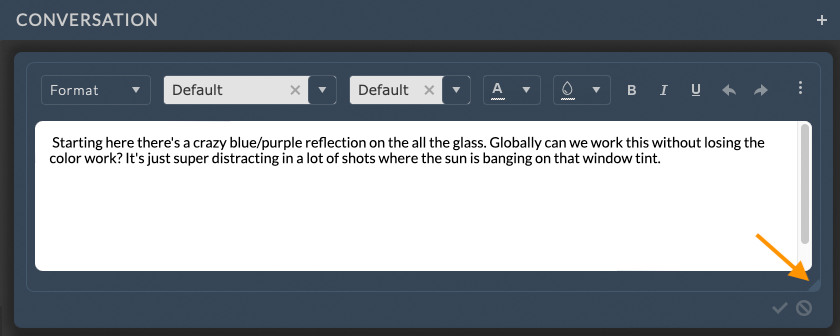
While editing a note, the text area can be expanded to fit the content you are entering.
To resize the text area, click and drag the resize handle at the lower right. Letting go of the resize handle will keep the text area at the new size.
Delete Note
Delete a conversation entry by clicking the  button next to the edit button at the top right of the note. You will be prompted to confirm deletion of the note.
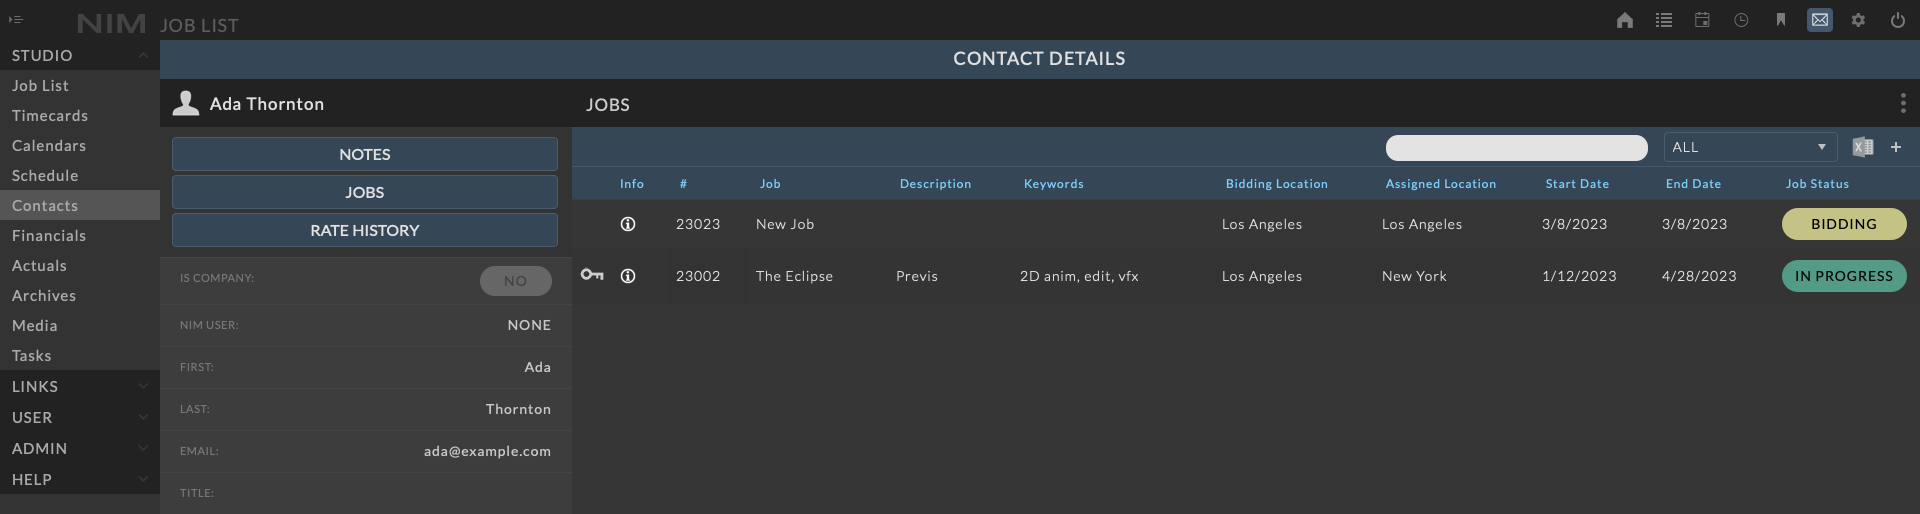
Contact Jobs
The Jobs tab displays a list of jobs associated with the contact. The jobs can be filtered by status and sorted by any of the columns. Clicking on the info button in a job row will open the job info panel. Users can work with jobs from the contact info panel by clicking the ellipsis menu and selecting the desired action. For more information on working with jobs, please refer to the Job List section of the documentation. For more information on adding a contact to a job, please refer to the Job Contacts section of the documentation.
Rate History
The Rate History tab displays a list of rates for line items on bids associated with the contact. Clicking on the Rate History button will open the Rate History panel.
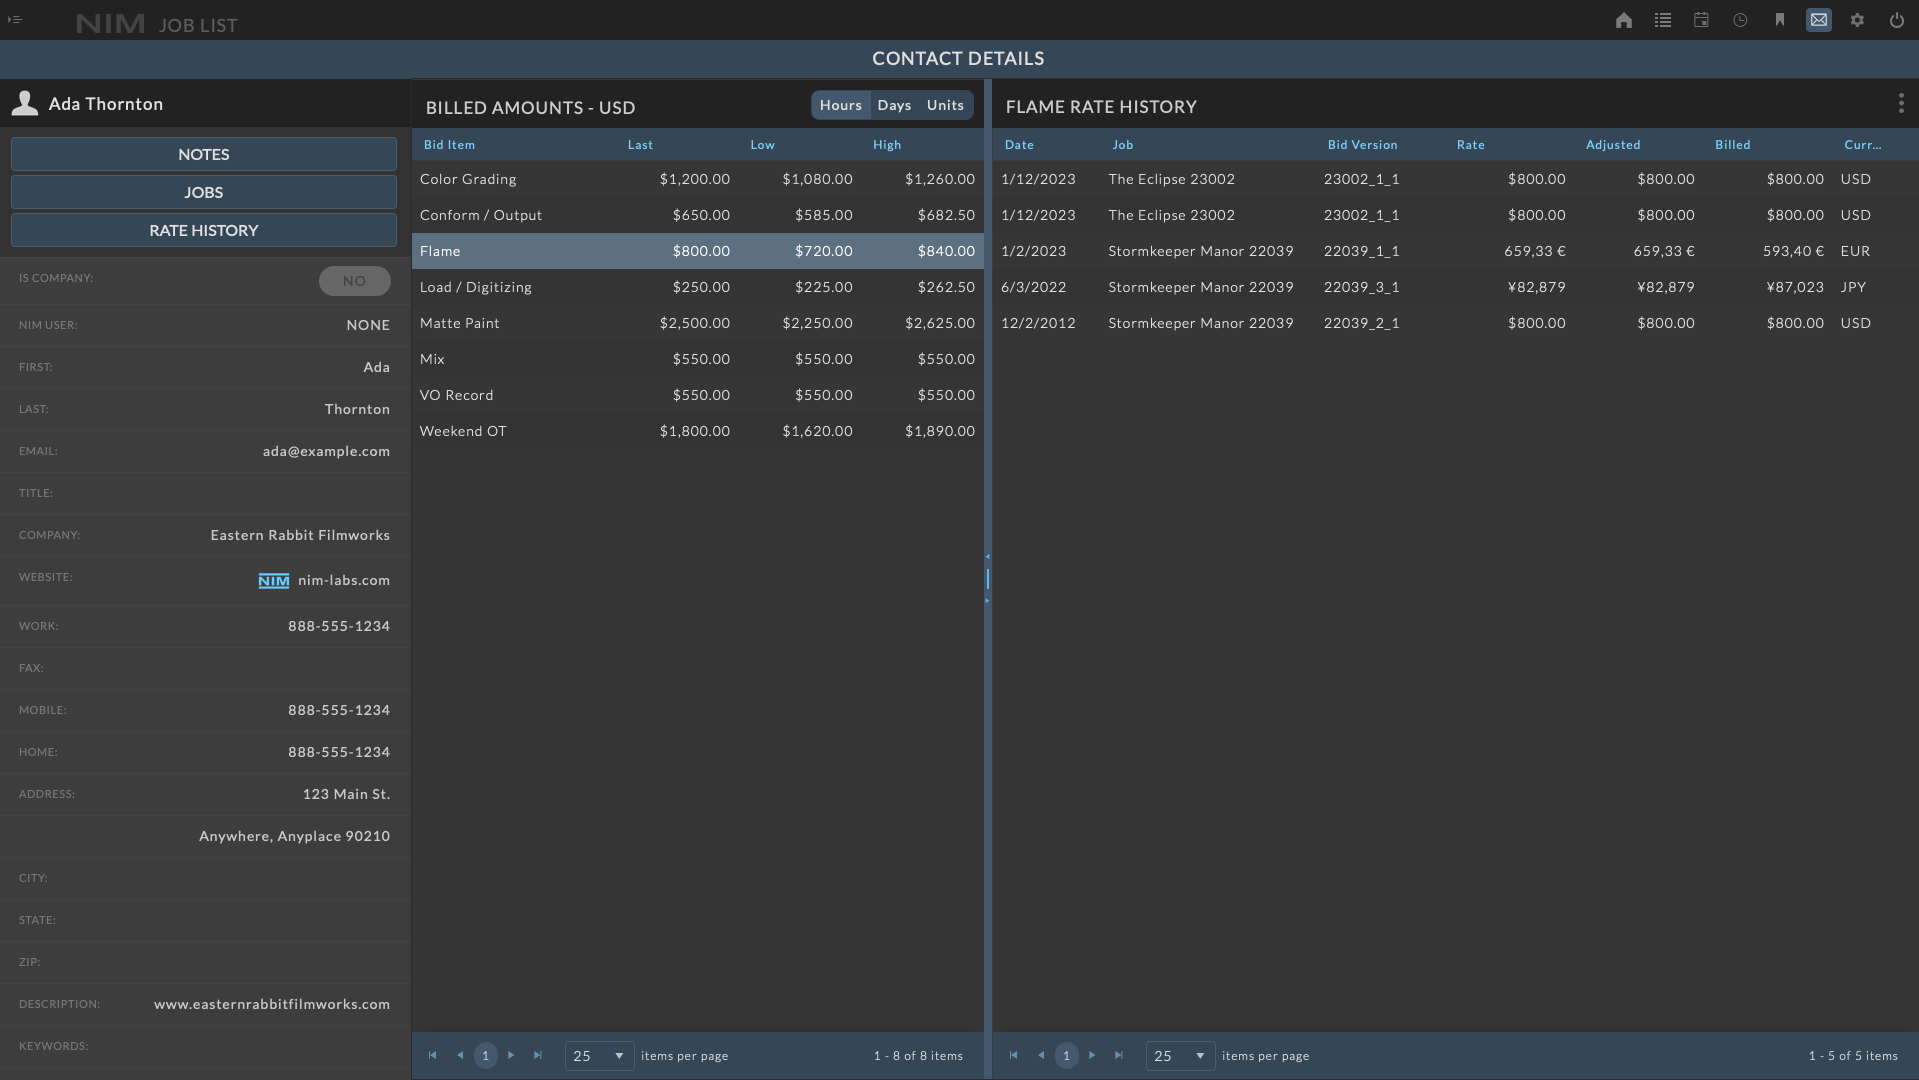
The Rate History panel is divided into two sections. The left section labeled Billed Amounts displays a list of line items on bids associated with the contact. The right section labeled Rate History displays a list of rates for the selected line item.
To close the Rate History panel, click the ellipsis menu at the top right of the panel and choose Close from the popup menu.
For more information on adding a contact to a bid, please refer to the Bid Contacts section of the documentation.
Splitter Bar
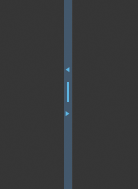
The splitter bar allows for resizing of the Rate History UI by adjusting the division between the Billed Amounts and Rate History sections. The splitter bar can be adjusted by clicking and dragging the bar between the two sections.
Clicking on the arrows on either side of the splitter bar will move the splitter bar to the maximum or minimum position. For example, clicking on the left arrow will adjust the left section to the minimum size, and the right section will be adjusted to the maximum size.
Billed Amounts
The Billed Amounts are grouped by the unit type and are selectable by clicking on the desired unit from the corresponding buttons in the toolbar.
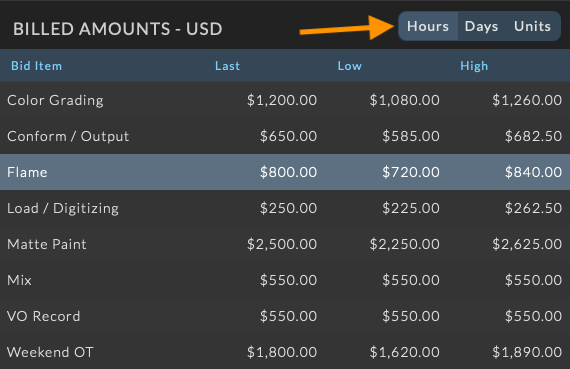
The details of the billed amounts include:
Bid Item |
This is the item name for the line item on the bid. |
Last |
This is the last rate used for any bid associated with the contact. |
Low |
This is the lowest rate used for any bid associated with the contact. |
High |
This is the highest rate used for any bid associated with the contact. |
Note
The Billed Amounts are only available for line items that have been billed on an awarded bid. If a line item has not been billed on an awarded bid, it will not appear in the Billed Amounts list. All billed amounts will be displayed in the studio currency.
Rate History
The Rate History section displays a list awarded bids for the selected line item and the corresponding rate used.
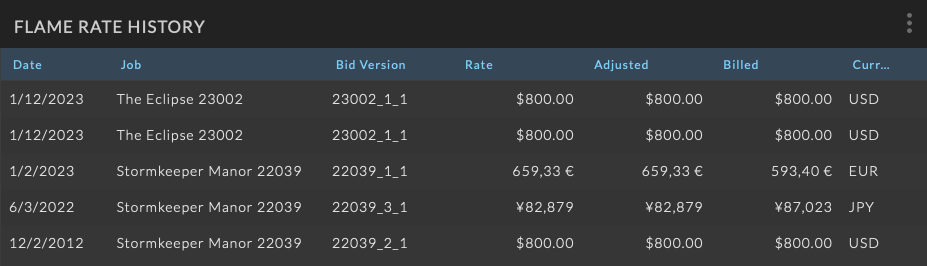
The details of the rate history include:
Date |
This is the date the bid was awarded. |
Job |
This is the name of the job associated with the bid. |
Bid Version |
This is the version number of the bid. |
Rate |
This is the initial rate for the line item on the bid. |
Adjusted |
This is the adjusted rate for the line item including any line item markup or discount. |
Billed |
This is the final billed amount including any overall markup or discount. |
Currency |
This is the currency of the bid. |
Note
The Rate History is only available for line items that have been billed on an awarded bid. If a line item has not been billed on an awarded bid, it will not appear in the Rate History list. All rate history amounts will be displayed in the corresponding bid currency.