Task Details
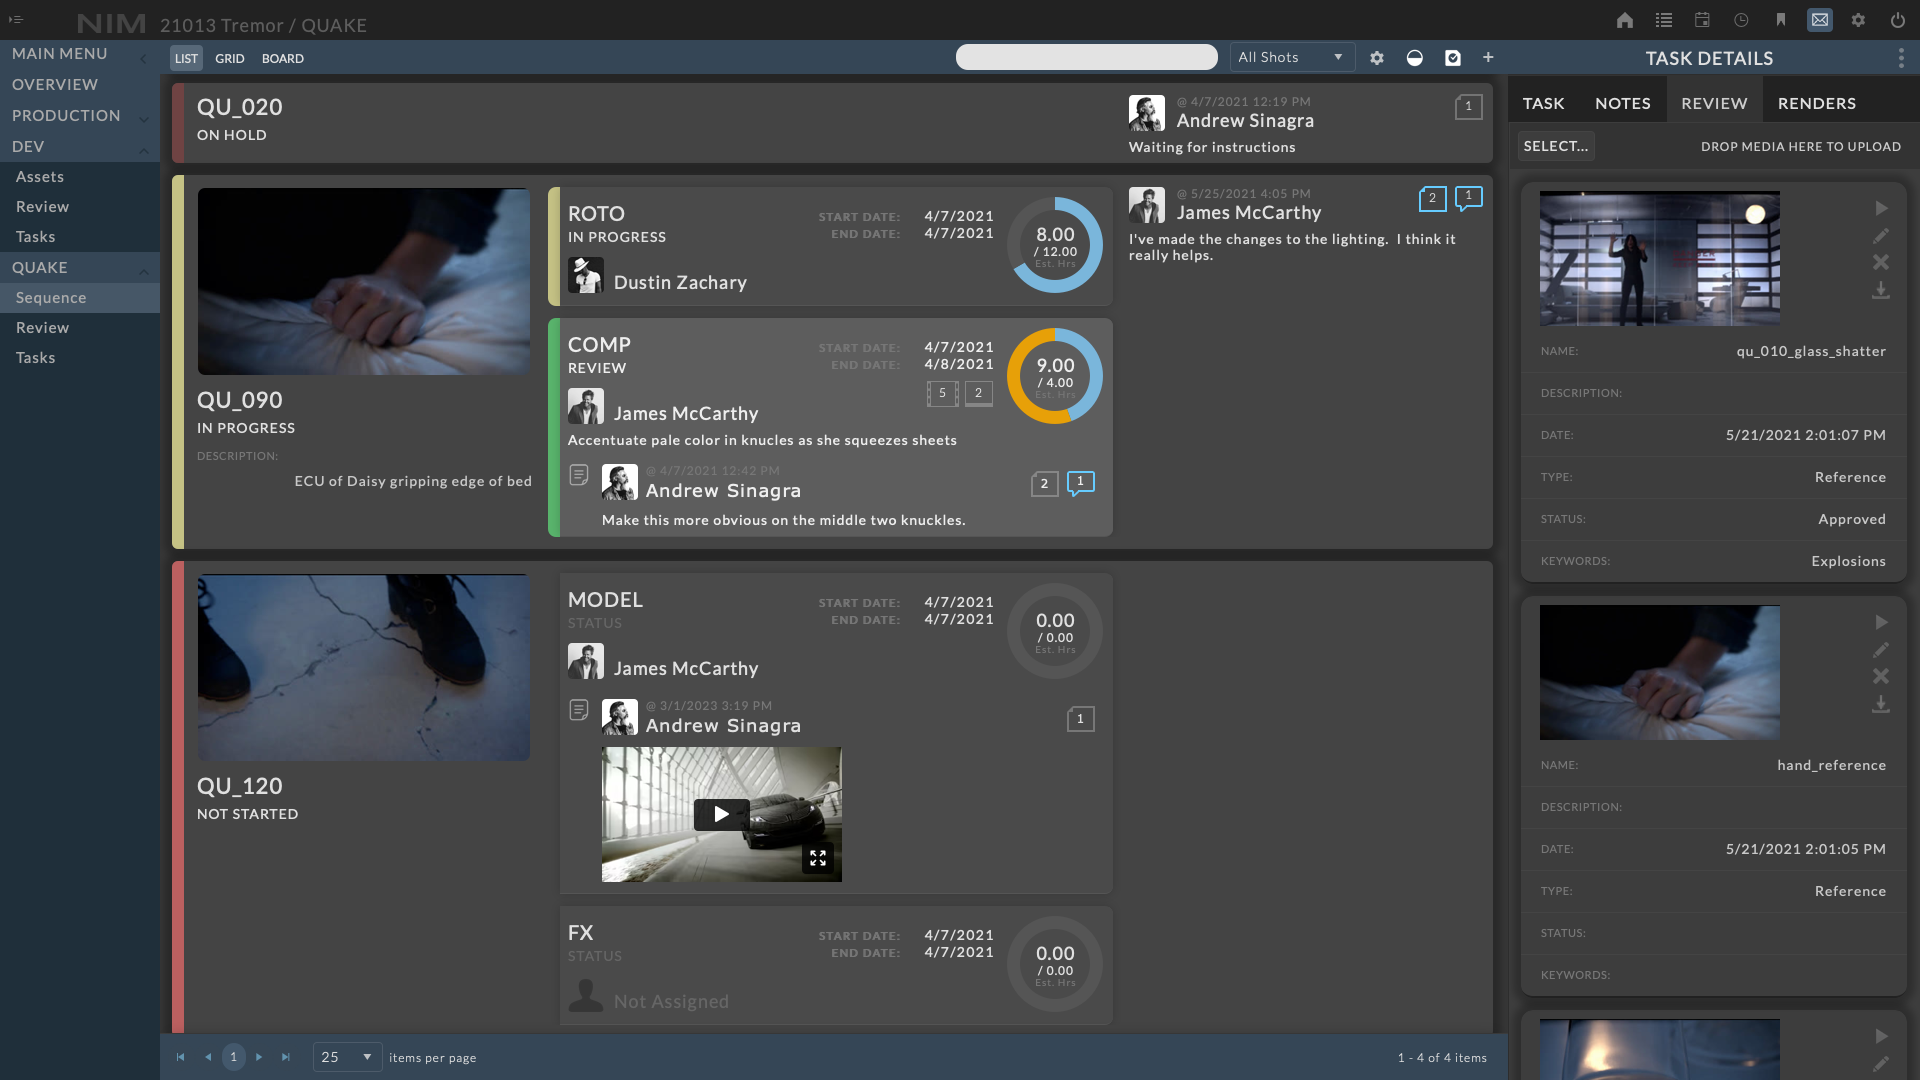
Task details are provided in several views throughout NIM. In list views, condensed task information is visible to quickly get an overview of the current task status. Full task information can be accessed via the dashboard, list, grid, and timeline views by selecting the corresponding items.
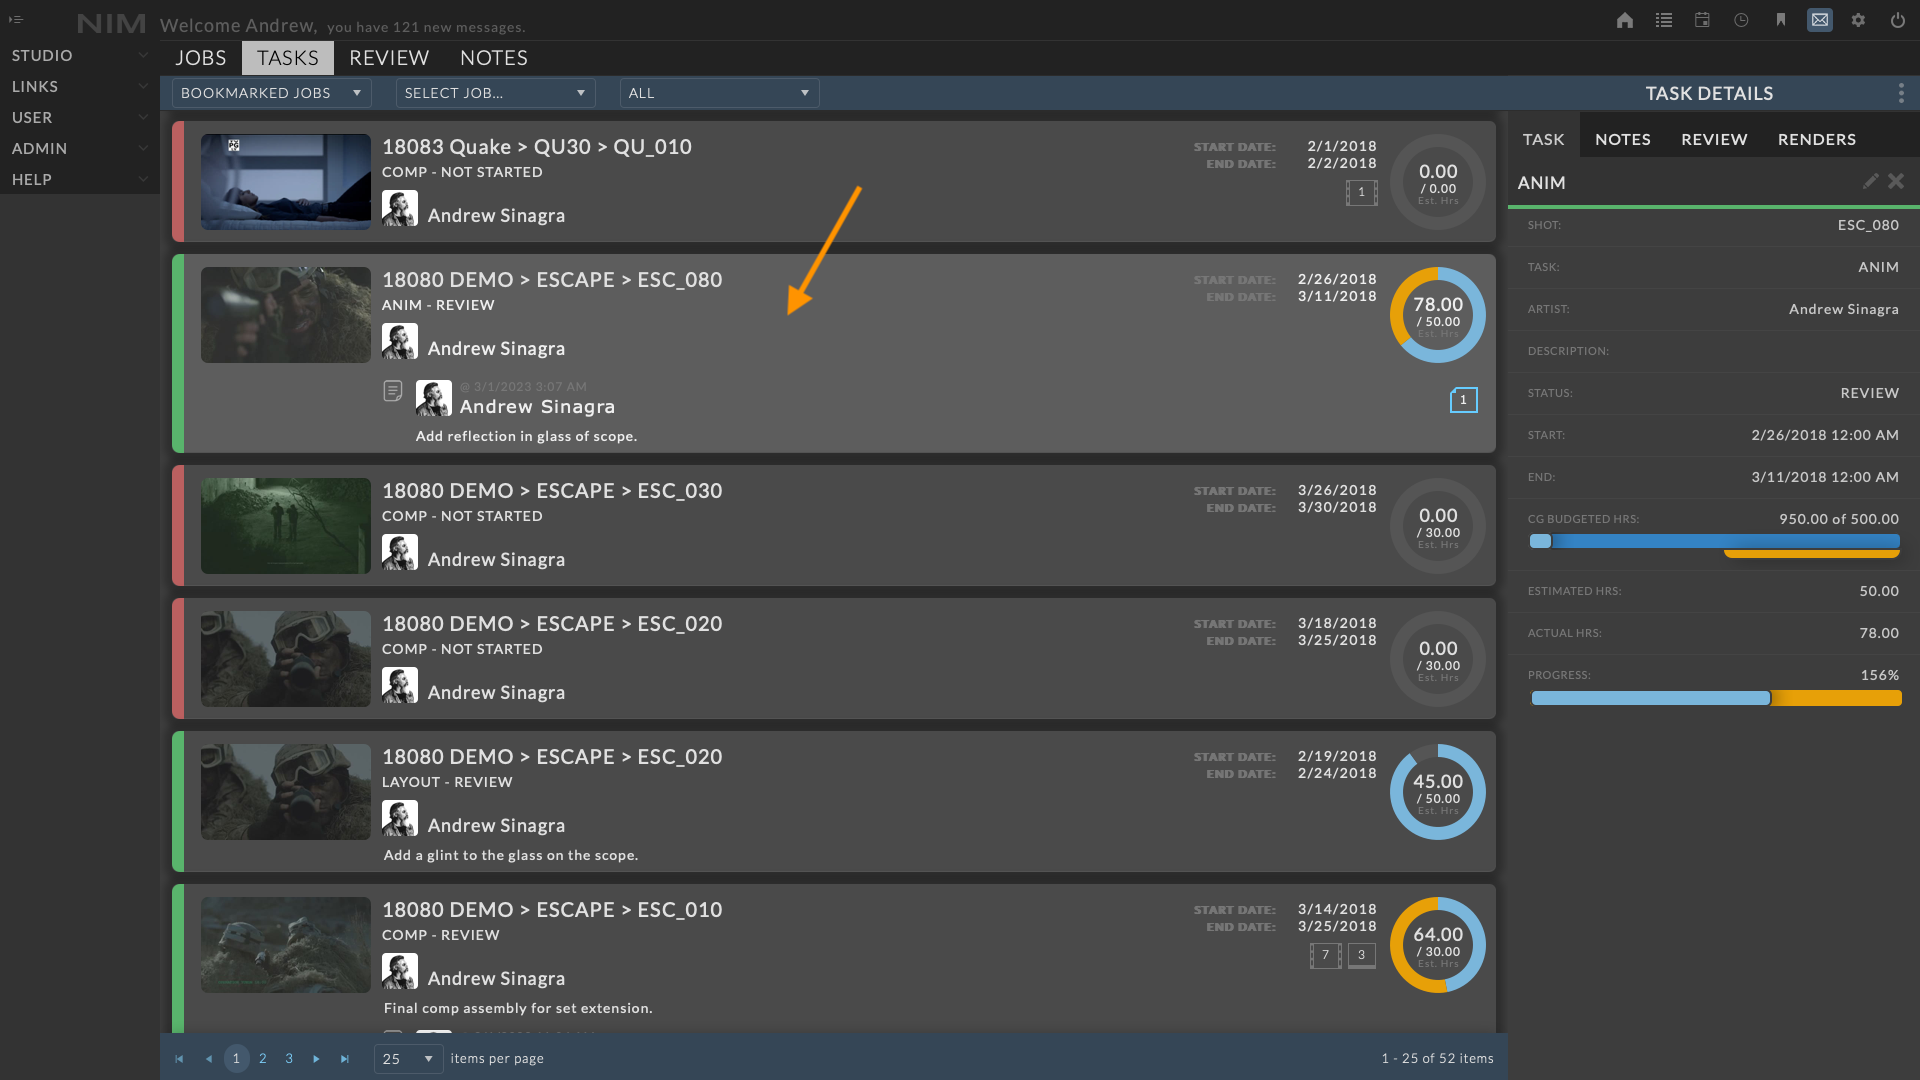
To access task details from the dashboard, click on the condensed task details in the dashboard tasks list:
To access task details from a list view, click on the condensed task details in the list:
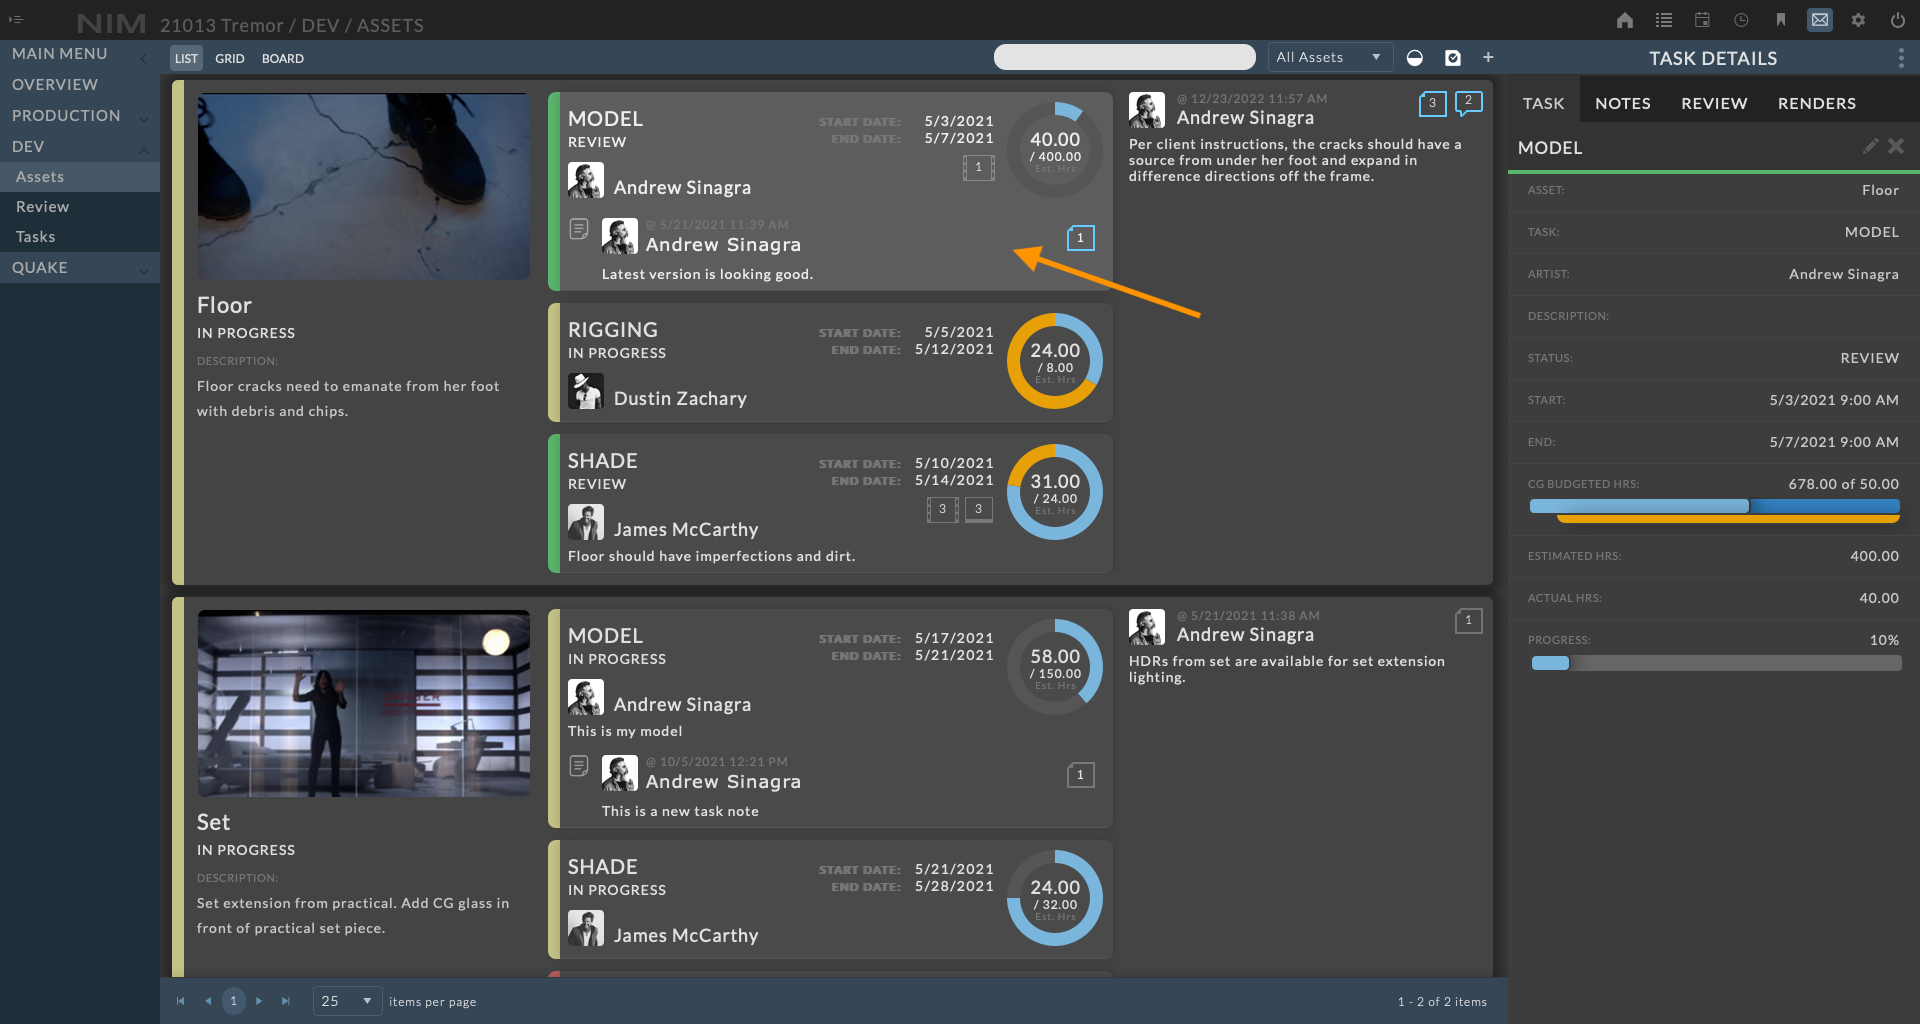
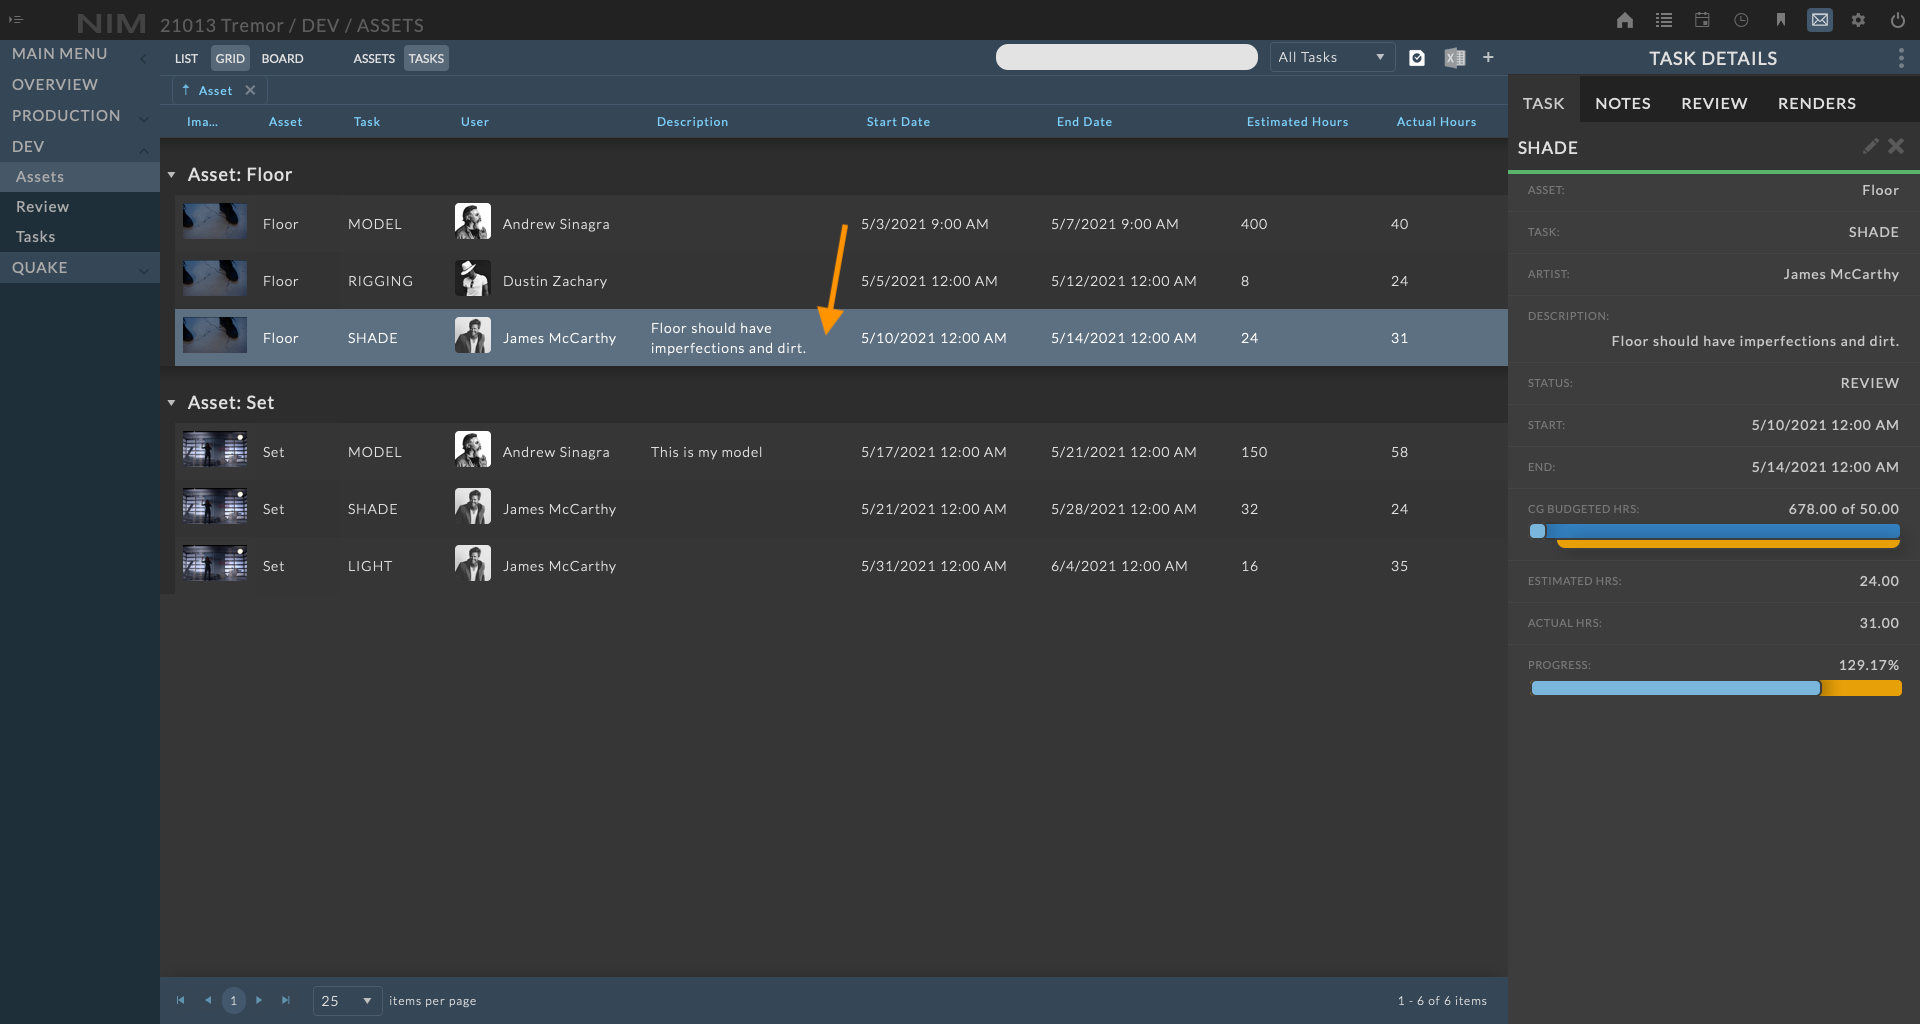
To access task details from a grid view, click on the task row in the grid:
To access task details from a task timeline, double click on the task in the task tree or the task event on the timeline.
Task Info
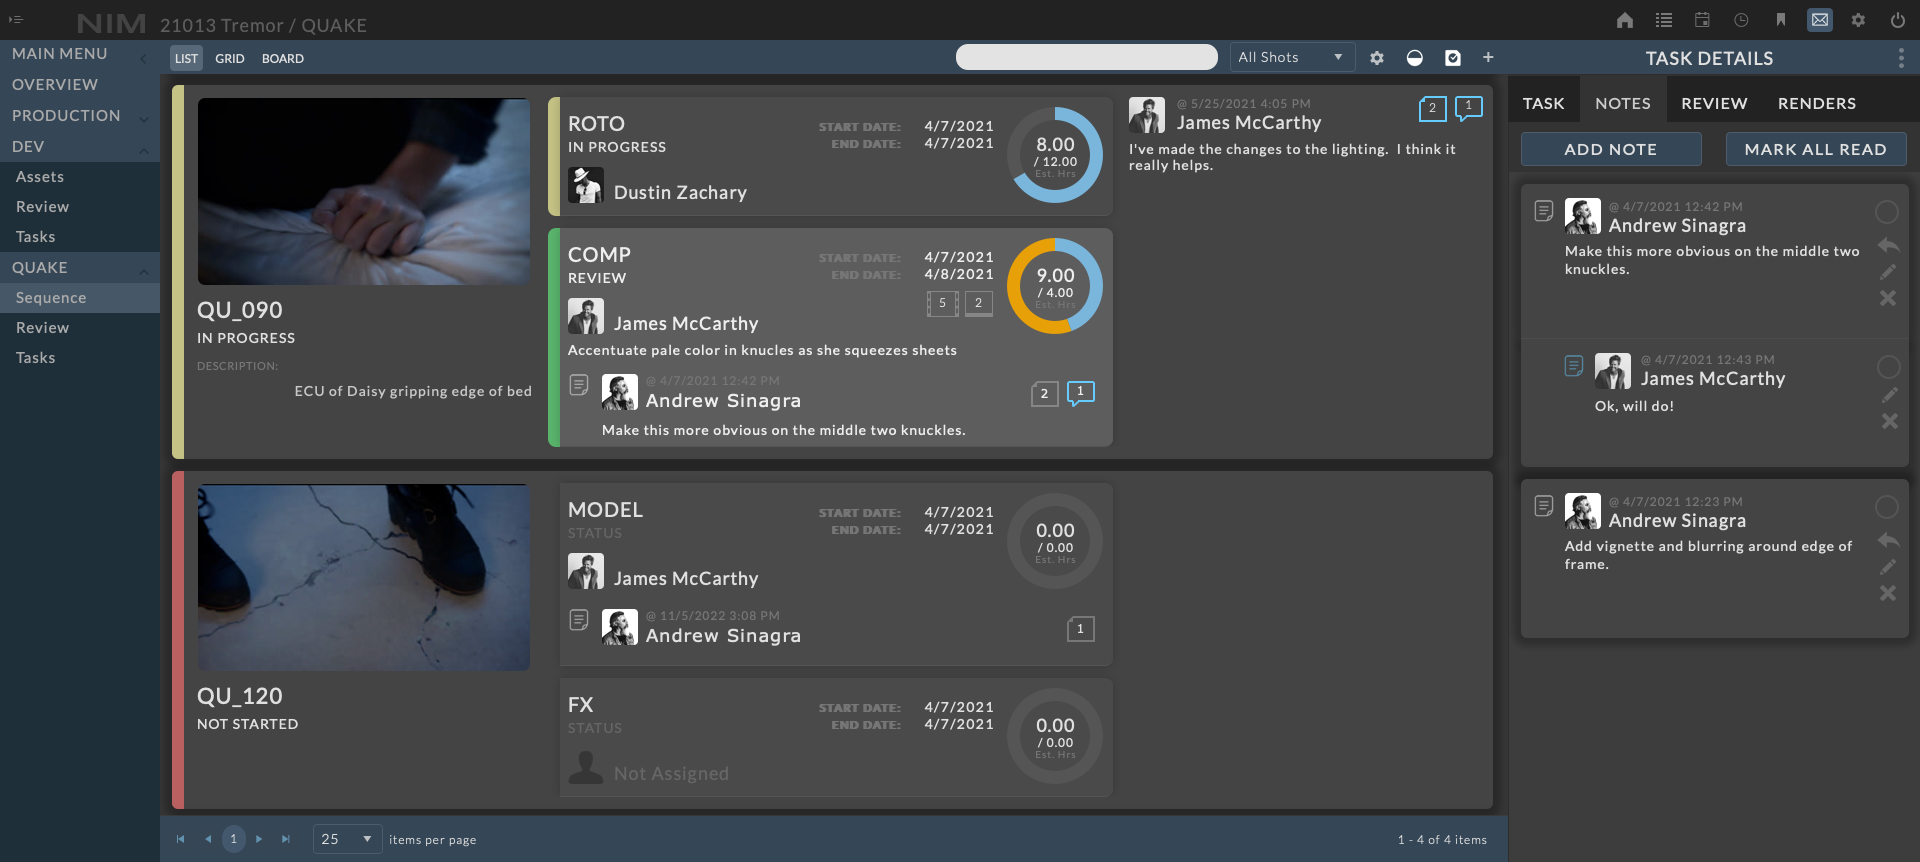
In the dashboard, list, and grid views, the task details are accessible via the task info panel. At the top of the info panel are a series of tabs and an ellipsis menu. The ellipsis menu provides the option to close the info panel.
The tab options include:
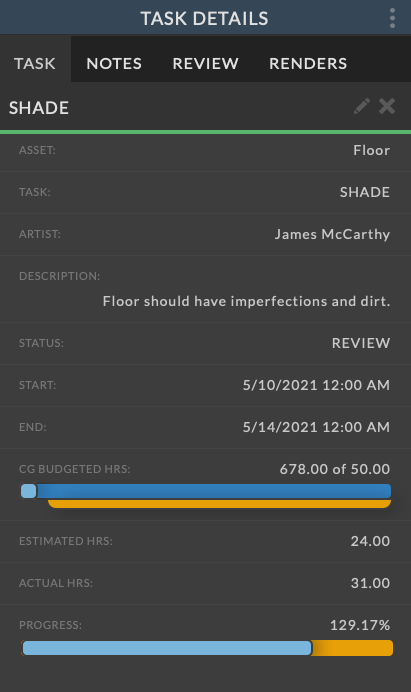
Task - Contains access to the main task information
Notes - Contains access to task specific notes
Review - Contains all review items uploaded to this task.
Renders - Contains all renders logged to this task.
Each tabs provide functionality directly for the tab contents.
Task edit and delete options are found on the Task tab.
Info Panel
Editing Tasks
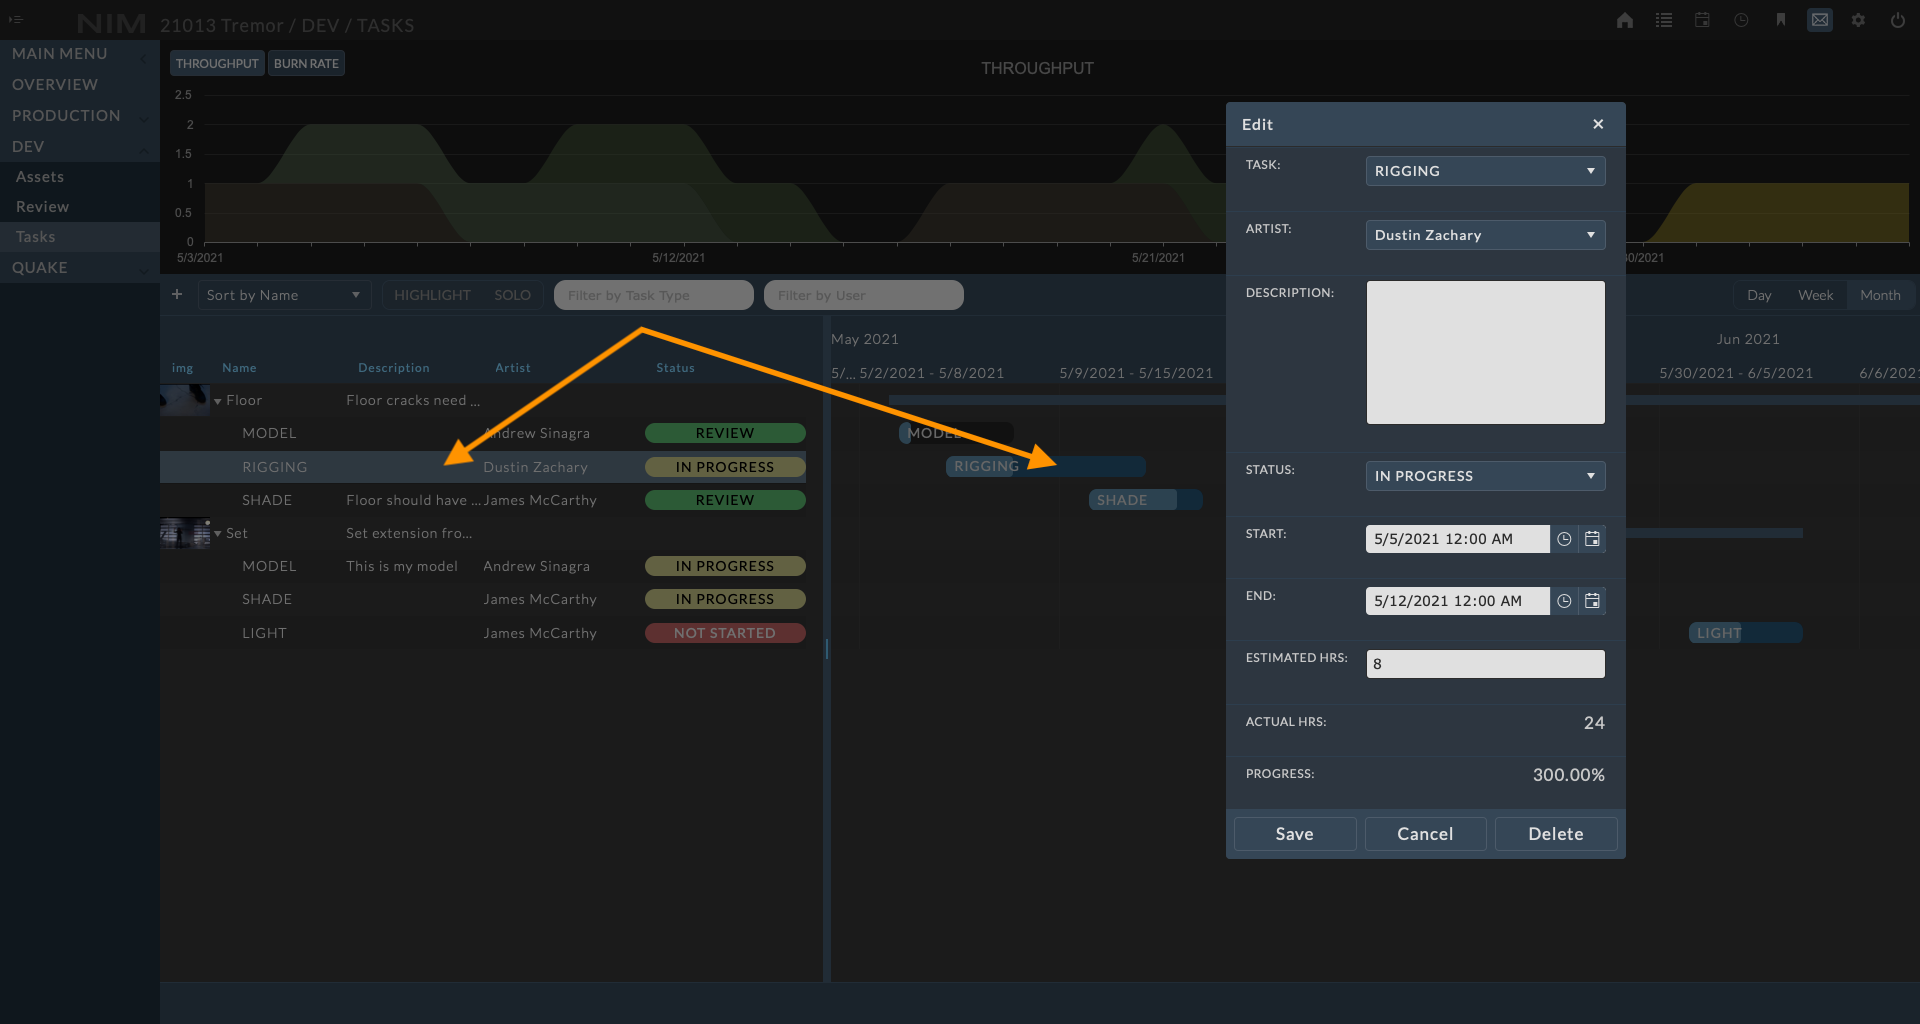
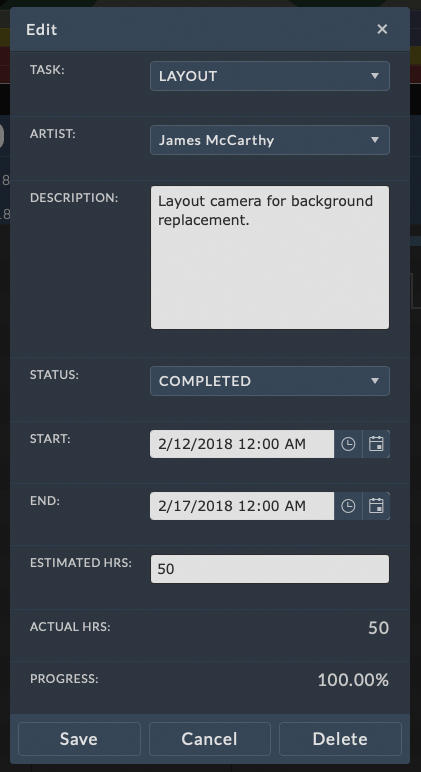
To edit the task details from an info panel, click on ellipsis menu at the top right of the Task tab. Make the necessary changes and click the Save button at the bottom of the info panel to save your changes. Click the Cancel button to return without saving changes.
Available task information includes:
Parent |
The type and name of the task’s parent object. |
Task |
The dropdown contains a list of task types. |
Artist |
The artist to be assigned to this task. The list contains all users that are assigned to the job crew. |
Description |
A brief description of the task. |
Status |
The current status of the task. |
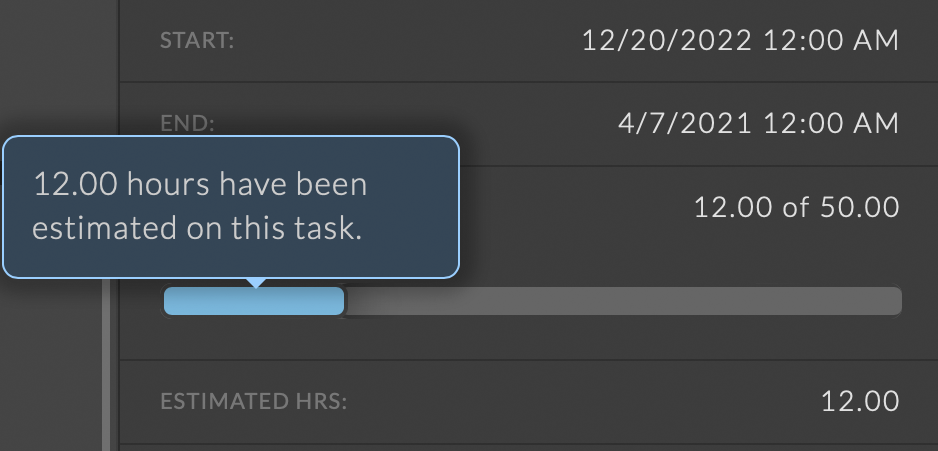
Start |
The date and time that the task is scheduled to start. |
End |
The date and time that the task is scheduled to end. |
Budgeted Hrs |
The total number of hours estimated for all tasks on the job that are associated with the same bid item compared against the total number of hours bid. If the line item in the bid used the “unit” type, no bid value will be displayed here. The title includes the associated bid item and the bar chart below shows a graphical representation of the values. Refer to the Budget Bar section of the documentation for more information. |
Estimated Hrs |
The estimated number of hours that will be spent on this task. |
Actual Hrs |
The number of hours entered for this specific task via timecards. |
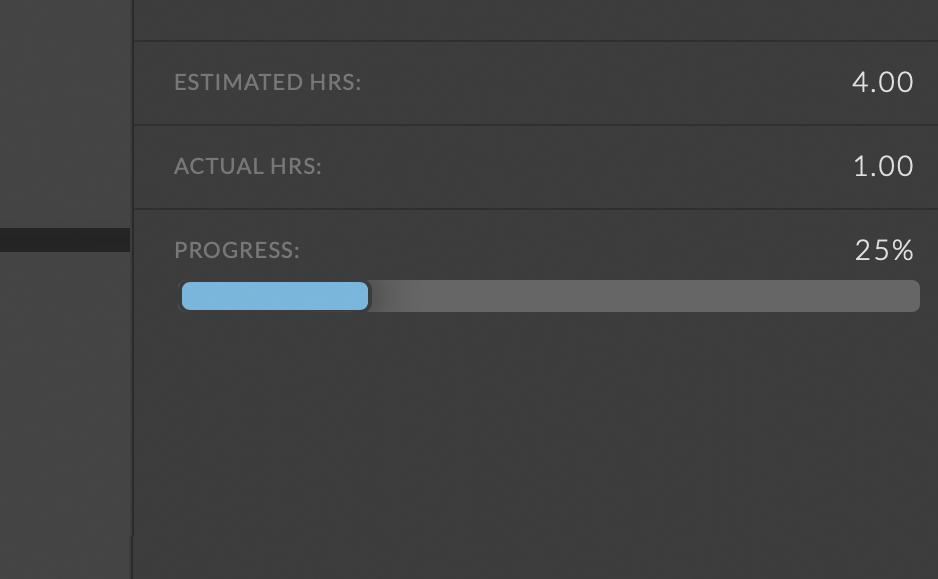
Progress |
A percentage of task completion. This is calculated by comparing actual hours to estimated hours. If actual hours exceed estimated hours, this completion percentage will rise above 100%. This completion percentage is reflected in the visual representation of the task progress bar. The light blue portion of the bar represents its completion percentage. If it rises above 100%, the orange portion represents the amount beyond 100%. If no hours are estimated, but hours have been entered against this task via timecards, the bar will be displayed in dark blue. |
Note
Hovering over the sections of the Budget or Progress bars will display a tooltip with a detailed explanation of the value.
Budget Bar
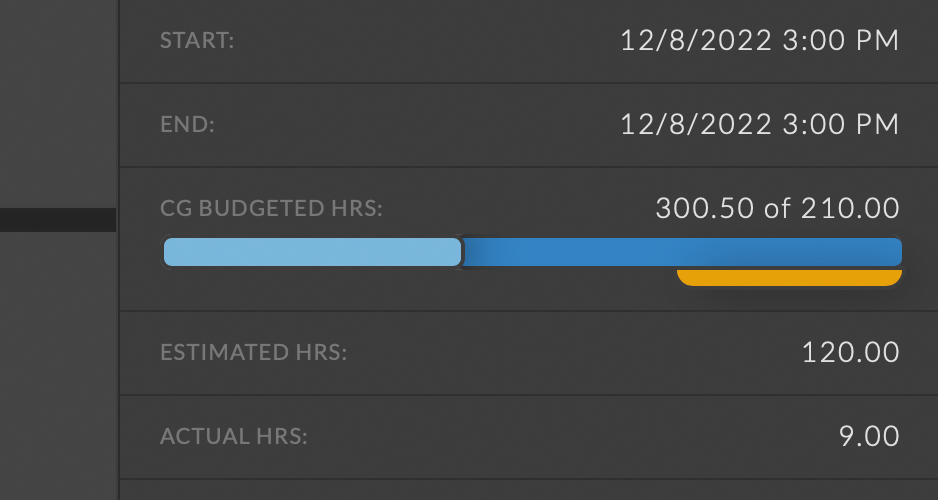
The budget bar chart displays the total amount of estimated hours for this task and other tasks on the job compared to the number of hours bid for the associated bid item. The name of the associated bid item is included in the label.
The hours estimated on this task are represented as light blue. Hovering over the light blue section of the bar will display a tooltip explaining the value.
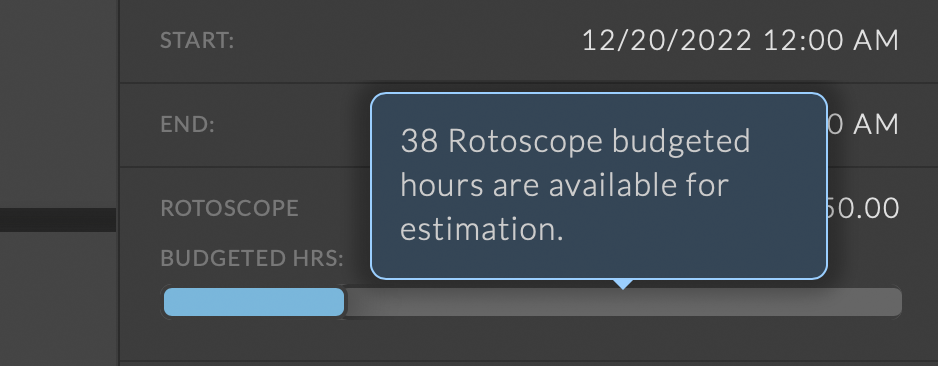
Hours available for estimation are represented as light grey. Hovering over the light grey section of the bar will display a tooltip explaining the value. If the bid item units are set to “units”, the quantity will not be converted to hours and a value of 0 will be displayed.
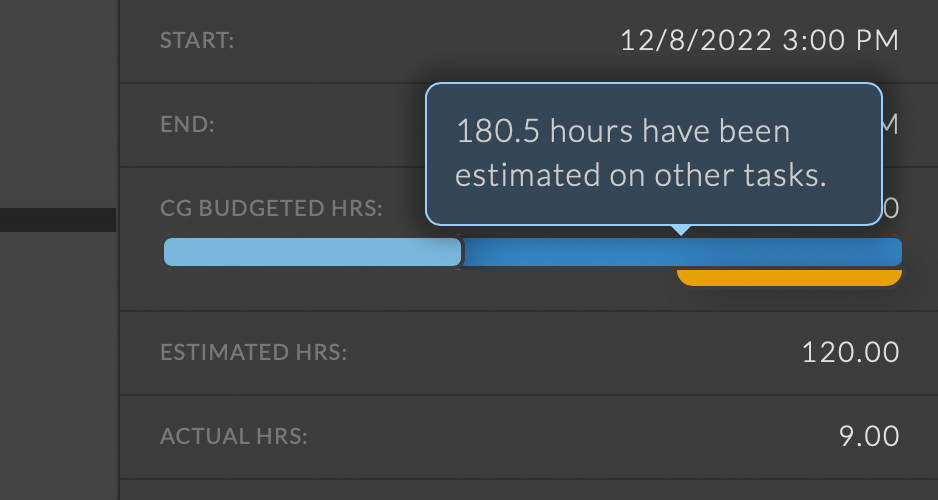
The hours estimated on other tasks that have task types associated with the related bid item are represented as dark blue. Hovering over the dark blue section of the bar will display a tooltip explaining the value.
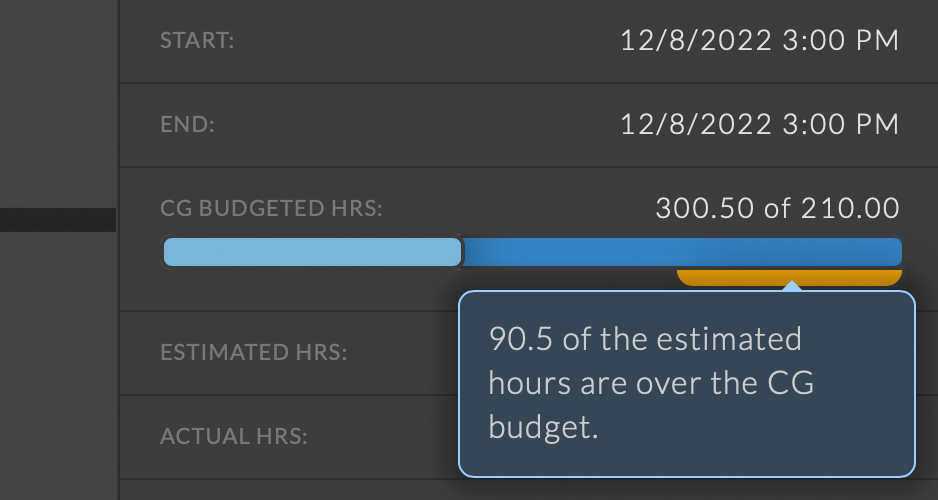
If the estimated hours are over the bid hours for the associated bid item, an orange bar will be displayed below representing the percentage of hours over the bid. Hovering over the orange section of the bar will display a tooltip explaining the value.
Progress Bar
The progress bar displays a visual representation of the actual time entered in timecards for this task versus the estimated task time. Actual hours are represented as a percentage of the total number of estimated hours.
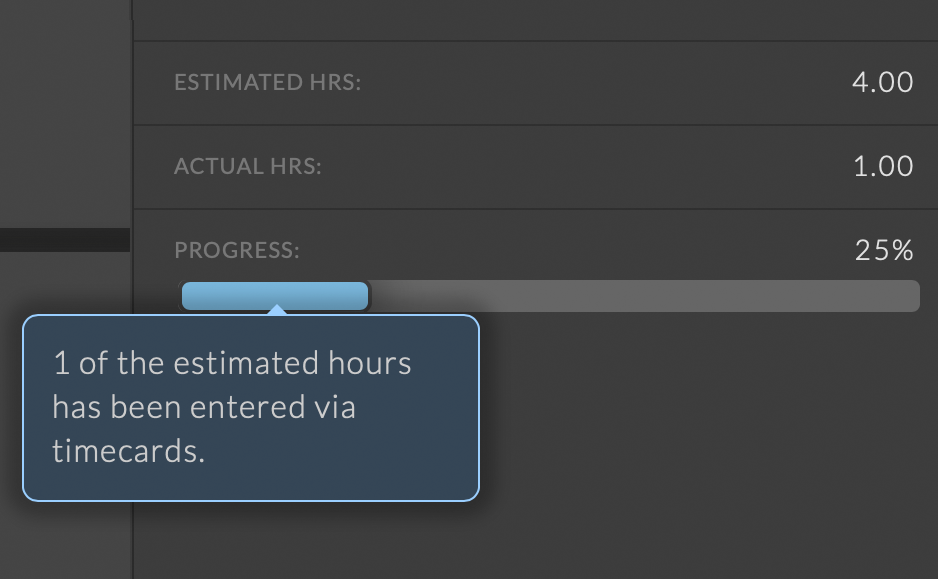
The hours entered on timecards that have been allocated to the task are represented as light blue. Hovering over the light blue section of the bar will display a tooltip explaining the value.

The remaining estimated hours are represented as light grey. Hovering over the light grey section of the bar will display a tooltip explaining the value.
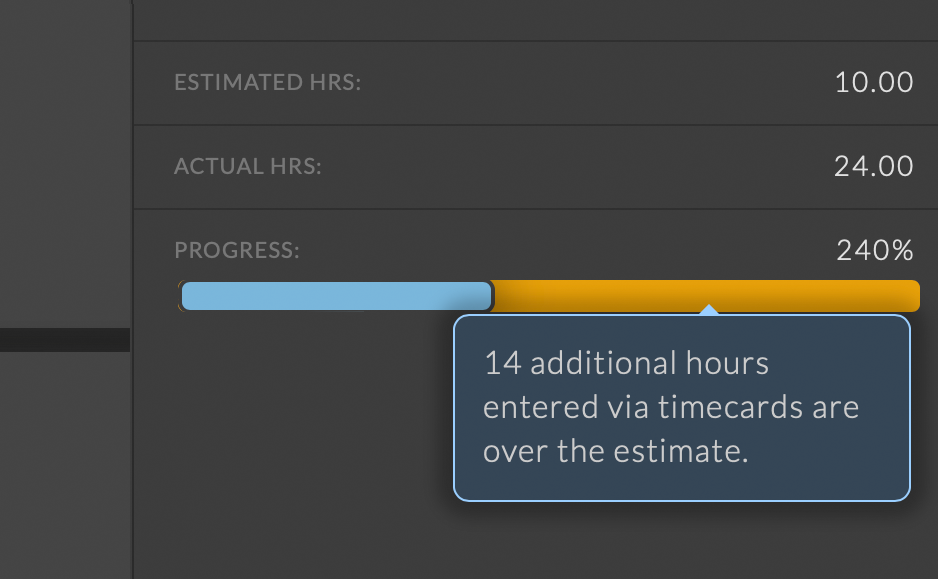
If the actual hours entered in timecards are over the estimated hours, an orange bar will be displayed below representing the percentage of hours over the estimate. Hovering over the orange section of the bar will display a tooltip explaining the value.
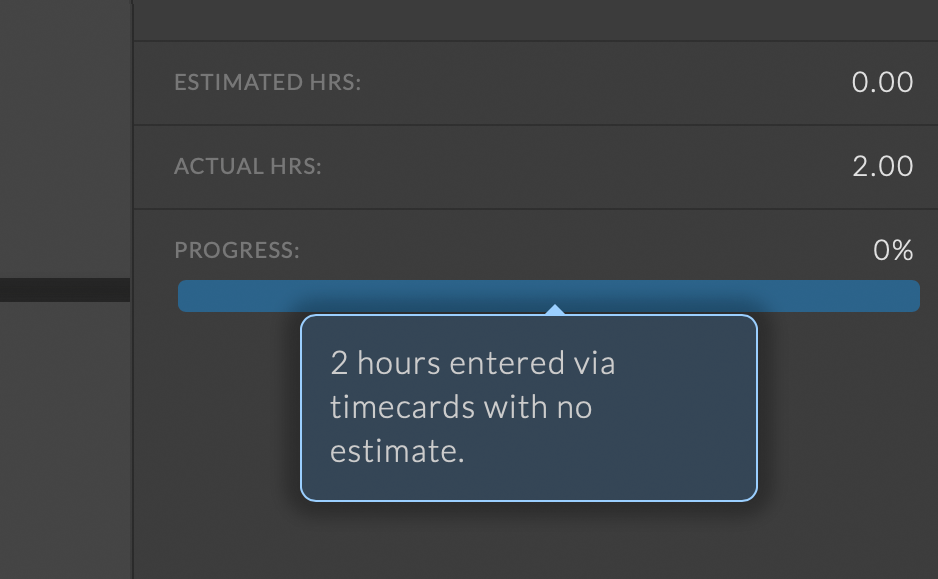
If hours have been entered via timecards for the task and there are no estimated hours, the bar will be displayed in dark blue. Hovering over the dark blue section of the bar will display a tooltip explaining the value.
Deleting Tasks
To delete a task, click on the  in the Task tab. Make the necessary changes and click the Save button at the bottom of the info panel to save your changes. Click the Cancel button to return without saving changes.
Timeline
Editing Tasks
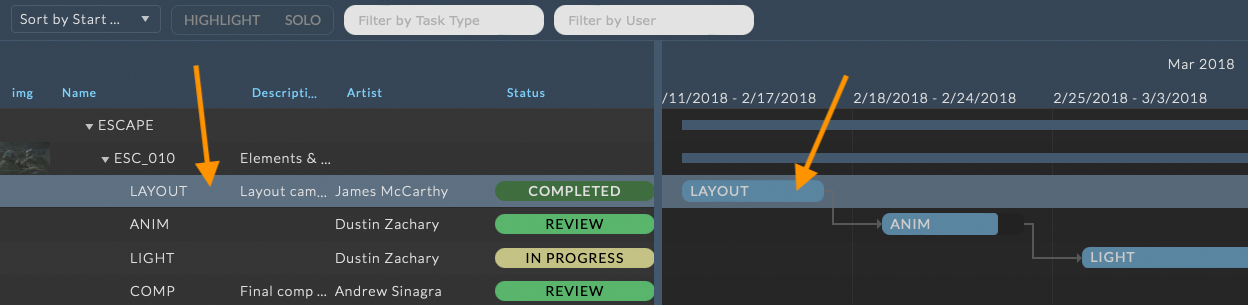
Tasks can be selected for editing by double clicking the task from either the tree, or the timeline. A dialog will appear allowing you to edit the task information.
Available options are:
Task |
The dropdown contains a list of task types. |
Artist |
The artist to be assigned to this task. The list contains all users that are assigned to the job crew. |
Description |
A brief description of the task. |
Status |
The current status of the task. |
Start |
The date and time that the task is scheduled to start. |
End |
The date and time that the task is scheduled to end. |
Estimated Hrs |
The estimated number of hours that will be spent on this task. |
Actual Hrs |
The number of hours entered for this specific task via timecards. |
Progress |
A percentage of task completion. This is calculated by comparing actual hours to estimated hours. If actual hours exceed estimated hours, this completion percentage will rise above 100%. This completion percentage is reflected in the visual representation of each task in the timeline. The lighter portion represents its completion percentage. If it rises above 100%, the darker portion represents the amount beyond 100%. |
To save any changes click the SAVE button at the bottom of the edit window. Click the Cancel button to return to the view mode without saving changes.
Deleting Tasks
There are two options to delete a task from the timeline.
On the timeline, click the X at the right of the task.
While editing a task, click on the DELETE button at the bottom of the edit window. You will be prompted to confirm deletion of the task.
For more information on working with the task timeline, please refer to the Task Timeline section of the documentation.
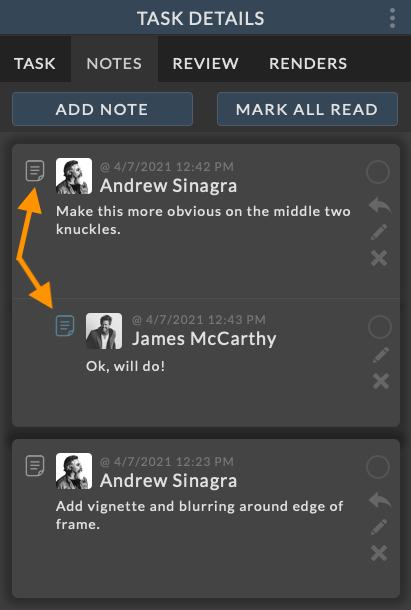
Notes
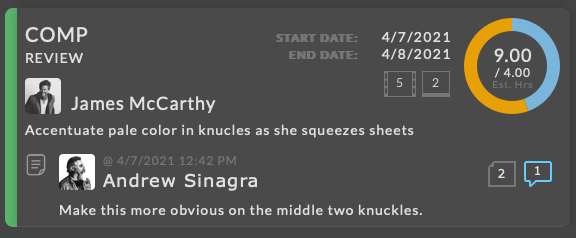
The Notes tab in the task info panel displays the full list of notes that have been added to the task. Each note includes information for the user that submitted the note, the date/time the note was created, if the note has been addressed or read, and if there are any replies.
Create Note
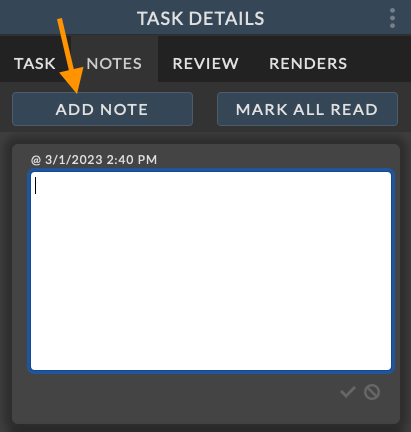
To add a note, click the ADD NOTE button at the top of the Notes tab.
A new note will appear at the top of the notes panel with a blank text area to enter the note. The date/time and owner of the note is set automatically.
When done entering the note, click the  button at the bottom of the text area to save the new note, or click the
  to cancel without saving the note.
Upon saving, the new note will appear in on the task and in the notes list.
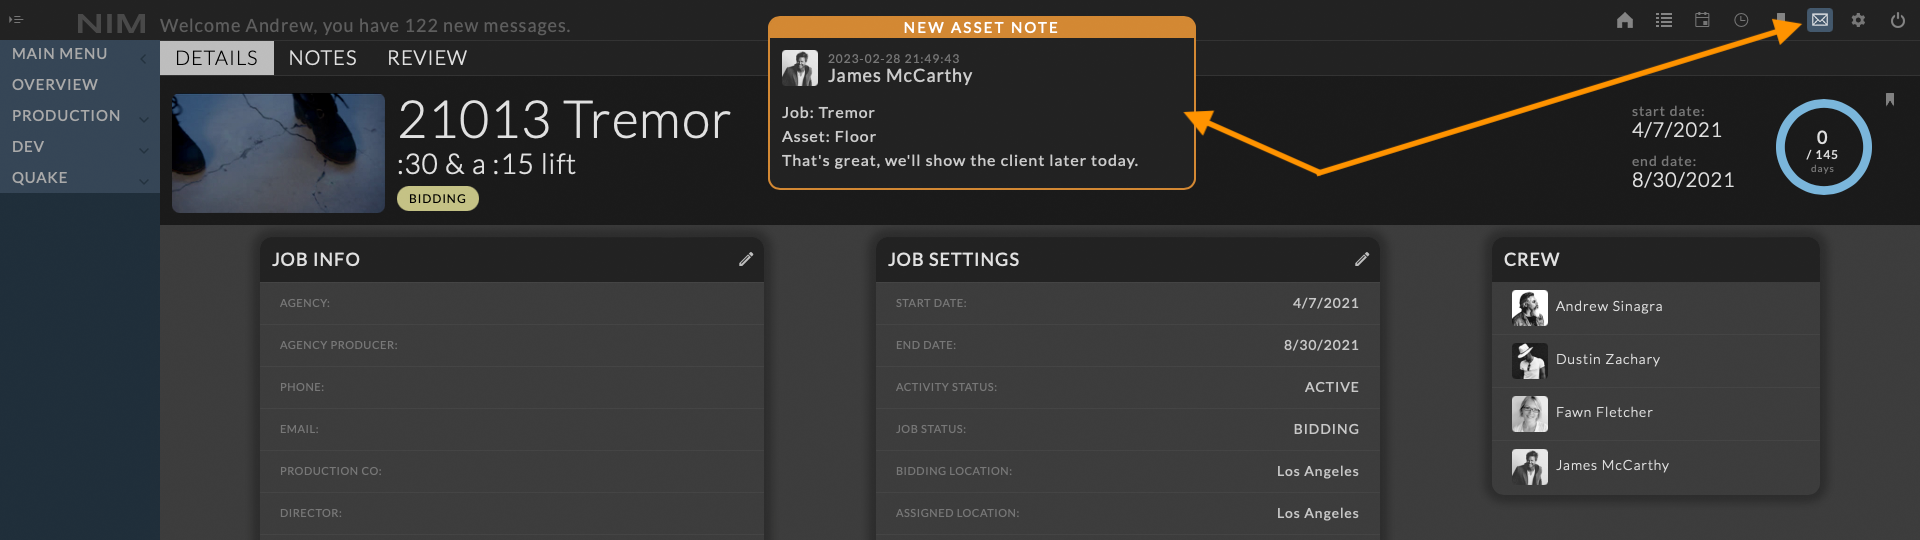
Any users who have NIM open and are attached to the note via replies or assignment will receive a popup notification in their browser and the notes button in the NIM toolbar will be highlighted.
Mark As Read
The indicator icon to the top left of the each note and reply denotes the “Read” state of the note. If the note or reply has been marked as read, then the icon will be grey. If note is unread, then the icon will be highlighted.
To change the read state of an individual note, click on the indicator icon. This will toggle the note from its current read state to being read or unread respectively.
To mark all notes as read, click on the Mark All Read button at the top of the Shot Notes panel. If you are viewing notes in the notes detail panel, or click the ellipsis at the top right and choose Mark All Read from the popup menu.
Mark Note Addressed
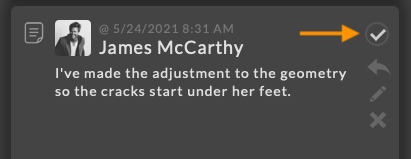
To mark a note as addressed, click on the  button at the top right of the note.
The note will now have a check mark to indicate the note has been addressed. Click the checkmark again to unmark the note.
Reply to Note
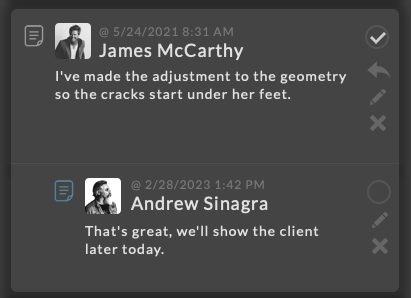
To reply to a note, click on the  button at the right of the note you wish to reply to.
A text area will open at the bottom of the parent note to enter a nested reply. Click the checkbox below the input field to save your reply, or the cancel button to return to the view without saving the reply.
Replies to a note are indented and contained below the parent note.
Review
The task Review tab contains all review items uploaded to this task. Review allows users to upload video, still images, and PDF documents for markup and notes. These review items are available to all users within a given context, such as a job, asset, or shot, so any comments can be shared easily with all team members. Whiteboarding tools allow users to write directly on video frames, stills, or PDF pages and save the markup as individual notes that can be exported in PDF form or emailed directly through the rule based notifications.
Upload Task Review
Review items can be uploaded to a task several ways:
Direct Upload using the Upload Review button
Using the NIM API
Automatically from Drafts created by the Thinkbox Software® Deadline® pipeline integration tools.
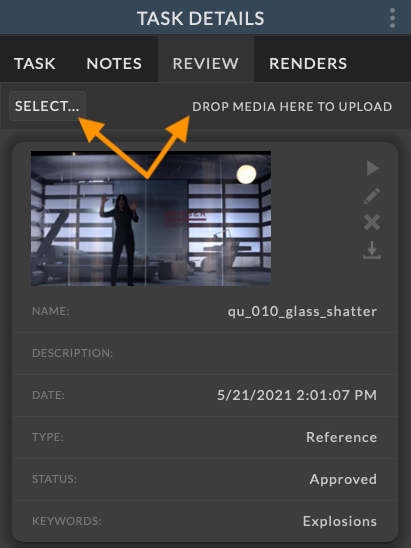
Upload a review item by clicking on the Upload File button. You will be presented with a file browser to select a local file to upload.
You can also drag and drop files directly from the desktop to the area labeled Drop videos, images, or PDFs here to upload. When dragging an item over the upload bar, the area that you can drop on is illuminated.
If the file needs to be converted to a different format, NIM will handle the media conversion and on completion will show the details and a thumbnail for the new review item. Depending on the size of the media, it may take some time to convert the media.
Note
Uploaded files that do not meet the maximum size and codec defined will be automatically converted to the proper size and format needed for NIM Review. The maximum size for movie and still images can be set in the Admin > Review section of NIM.
Edit Review Details
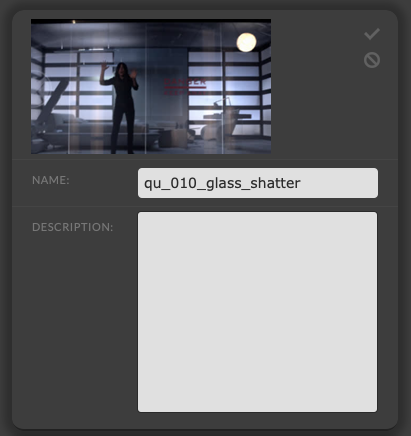
Review item details can be editing directly in the Review tab or by loading the review item and editing the information in the Review panel.
To edit the review item details, click on the  to the right of the review item.
After making the necessary changes, click the check mark button to save.
Click the cancel button to return to the view mode without saving changes.
Delete Review Item
To delete a review item, click the  to the right of the review item. You will be prompted to confirm deletion of the review item.
Download Review Item
To download the review item media, click the  to the right of the review item. The download will start immediately and a progress wheel will appear in the NIM taskbar while the media is downloading.
Load Review Details
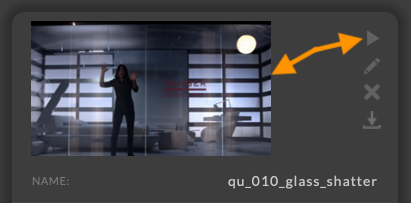
To load the full review item details including notes and version, click the  to the right of the review item or click on the review item thumbnail.
This will slide the task details to the left of the screen and reveal the review details panel.
When a review item is selected, a bar at the right of the review item in the list will be highlighted.
To close the review details, click the ellipsis menu, and choose “Close Review Details” from the popup menu.
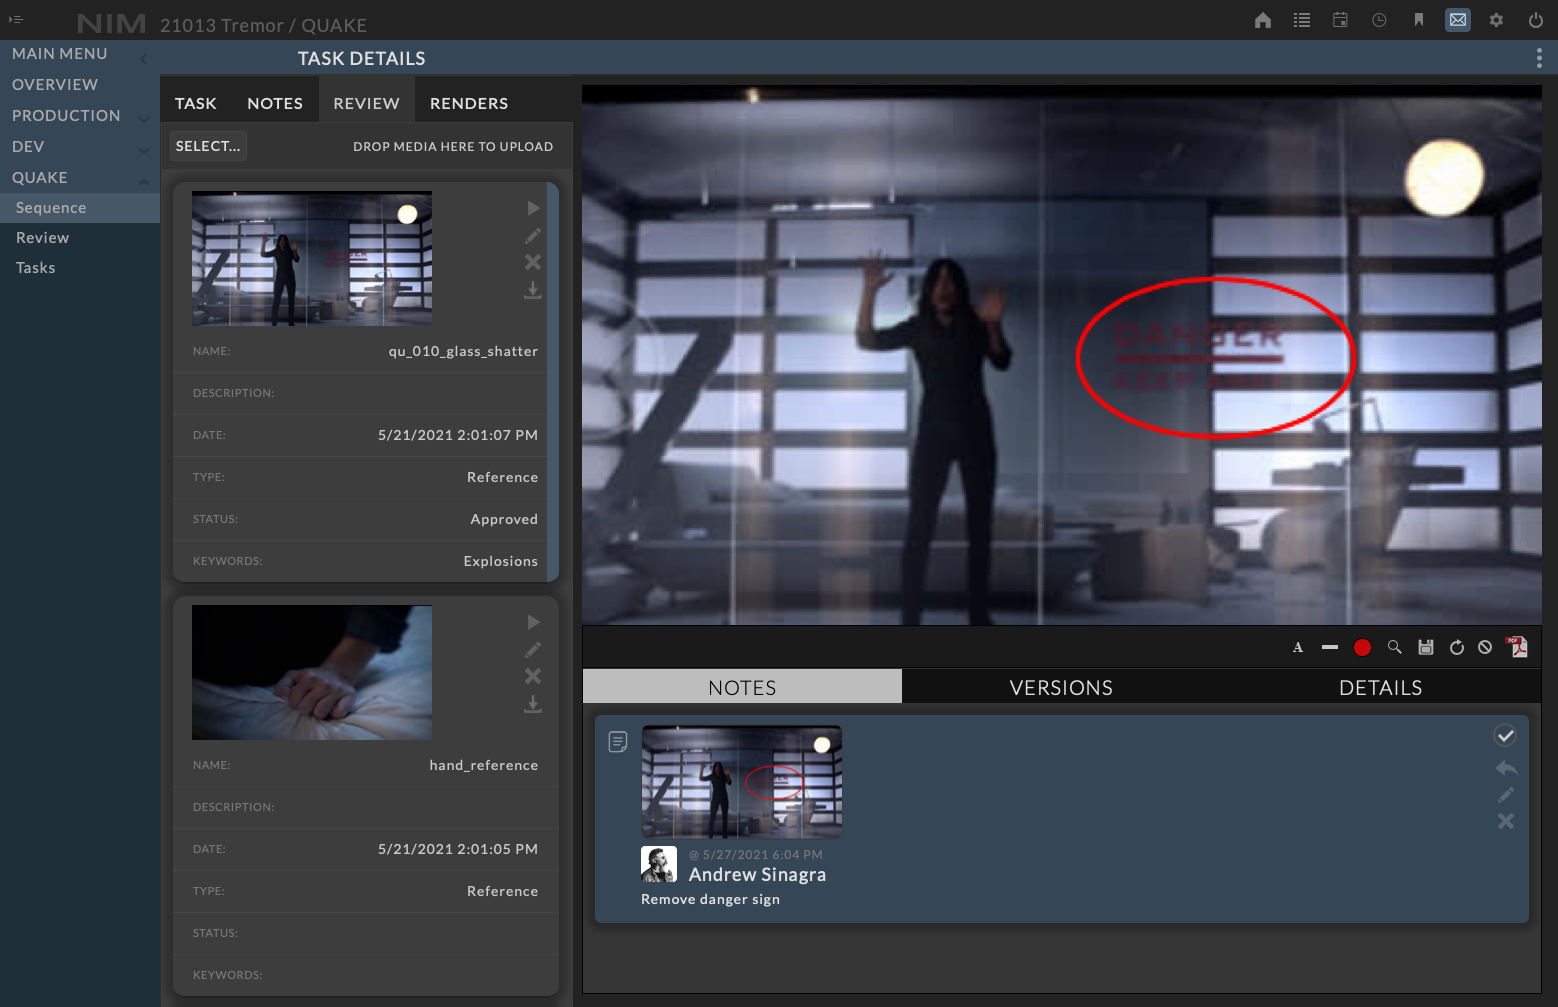
The full list of review features are explained further in the Review section of the documentation.
Renders
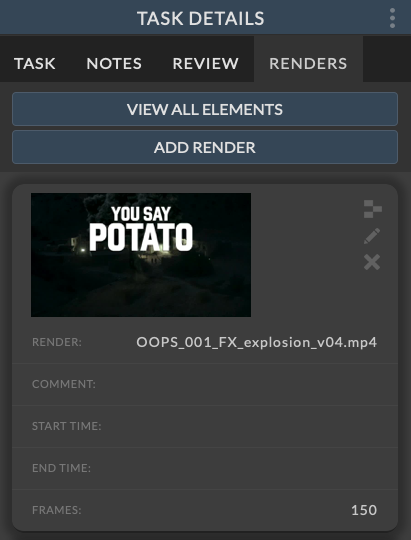
NIM Renders are containers to track information related to the renders of a scene file including associated render details, elements (render passes) and review items (proxies). The Renders tab displays the information related to renders added to the task.
Click the ADD RENDER button in the Renders Tab to manually add a render.
Click the VIEW ALL ELEMENTS button to view all elements across all renders logged to the selected task. Each render logged to the task may consist of one or more elements.
Detailed information on working with Renders is explained in the Renders section of the documentation.
Detailed information about Elements is explained in the Elements section of the documentation.
Tip
When using Thinkbox Software® Deadline® pipeline integration tools, or a post render script from any render manager calling the NIM API, a render job can automatically log a render and each render layer of can be added as an element to the render. Additionally, proxy movies of the renders can be uploaded as review items and associated with the render.