Job Configuration
The job configuration page allows you to edit job details, create shows, set storage and project structure options, and manage offline items. To access the Job Configuration, click on the Production > Config menu option.
Job
The Job tab contains panels for editing job details, creating shows, as well as an Output area for displaying folder creation messages and warning.
Details
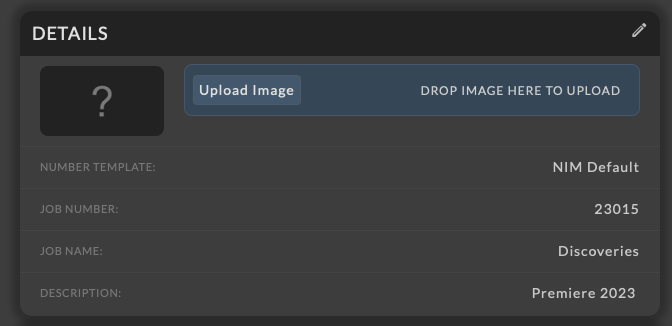
In the job details section you can make updates and adjustments to details including:
Icon
Number Template
Number
Name
Description
To edit the details, click the edit button in the details header. After making the necessary changes, click the check mark button to save. Click the cancel button to return to the view mode without saving changes.
Job Icon
To add a job icon, click on the Upload Image button, select an image and click open.
Alternatively you can drag and drop and image from your computer into the upload image region.
Show Configuration
A show in NIM is a collection of shots. Each job may contain multiple shows to organize the breakdown of shots. The organization of shows is largely dependent on the company needs.
For example:
Shows can be everything from an individual spot, an individual deliverable, or simply a sequence of shots. In commercials a show could be determined as a deliverable where in episodic work it could be an entire episode, or in features a show could denote a sequence. The organization is up to you.
In addition to the list of shots associated with a show, each show can have a linked previs section. The previs allows users to work in scratch pad area. Example use cases may be in situations where editorial is not locked, or as a general R&D area to create shots before they are committed to the show. The Previs section works identically to the Sequence with its own set of shot names and project folders.
Shows also contain a review section that displays all review items uploaded to the show and all children of the show.
Tip
The organization of shows influences how job actuals are displayed. In the job actuals, shows display subtotals for all estimated and accrued time and total hard cost. Please take into account how you would like to visualize the job actuals when dividing your structure into shows.
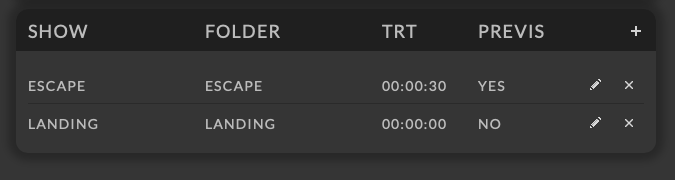
Add a Show
To add a show click on the  button at the right of the Show panel. You will be presented with fields to enter the show name, the TRT (Total Running Time), and dropdown to choose whether or not to make a linked Previs show. The name of the show folder will be taken from the currently selected project structure.
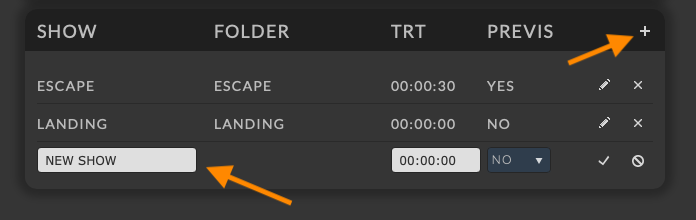
Click the Save button at the right of the row to save your changes. Click the Cancel button to return to the view mode without saving the show.
Note
If the job is already ONLINE, then the associated Show folders will be made immediately. If the job is OFFLINE, bringing the job ONLINE at a later date will create all necessary Show and Shot folders. The result of creating the show folders will be displayed in the Output section at the bottom of the page.
Edit a Show
To edit the show options, click the  button at the right of the show’s row. After making the necessary changes, click the check mark button to save. Click the cancel button to return to the view mode without saving changes.
When editing a show, limited fields will be available once the show has been brought online.
Delete a Show
Delete a show by clicking the  at the right of the show’s row. You will be prompted to confirm deletion of the show.
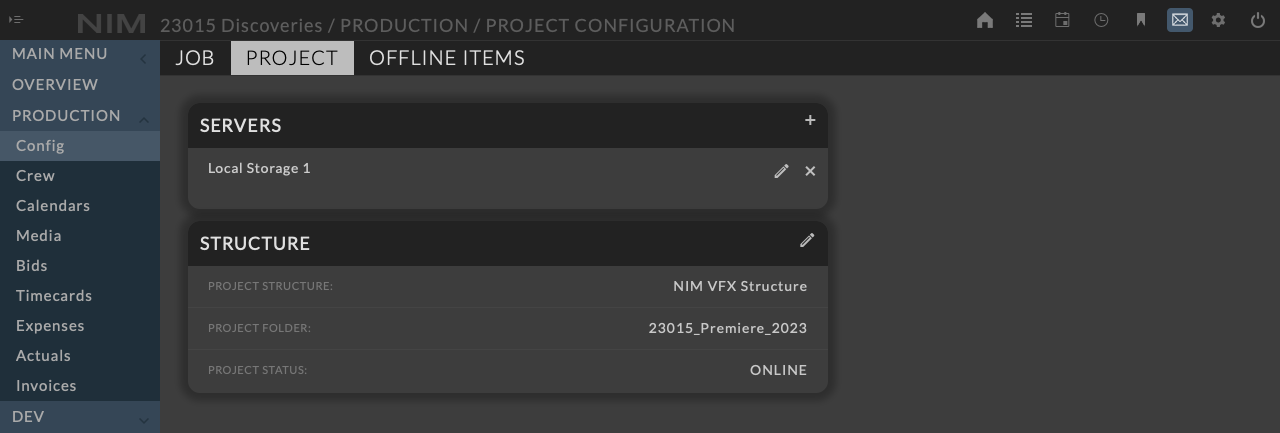
Project
The Project tab allows configuration for where and how project files are saved on the filesystem. From this tab, servers can be added to the job, a project structure can be selected, the root project folder can be named, and the project can be brought on or offline.
Project Servers
Servers added to the list will be used when bringing a job online. The selected project structure will be replicated across all servers. If a server is added after the job has been brought online, any folder structure that has already been created will be replicated on the new server.
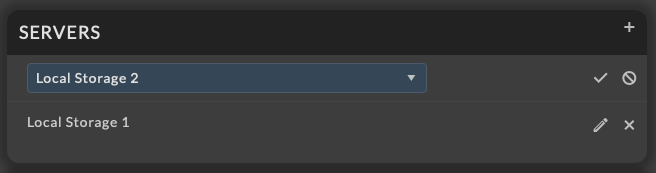
Add a Project Server
Clicking the button at the top right of the servers section will add a dropdown to select a new server. You can add as many servers as you like.
Edit a Project Server
To change the selected server, click the button to the right of the server name. To commit the server selection, click the checkmark at the right of the row. Click the Cancel button to return without saving the server to the job.
Delete a Project Server
To remove a server from a job, click the button to the right of the server name. You will be prompted to confirm deletion of the server.
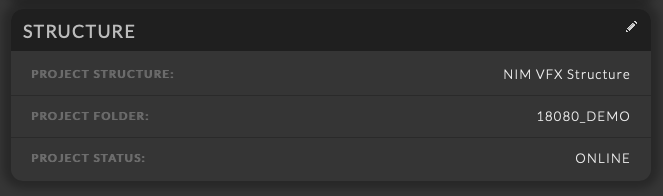
Project Structures
If you plan on using NIM Project Structures and Connectors, you will need to bring the job “Online”. Bringing a job online will create a folder structure on your selected servers using the NIM Project Structure template you have selected.
There are several steps required to properly bring a job online, including:
Adding Job Servers
Selecting a Project Structure
Verifying the Project Folder name
Clicking the Bring Online button
Note
You do NOT need to bring a job online to bid, project, or actualize jobs or track assets, shots, tasks, and timecards. However using the NIM Project Structures will help create a complete workflow that will seamlessly integrate in your production pipeline.
Bringing a job online
In the Servers section, you added the servers you wish to have the project structure created on. Now we want to click on the button in the Structure panel header, and select the project structure from the Project Structure dropdown.
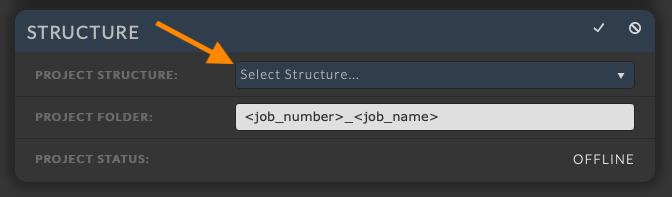
The project structure defines the folder template that is to be used when the job is brought online.
Important
While different jobs can use different project structures, only one project structure per job can be defined.
The default project folder name will be automatically generated based on the project structure template. The project folder name can be overridden prior to the job being brought online.
Once your selections for the project structure and folder name are complete, click the checkmark to commit your changes. If the project folder name is using variables, you will see a preview of the final project folder name upon returning to view mode.
When you are ready to bring the project structure online, click the BRING ONLINE button.

Warning
This will commit the project structure. Be sure that your project structure is correct as there is no undo within the UI for this action. If you need to clear the project structure, there is a NIM VM script that will clear the project structure from the job. For more information on the Reset Project Structure script, please refer to the nim-reset-project-structure section of the documentation.
The results of the folder creation will be displayed in the output window. If there are problems or there is an error, you will see the error displayed in bold. Typically any errors may be related to permissions on the project server.
After fixing any possible issues, you can click the Structure edit button to take the job OFFLINE. This re-enables the BRING ONLINE button. Clicking this button again will rebuild the full folder structure across all job servers.
Note
Rebuilding the project structure will not interfere with any existing folder structure.
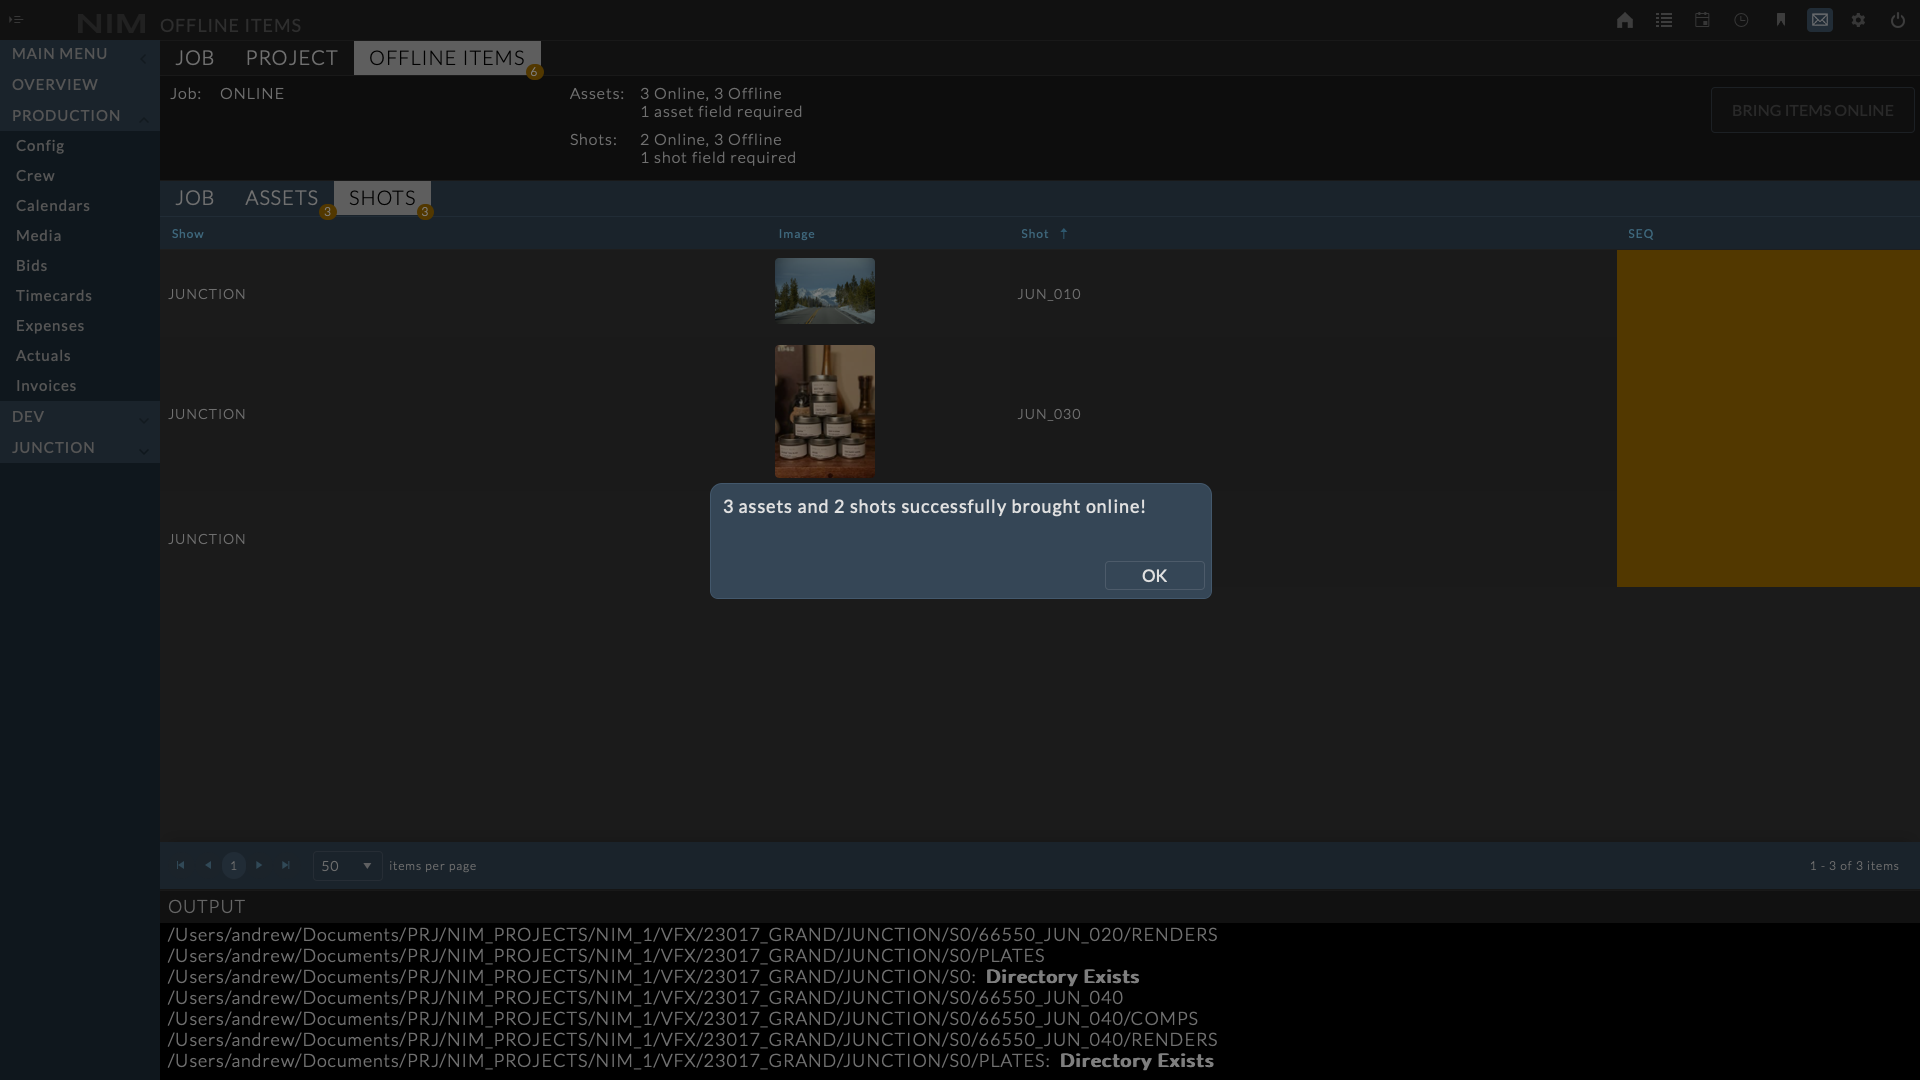
Offline Items
The Offline Items tab displays the online status of the job and items within the job. This tab is used when the job is associated with a project structure that contains variables. In that situation, assets or shots may require specific fields to be filled before they can be brought online, as those fields may determine the path of the asset/shot. This page provides a snapshot of which assets and shots are online and which fields are required to bring the offline items online. It also provides access to easily edit the fields in question and bring the items online.
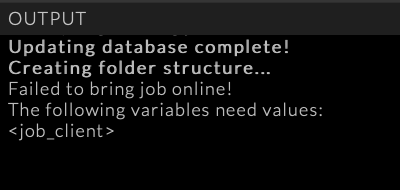
When an item can not be brought online due to insufficient data, the required fields will be indicated in the Output panel.
Offline Items Dashboard
The Offline Items dashboard provides a summary of the online/offline status of the job and the assets and shots within the job. If any items are ready to be brought online, the number of items will be displayed in blue text, and the BRING ITEMS ONLINE button will have a blue background. Clicking the BRING ITEMS ONLINE button will bring all items that meet the project structure requirements online.
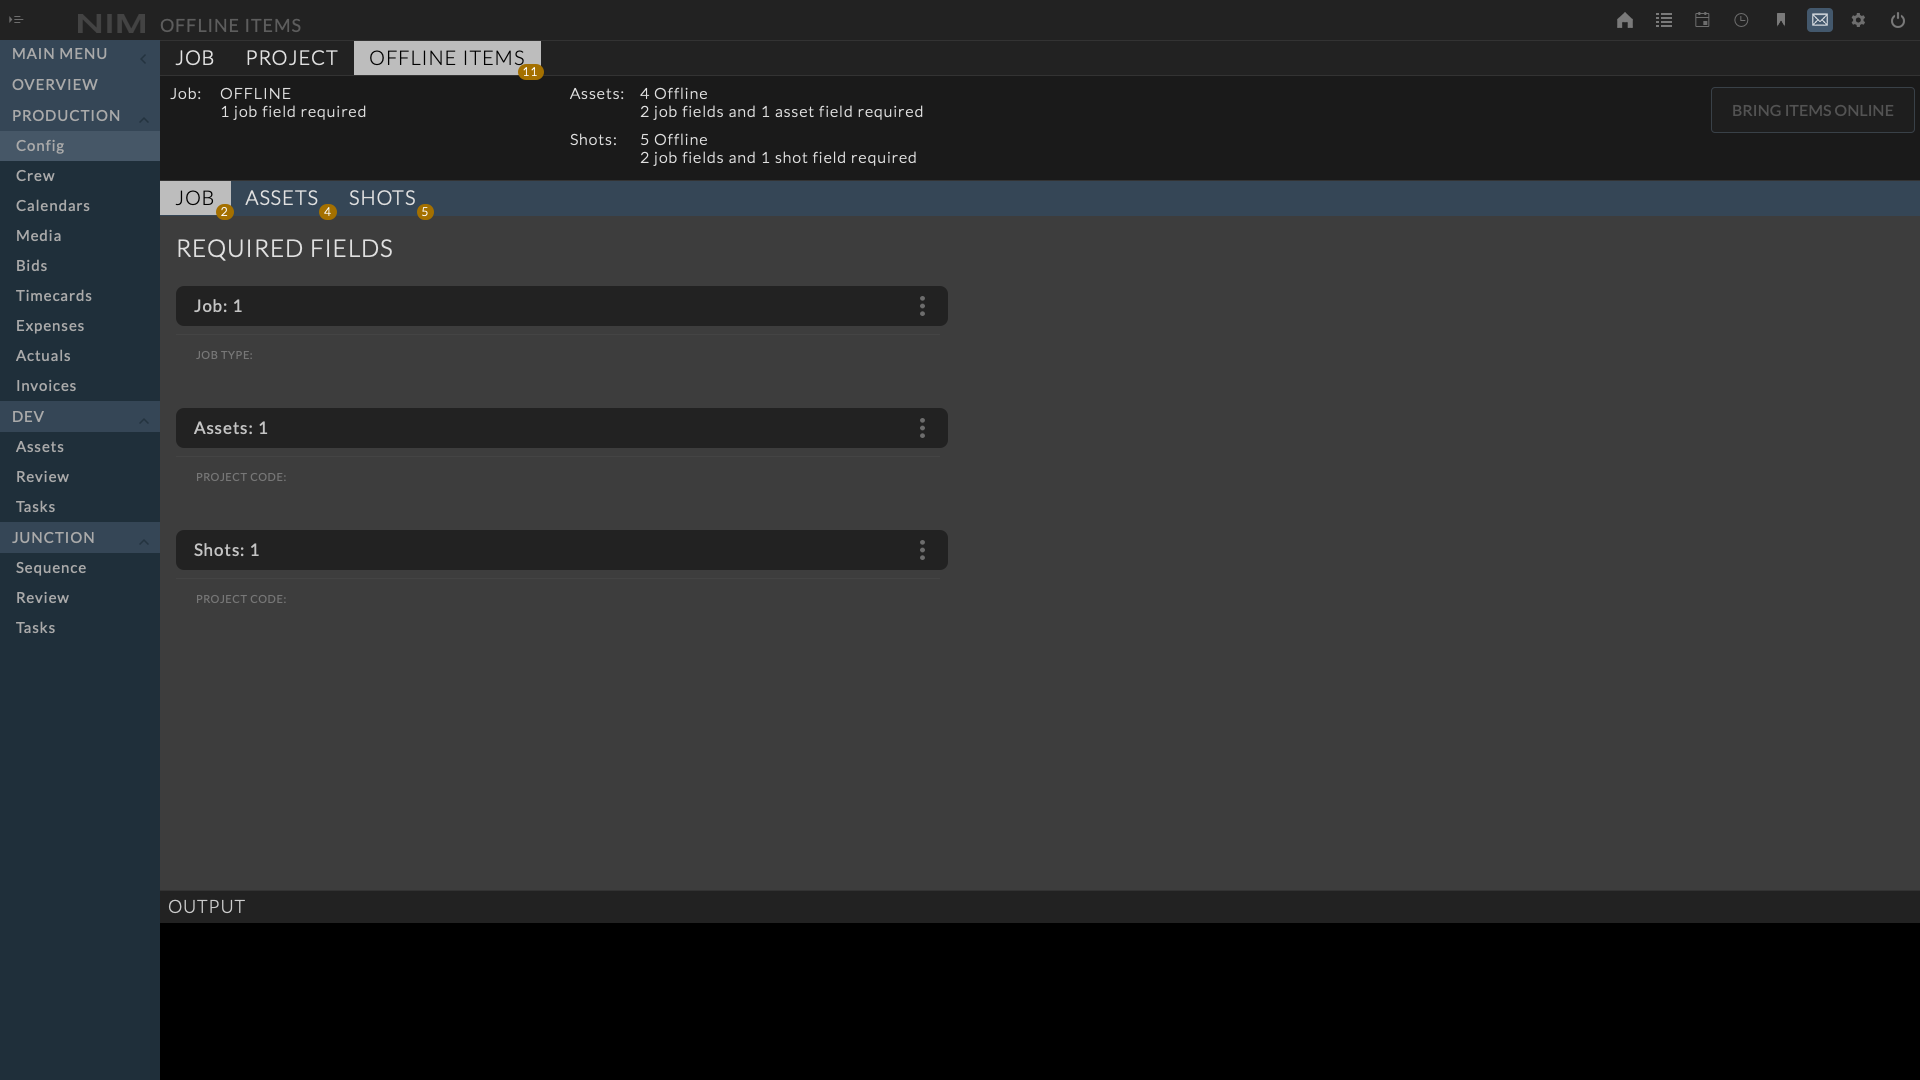
Offline Items - Job
The job tab displays empty job fields that are required to bring specific items online. The fields are grouped by the type of item that requires them.
To edit a field, click the ellipsis menu at the top right of the corresponding group header. After making the necessary changes, click the save button to save the changes.
Note
If show and shot folders share the same variable requirement, the field will only be displayed in the show since shots are show dependent.
After updating the required fields, if one or more items can be brought online, the BRING ITEMS ONLINE button will have a blue background and the dashboard summary will highlight the number of items ready to be brought online in blue. When the BRING ITEMS ONLINE button is clicked, the eligible items will be brought online.
Example:
In this example project structure, the ASSET ROOT folder uses two job variables:
<job_number>_<job_project_id>_<asset_name>
When an asset using this project structure is brought online, the folder name will begin with the job number, followed by a custom field Project ID, then the asset name. If either of the job fields are blank when assets are created, they will not be brought online. The required fields will be displayed in the Offline Items, Job tab and grouped under the ASSETS heading.
In the image below the Client field is required by a project folder, and we see the Project ID field as being required for both assets and shows. The job number field required by the asset folder is not displayed since it was set at the time of job creation.
Offline Items - Assets
The assets tab displays a list of assets that are currently offline. If there are any asset fields required to bring these assets online, they will be shown as orange columns. When required fields are filled in and saved, they no longer appear orange in the list. If none of the assets in the list require that field anymore, the column will be removed from the list.
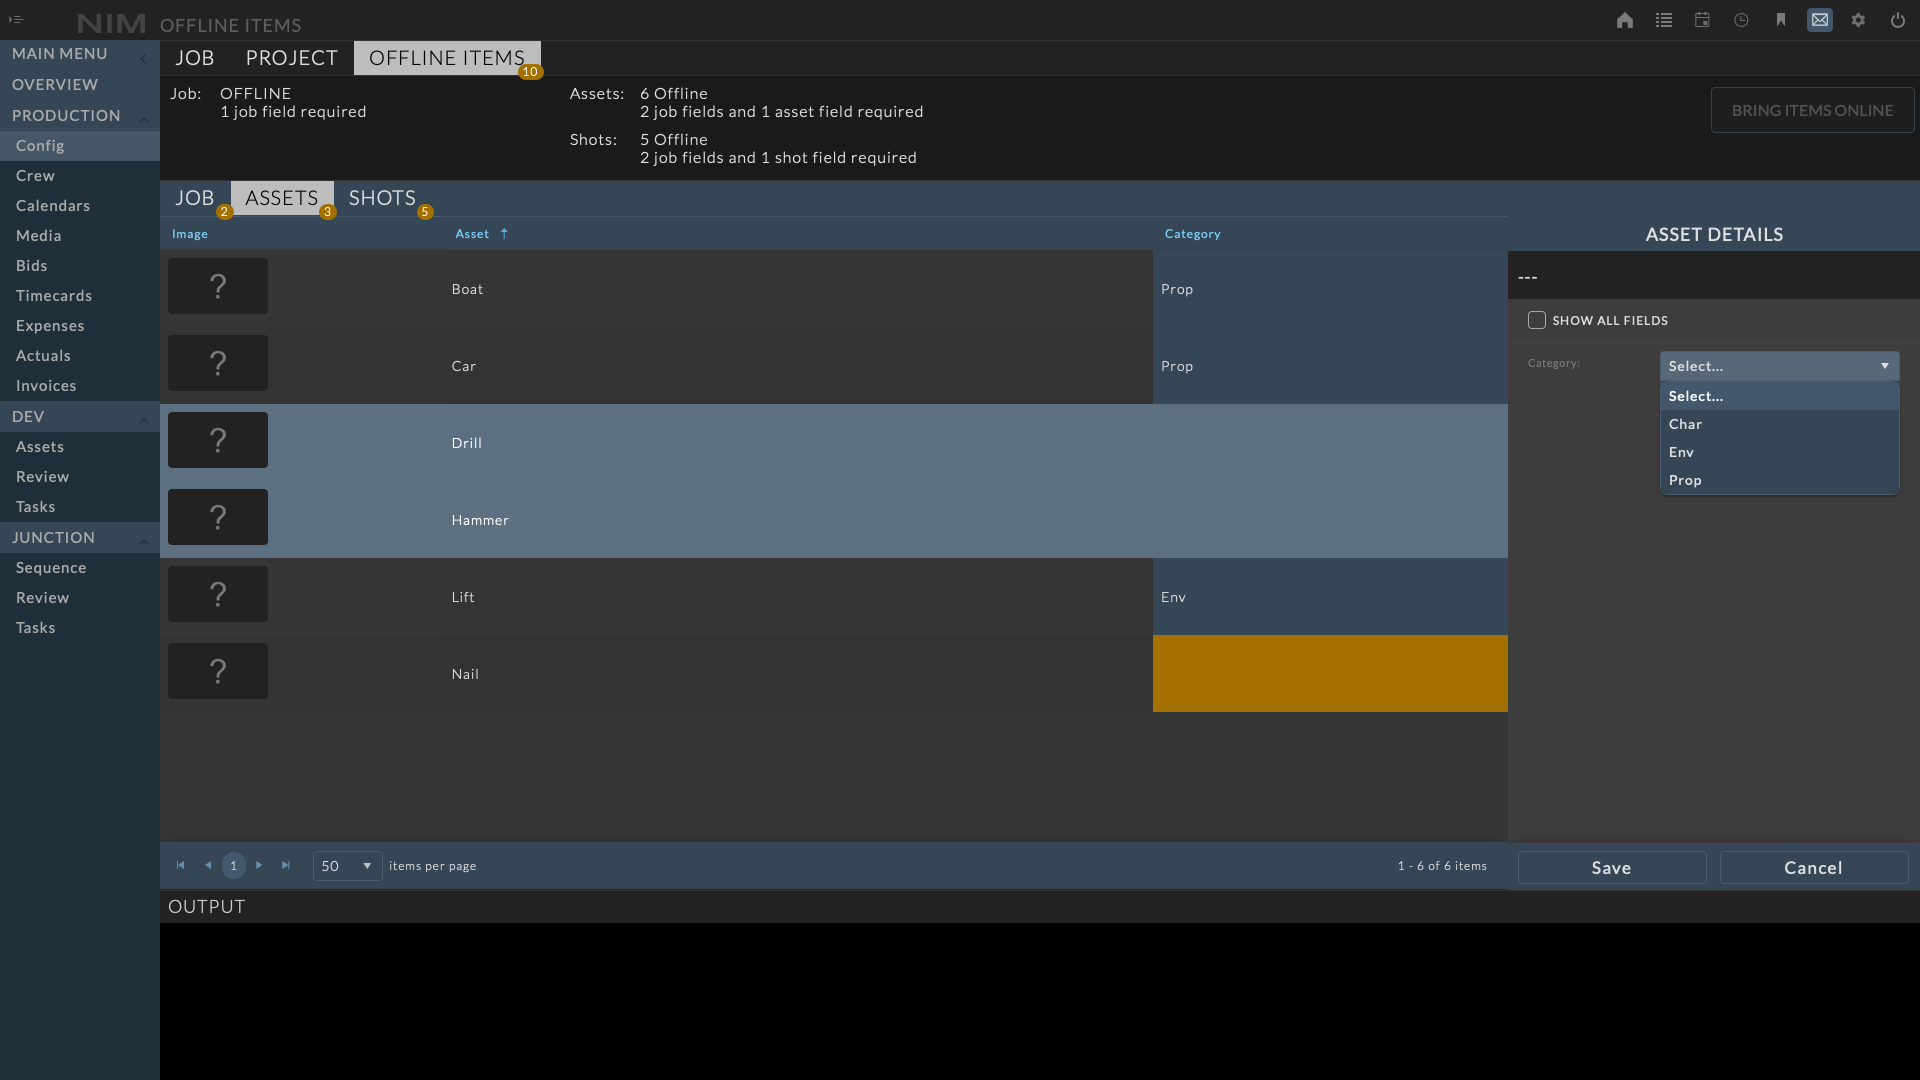
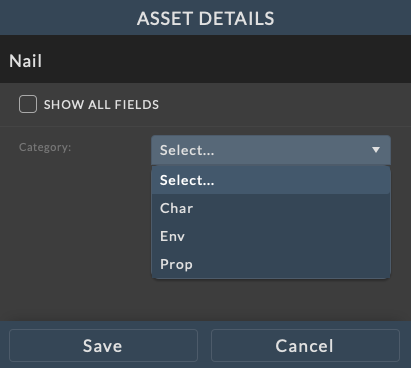
Rows can be clicked to expand an info panel on the right side of the page. By default, the only visible fields in this panel are ones that are required to bring the item online.
The Show all Fields checkbox can be clicked to show all fields on the item. All fields in this panel can be edited by clicking the edit pencil button at the top of the panel, making changes, and clicking the save checkmark.
Note
You can multi-select assets to modify a group at once by holding the shift key and clicking the assets to select a range or use the Command or Ctrl key depending upon your OS to select non-sequential assets.
If one or more assets can be brought online after changes made in this tab, the BRING ITEMS ONLINE button in the upper dashboard will turn blue, and the assets summary in the dashboard will list the number of items ready to be brought online in blue. If the button is clicked, the eligible items will be brought online and removed from this list.

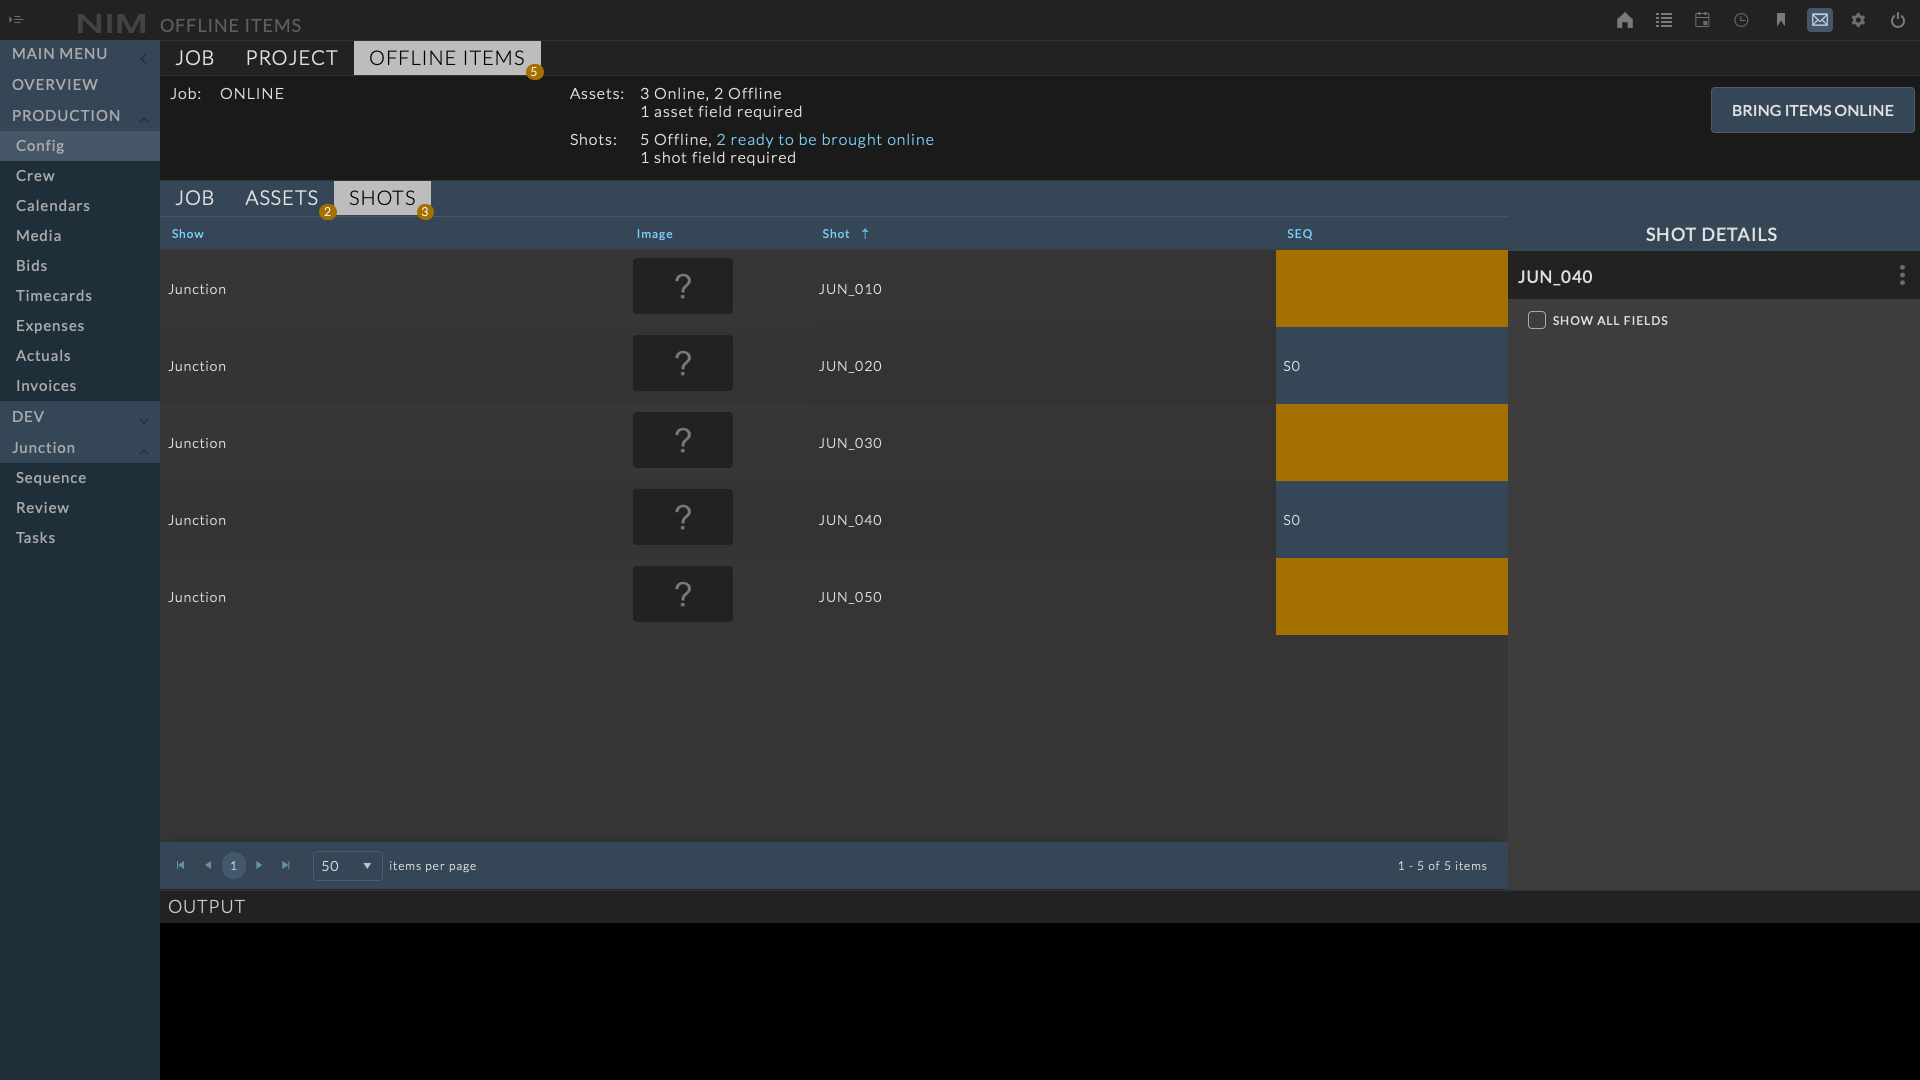
Offline Items - Shots
The shots tab displays a list of shots that are currently offline. If there are any shot fields required to bring these shots online, they will be shown as orange columns. When required fields are filled in and saved, they no longer appear orange in the list. If none of the shots in the list require that field anymore, the column will be removed from the list.
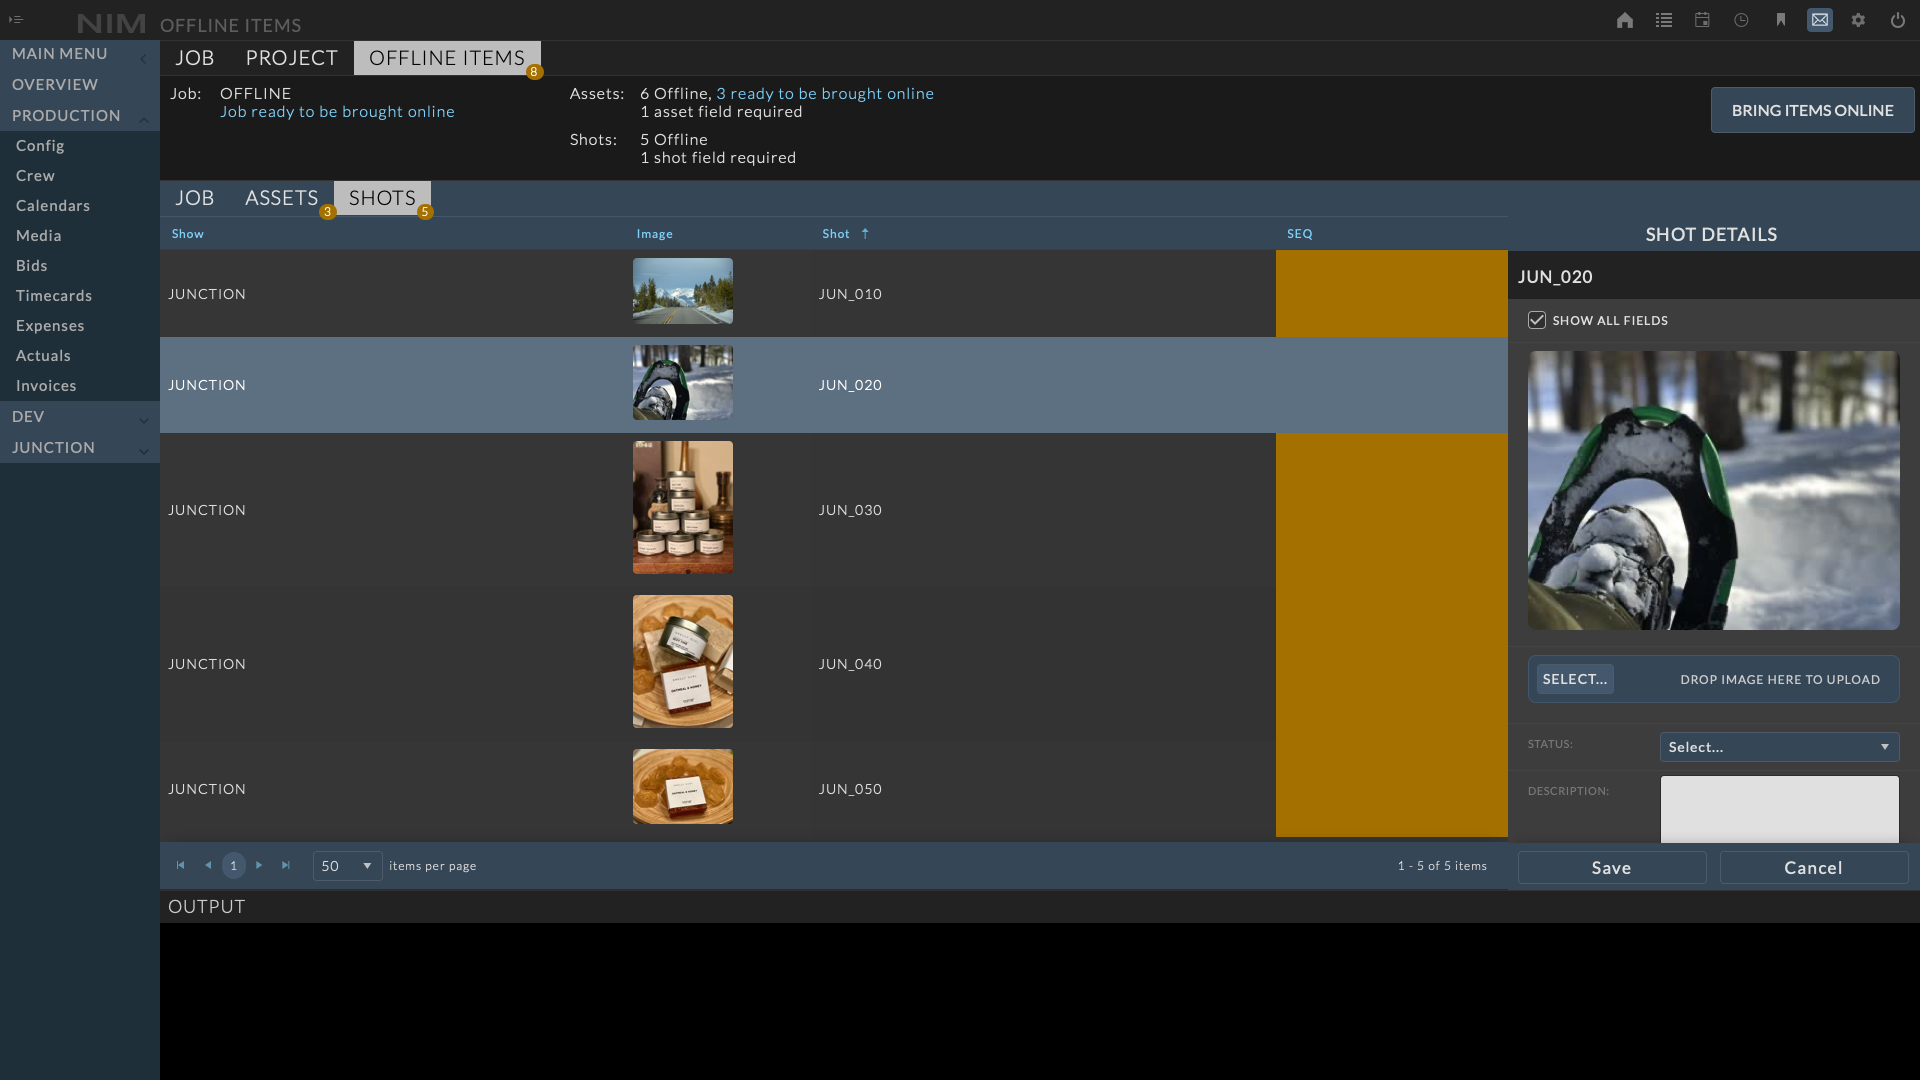
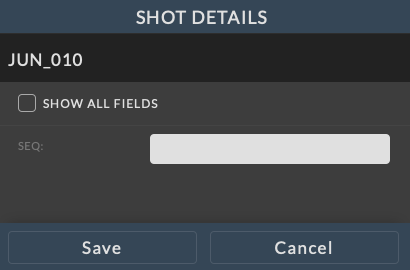
Rows can be clicked to expand an info panel on the right side of the page. By default, the only visible fields in this panel are ones that are required to bring the item online.
The Show all Fields checkbox can be clicked to show all fields on the item. All fields in this panel can be edited by clicking the edit pencil button at the top of the panel, making changes, and clicking the save checkmark.
Note
You can multi-select shots to modify a group at once by holding the shift key and clicking the shots to select a range or use the Command or Ctrl key depending upon your OS to select non-sequential shots.
If one or more shots can be brought online after changes made in this tab, the BRING ITEMS ONLINE button in the upper dashboard will turn blue, and the shots summary in the dashboard will list the number of items ready to be brought online in blue. If the button is clicked, the eligible items will be brought online and removed from this list.

Output
The output console shows the result from the system commands used to create folder structures in all tabs on the Config page. Any warnings or errors when creating folders will be displayed in bold.