Shot Details
Shot details can be accessed by clicking on the shot information in the shot list, clicking a row in the shot grid, or by clicking on a board in the shot board view.

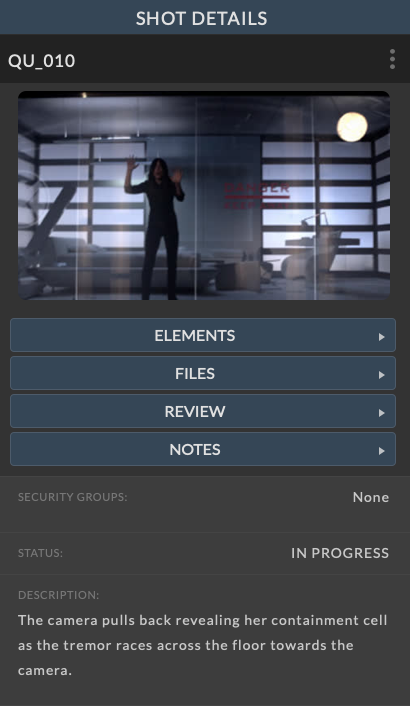
At the top of the info panel will be the shot name along with an ellipsis menu. Click on the ellipsis menu for Edit, Delete, and Close panel options.
If an image has been uploaded for the shot icon, it will be displayed here. If no shot image has been uploaded, no image will be displayed. For more details, please refer to the Icon section of the documentation.
Below the shot icon (if available) will be a series of buttons to open the details of shot related objects. These include:
To edit the shot details, click on the ellipsis menu in the shot info panel and choose Edit. Make the necessary changes and click the Save button at the bottom of the info panel to save your changes. Click the Cancel button to return without saving changes.
Available shot options include:
General Information |
|
Security Groups |
Security groups define which users have access to the shot information. Only users who are in the attached security groups will be able to see or edit this shot. You can add multiple security groups to a shot. Please refer to the Security Groups section of the documentation for more information. |
Status |
Displays the current shot status |
Description |
A brief description of the shot |
VFX |
A breakdown of the VFX needed for the shot |
FPS |
The frames per second for the shot |
Shot Length |
|
Frames |
The total number of frames in the shot |
Handles |
The total number handles |
Heads |
The number of handle frames at the head of the shot |
Tails |
The number of handle frames at the tail of the shot |
Camera Measurement |
|
Height |
The height of the camera |
Pan |
The number of pan degrees of the camera |
Tilt |
The number of tilt degrees of the camera |
Roll |
The number of Roll degrees of the camera |
Lens Information |
|
Lens |
The camera lens used |
FStop |
The f-stop used to film the shot |
Filter |
Any filter information related to the shot |
DTS |
Distance to Subject |
Focus |
Focus distance |
Stereo Information |
|
I.A. |
InterAxial distance ( the distance bewteen the left and right camera) |
Convergence |
The convergence of the left and right camera |
Source Footage |
|
Cam Roll |
The roll number from the take |
Stock |
The type of film stock used |
Formatting |
|
Format |
The source format of the shot |
Crop |
The crop of the final output |
Protect |
The area of the shot to protect |
Custom Fields |
Any defined shot custom fields will be available for editing in the shot info panel |
Delete a shot entry by clicking the ellipsis menu in the shot panel, and selecting Delete. You will be prompted to confirm deletion of the shot.
Icon
If an image has been uploaded for the shot icon, it will be displayed here. If no shot image has been uploaded, no image will be displayed.
To upload a shot icon click on the Upload Image button, or drag and drop and image from the desktop. The image will be uploaded and appear at the top of the info panel when complete.
Generate Icons
If the job has been brought online, NIM can use the SHOT PLATES folder to search for images to use as shot icons.
To automatically add/update icons for all shots in the show, click on the ![]() button in the shots toolbar. This will load the sequence Icons panel.
button in the shots toolbar. This will load the sequence Icons panel.
From the “Server” dropdown, choose the job server containing the project structure to scan. NIM will use the SHOT PLATES folder defined in the job’s project structure to look for images to create shot icons. The first image found in the folder will be used for the icon.
The “Update” dropdown lets you choose how to update shot icons:
MISSING |
Only update shots with no icon |
ALL |
Rebuilds all shot icons from found plates. |
Click the GENERATE ICONS button to start the scan. The progress will be displayed in the output area below.
For more information on project structure special folders, such as SHOT PLATES, please refer to the Special Folders section of the documentation.
Status
The shot status can be assigned via drag and drop or directly through the shot info panel. Shot statuses are defined in the Admin > Shots - Status menu. For more information on defining shot statuses please refer to the Status section of the documentation.
Drag and Drop
To update the shot status by drag and drop, click on the  button from the shot toolbar in any of the shot views. This action will load the Shot Assignment panel.
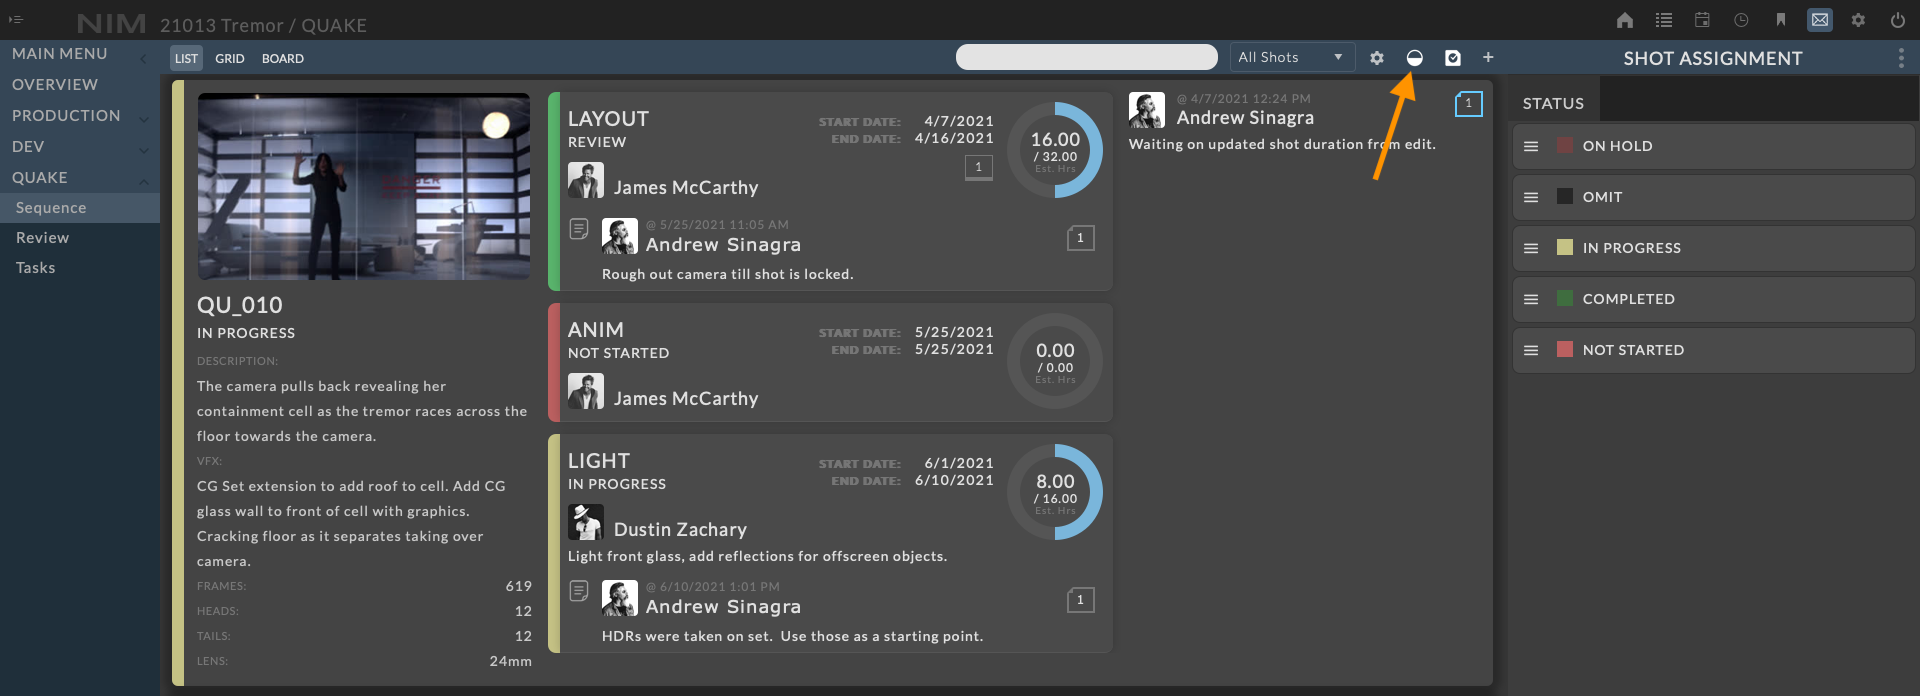
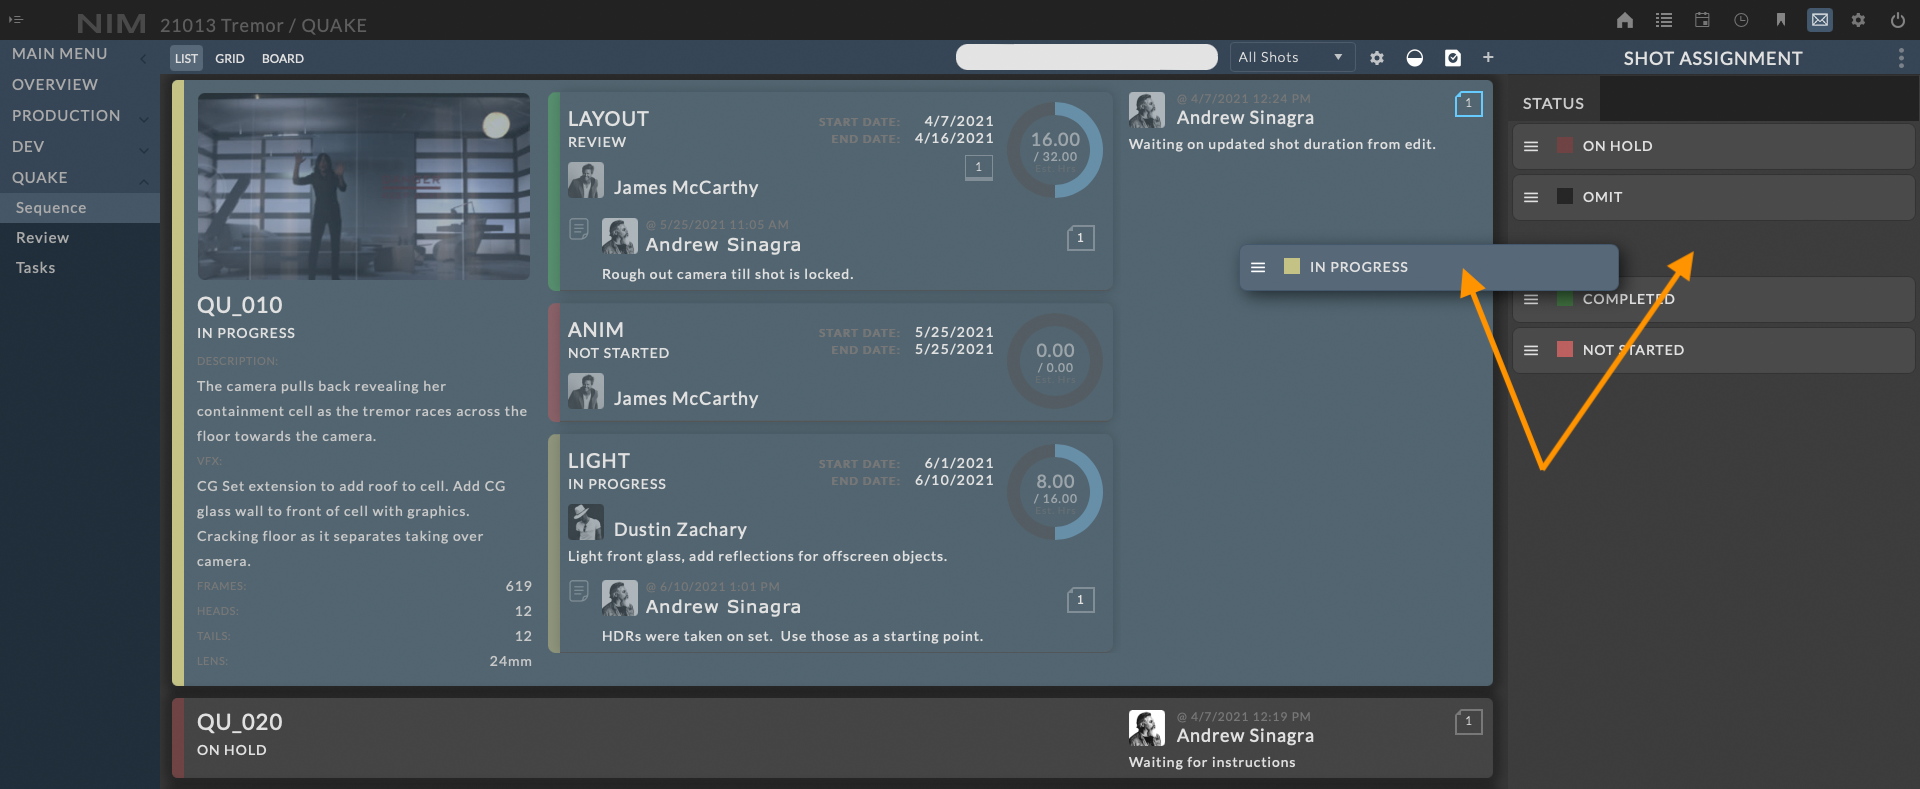
To assign a status to a shot click and hold on the status drag handle and drag and drop on the desired shot. To cancel a drag action, either drop the item back onto the Status list or press the escape button before releasing the drag handle.
Note
In the grid or board view, you can multi-select shots by holding the shift key and clicking the shots to select a range or use the Command or Ctrl key depending upon your OS to select non-sequential shots. Then drag and drop the status to assign to all selected shots simultaneously.
Info Panel
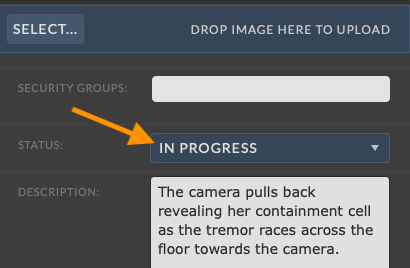
To update the shot status via the shot info panel, click on the ellipsis menu and select Edit to enter edit mode. Then change the Status dropdown to any of the available options and click the Save button at the bottom of the info panel to save your changes. Click the Cancel button to return to the view mode without saving changes.
Associated Task Status
If the shot status has an associated task status, all task statuses on the shot will be updated to the associated task status when the status is applied to a Shot. If the status has no associated task status, the shot tasks will not be modified.
For more information on defining associated task statuses, please refer to the Status section of the documentation.
Elements
The shot Elements panel contains all elements that have been saved to this shot or any tasks attached to this shot via NIM Connectors or added manually here through the UI. Elements are generic entities that may be associated with a shot, shot, task or render. Elements can be of any user defined type from the list of element types created in Admin > Elements - Types. Additionally, elements can be marked as published for filtering purposes.
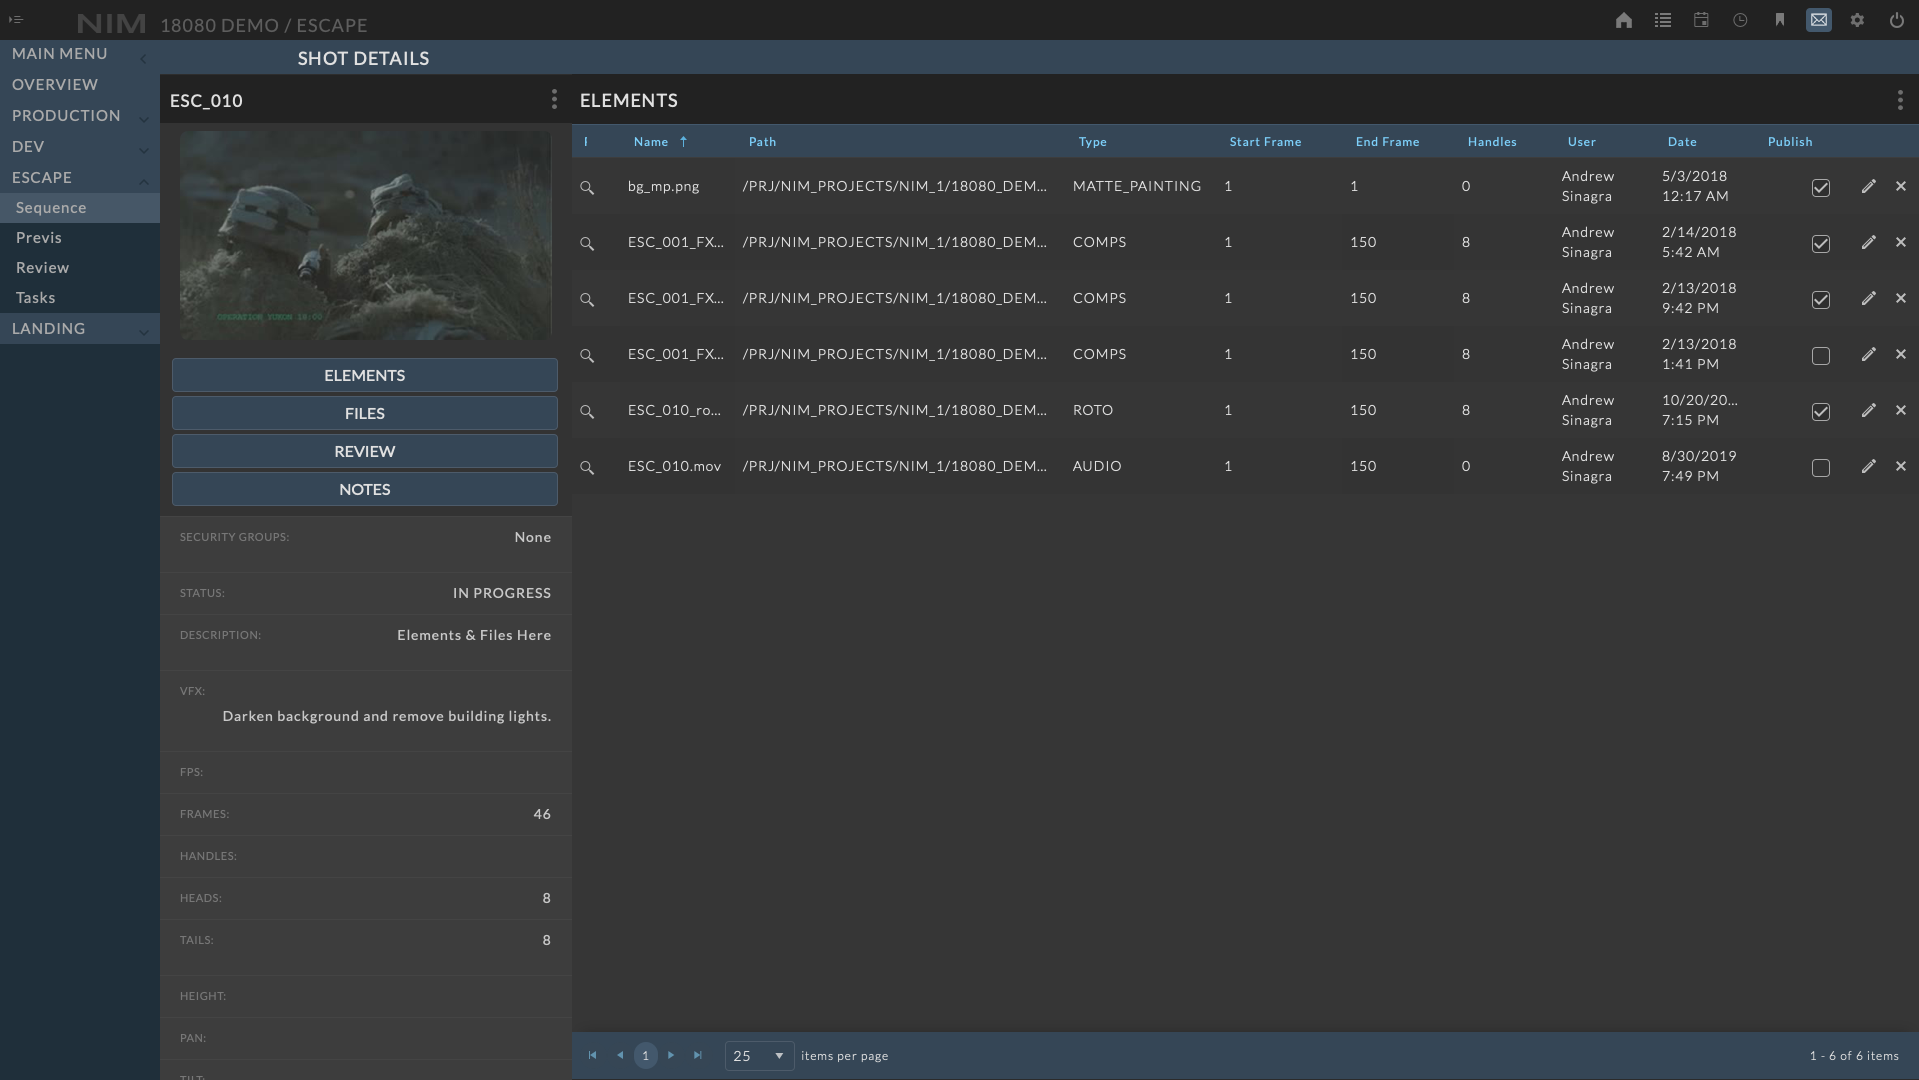
For more information about elements, please refer to the Elements section of the documentation.
Files
The shot Files panel contains all files that have been saved to this shot via NIM Connectors or added manually here through the UI. Files in NIM are considered scene or source files from applications that are used to create an asset or shot. These files are logged directly to the asset or shot from within the Asset or Shot Details.
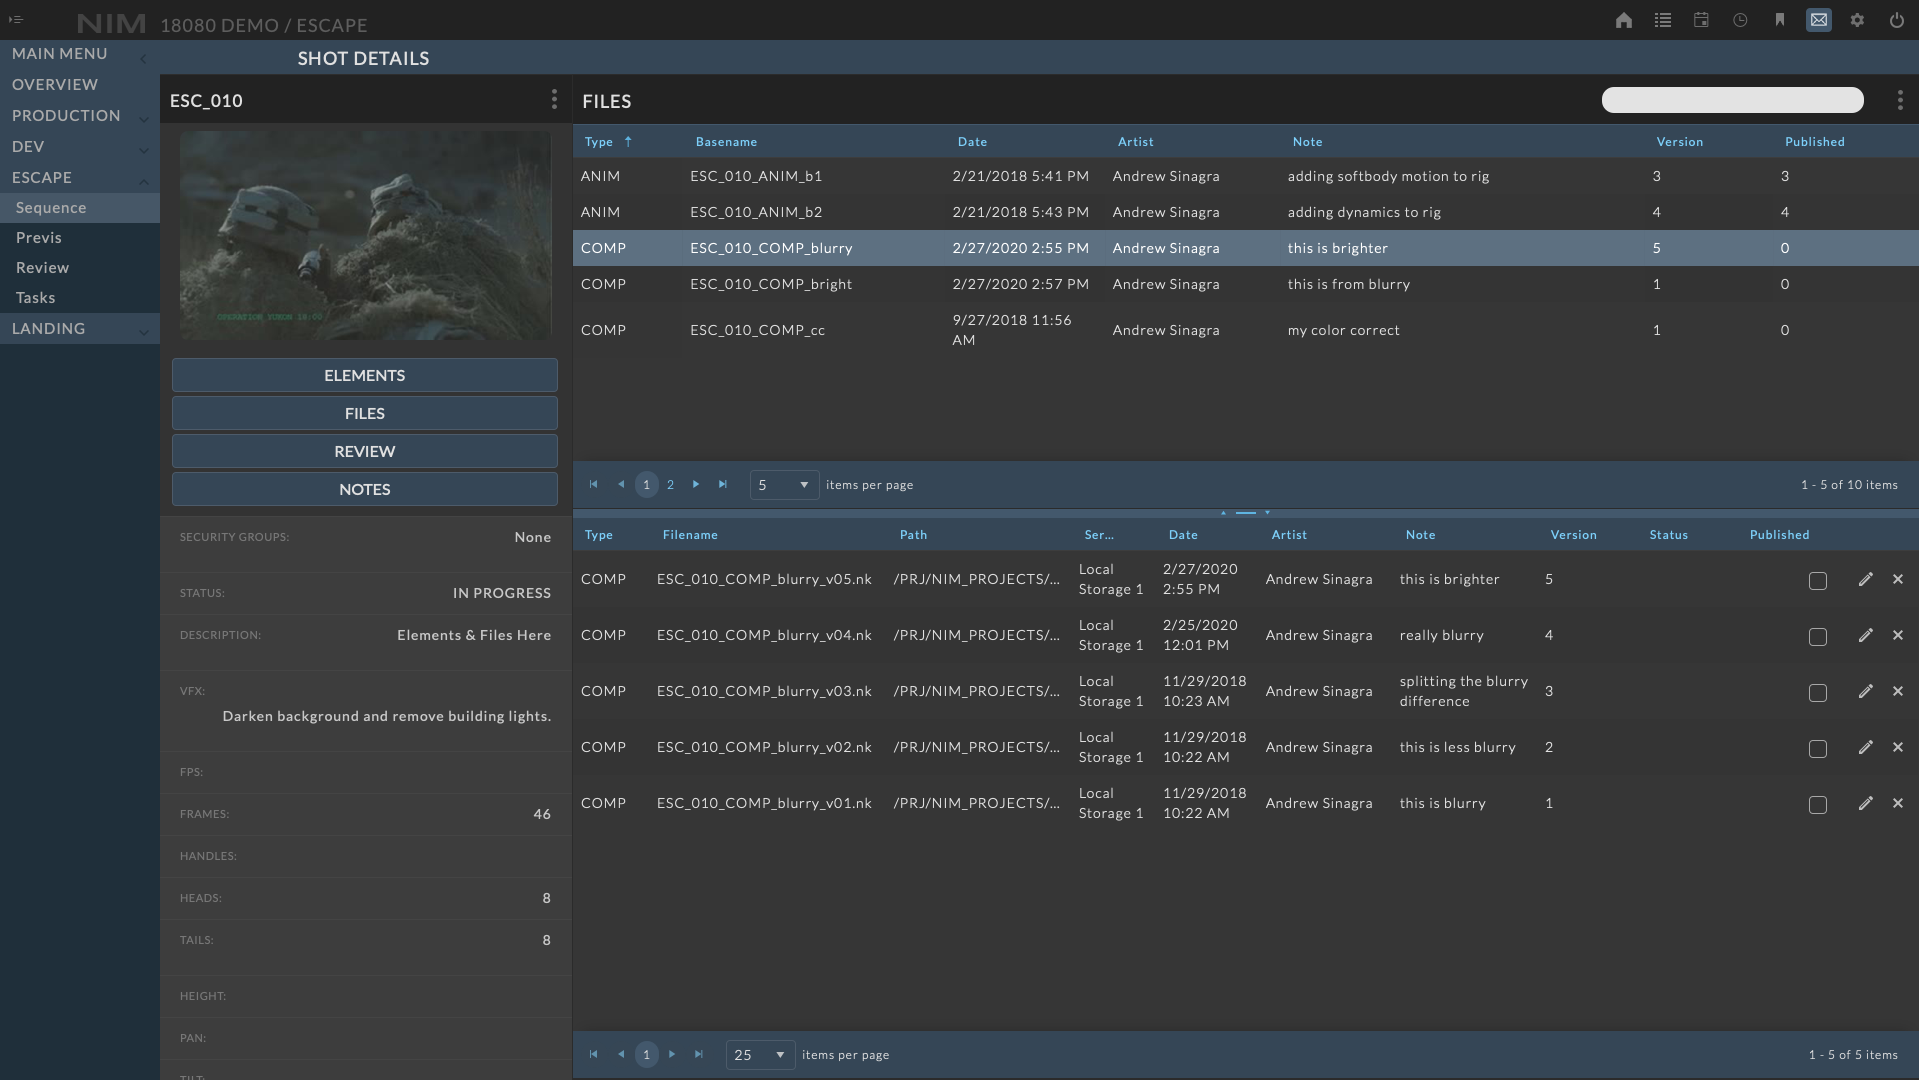
For more information about files, please refer to the Files section of the documentation.
Review
The shot Review panel contains all review items uploaded to this shot or tasks attached to this shot. Review allows users to upload video, still images, and PDF documents for markup and notes. These review items are available to all users within a given context, such as a job, asset, or shot, so any comments can be shared easily with all team members. Whiteboarding tools allow users to write directly on video frames, stills, or PDF pages and save the markup as individual notes that can be exported in PDF form or emailed directly through the rule based notifications.
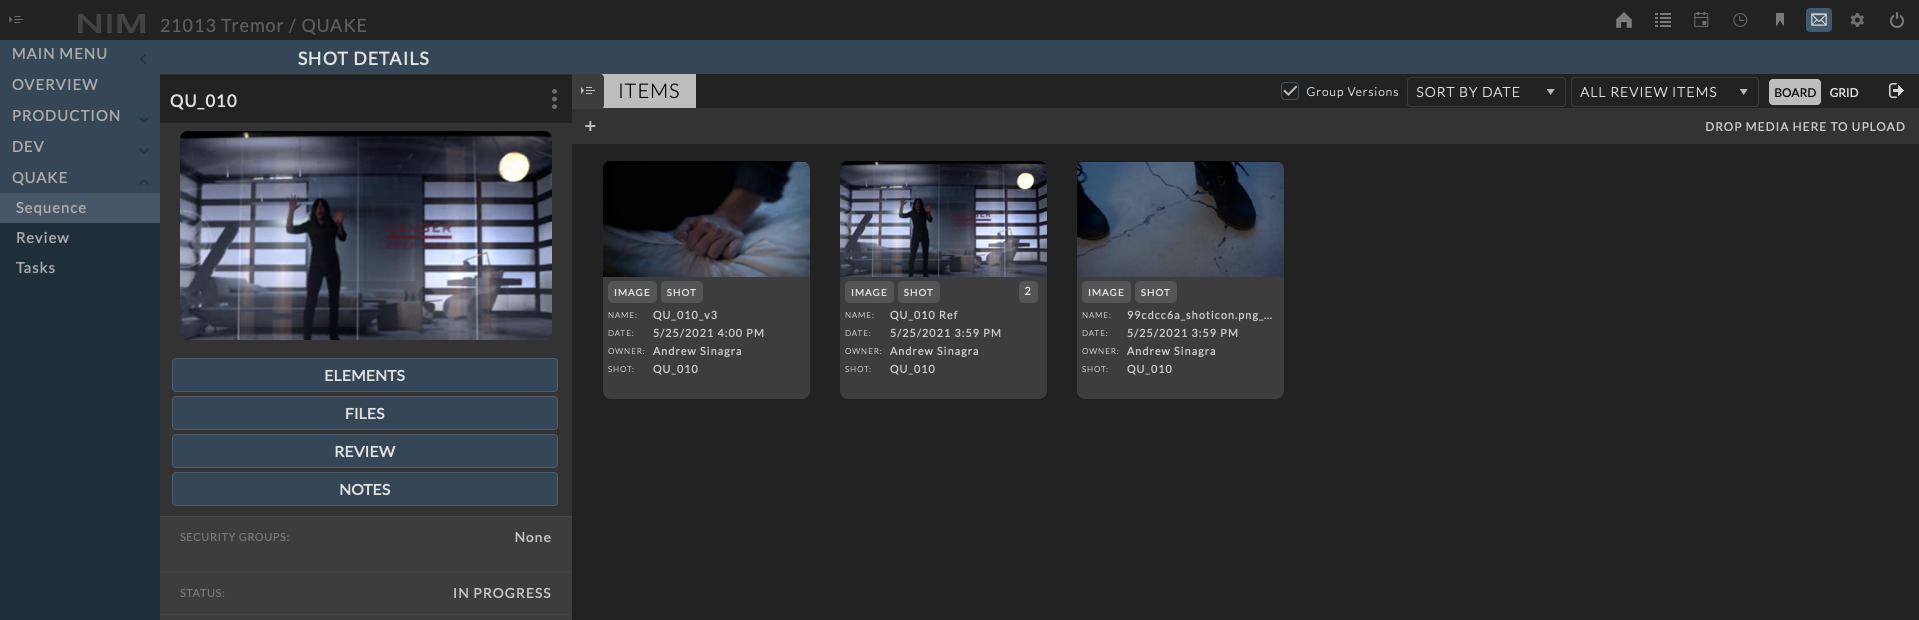
For more information about the review tools please refer to the Review section of the documentation.
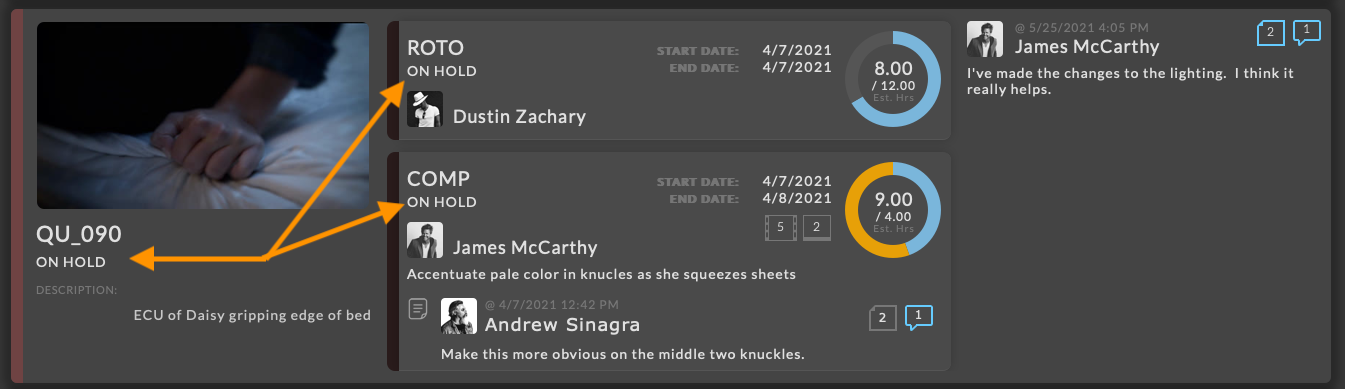
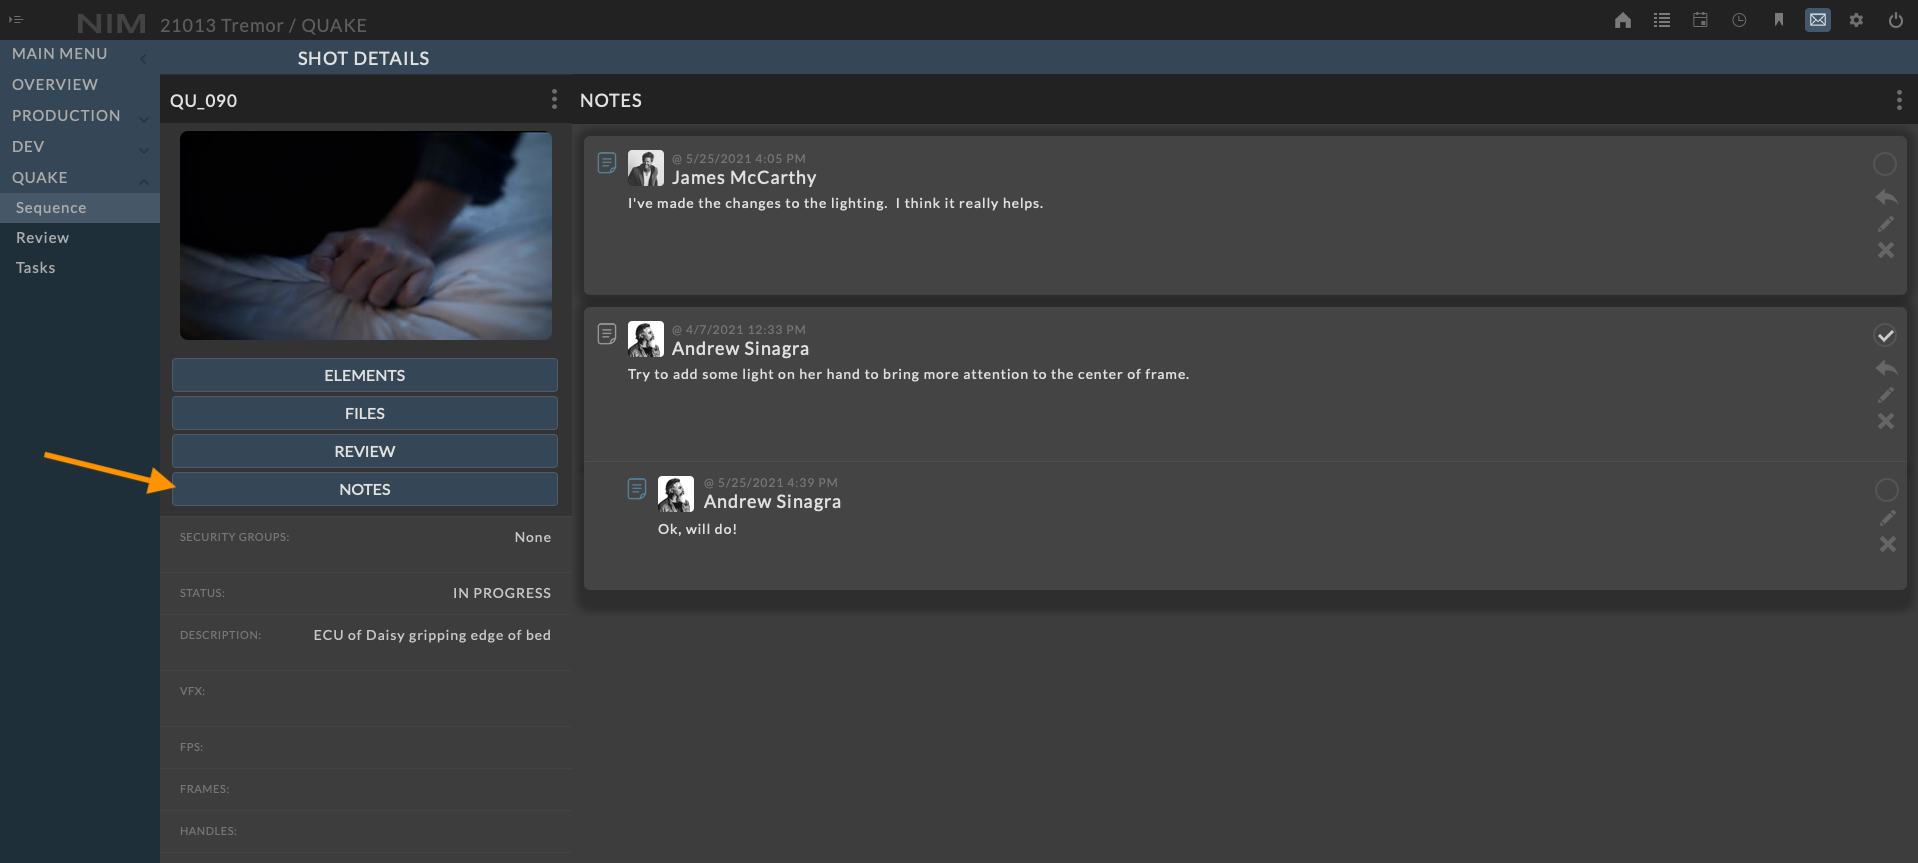
Notes
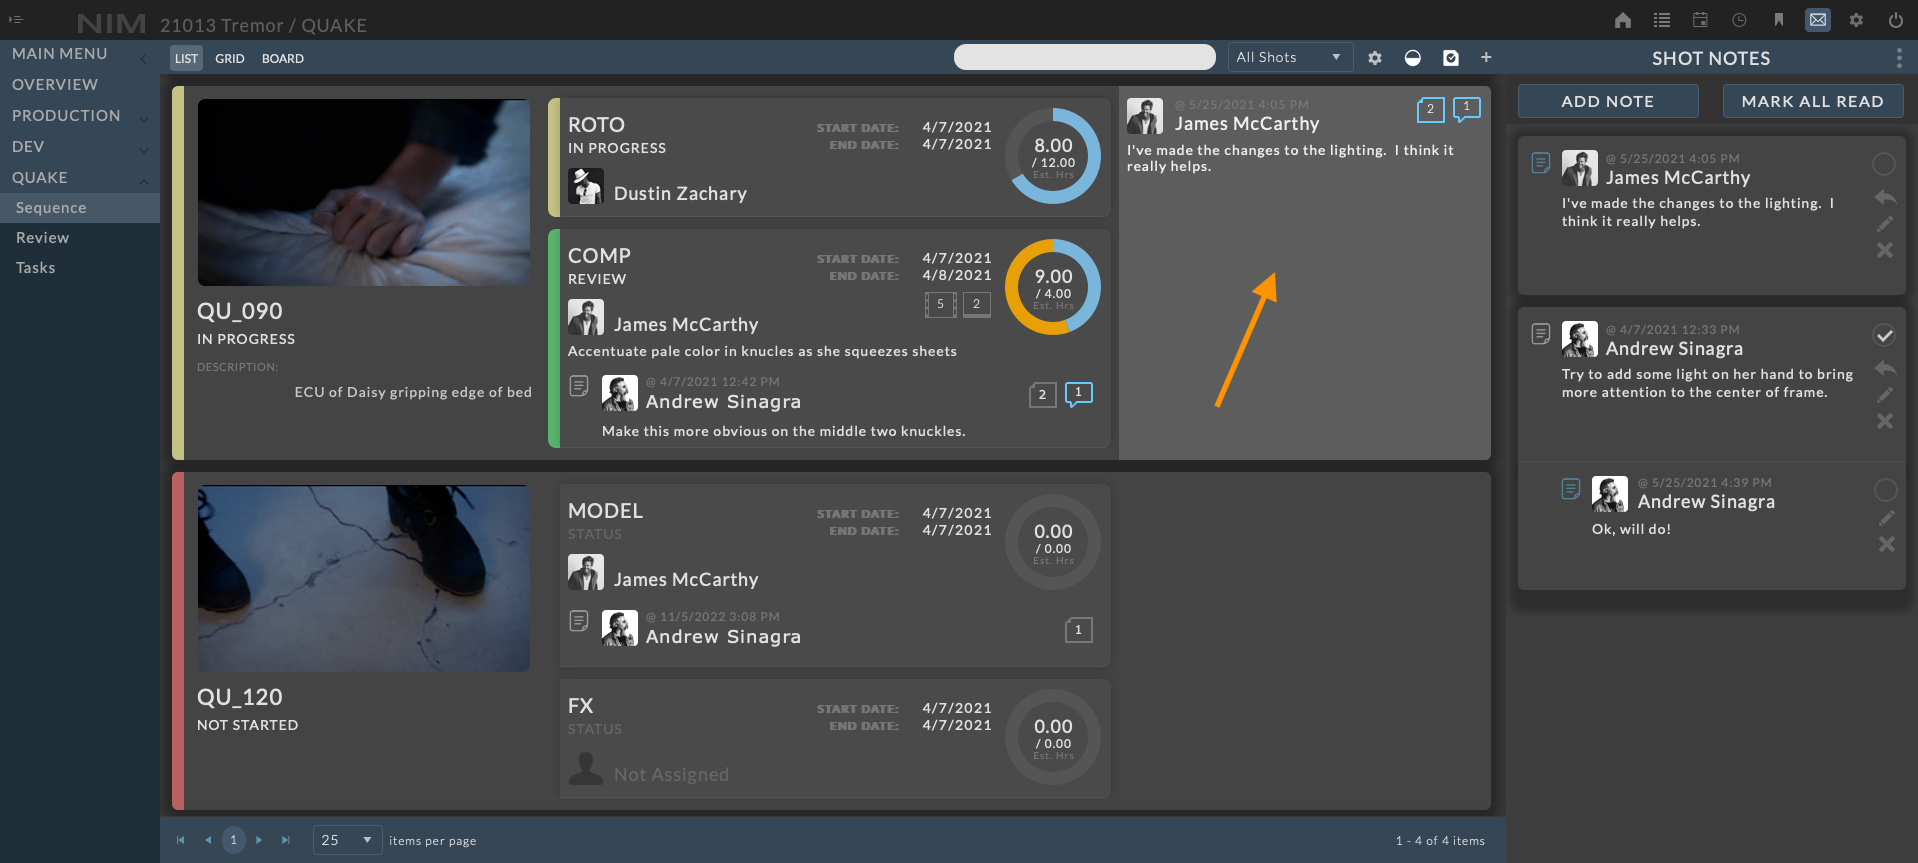
Notes can be assigned to shots by clicking on the latest shot note in the list view, or by clicking the Notes button in the shot info panel. Accessing shot notes via the list view will load the Shot Notes panel. Accessing shot notes via the shot info panel Notes button will open the notes in a larger detail view. Both views display the same information including a full list of notes that have been added to the shot along with the user that created the note, and the date and time it was created.
The Note Info Panel is a condensed view allowing for inline viewing with other shots and tasks.
The Note Detail Panel is an expanded view providing additional room for viewing and editing notes.
Create Note
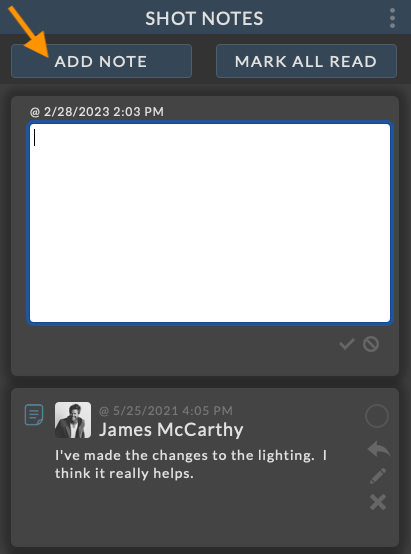
To add a note, click the ADD NOTE button at the top of the Shot Notes panel, or click the ellipsis at the top right of the notes detail panel and choose Add Note from the popup menu.
A new note will appear at the top of the notes panel with a blank text area to enter the note. The date/time and owner of the note is set automatically.
When done entering the note, click the  button at the bottom of the text area to save the new note, or click the
  to cancel without saving the note.
Upon saving, the new note will appear in the shot notes list.
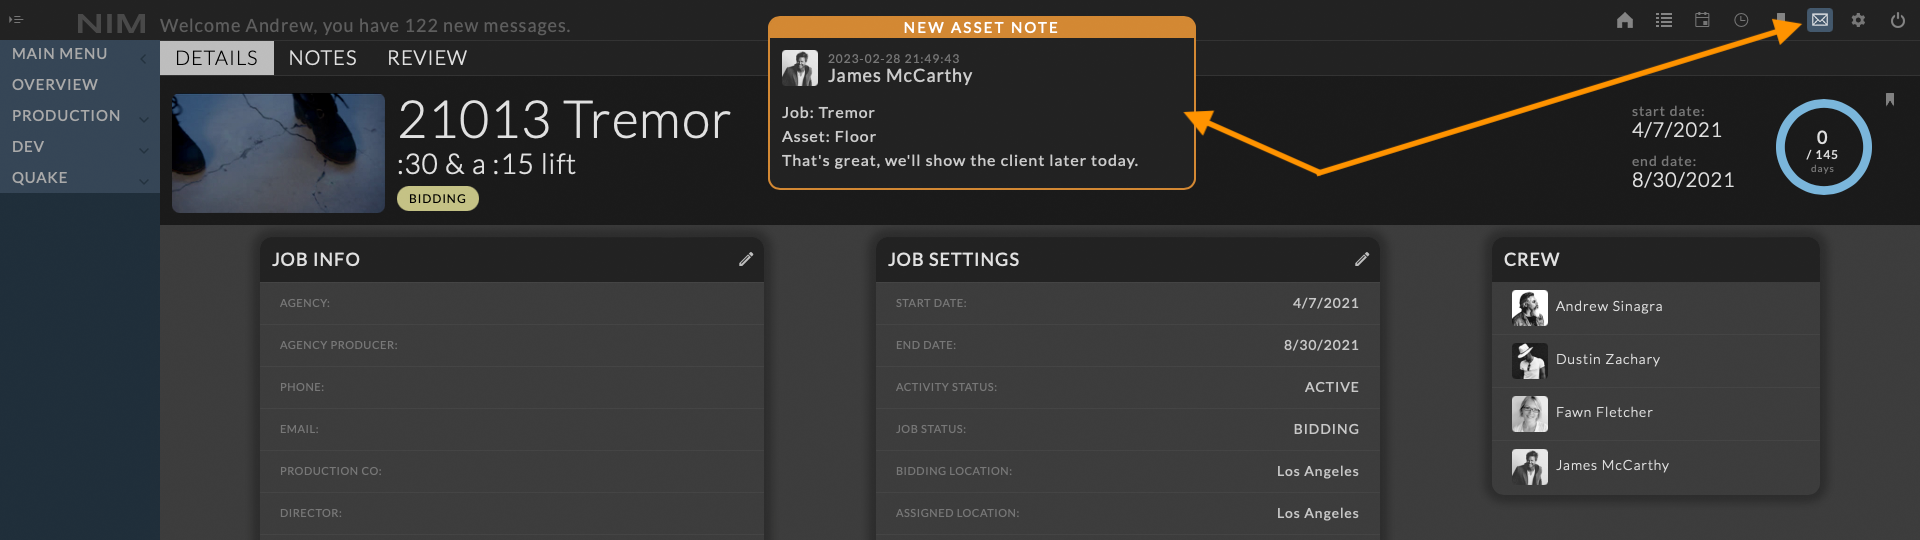
Any users who have NIM open and are attached to the note via replies or assignment will receive a popup notification in their browser and the notes button in the NIM toolbar will be highlighted.
Mark As Read
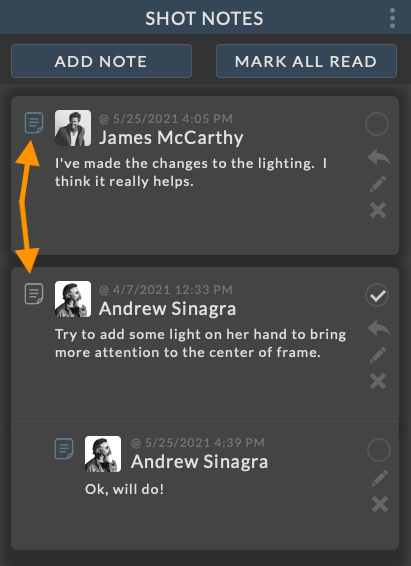
The indicator icon to the top left of the each note and reply denotes the “Read” state of the note. If the note or reply has been marked as read, then the icon will be grey. If note is unread, then the icon will be highlighted.
To change the read state of an individual note, click on the indicator icon. This will toggle the note from its current read state to being read or unread respectively.
To mark all notes as read, click on the Mark All Read button at the top of the Shot Notes panel. If you are viewing notes in the notes detail panel, or click the ellipsis at the top right and choose Mark All Read from the popup menu.
Mark Note Addressed
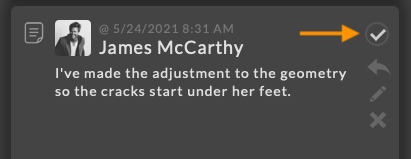
To mark a note as addressed, click on the  button at the top right of the note.
The note will now have a check mark to indicate the note has been addressed. Click the checkmark again to unmark the note.
Reply to Note
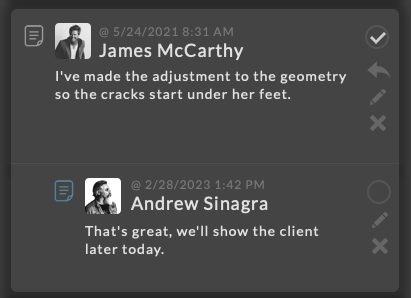
To reply to a note, click on the  button at the right of the note you wish to reply to.
A text area will open at the bottom of the parent note to enter a nested reply. Click the checkbox below the input field to save your reply, or the cancel button to return to the view without saving the reply.
Replies to a note are indented and contained below the parent note.