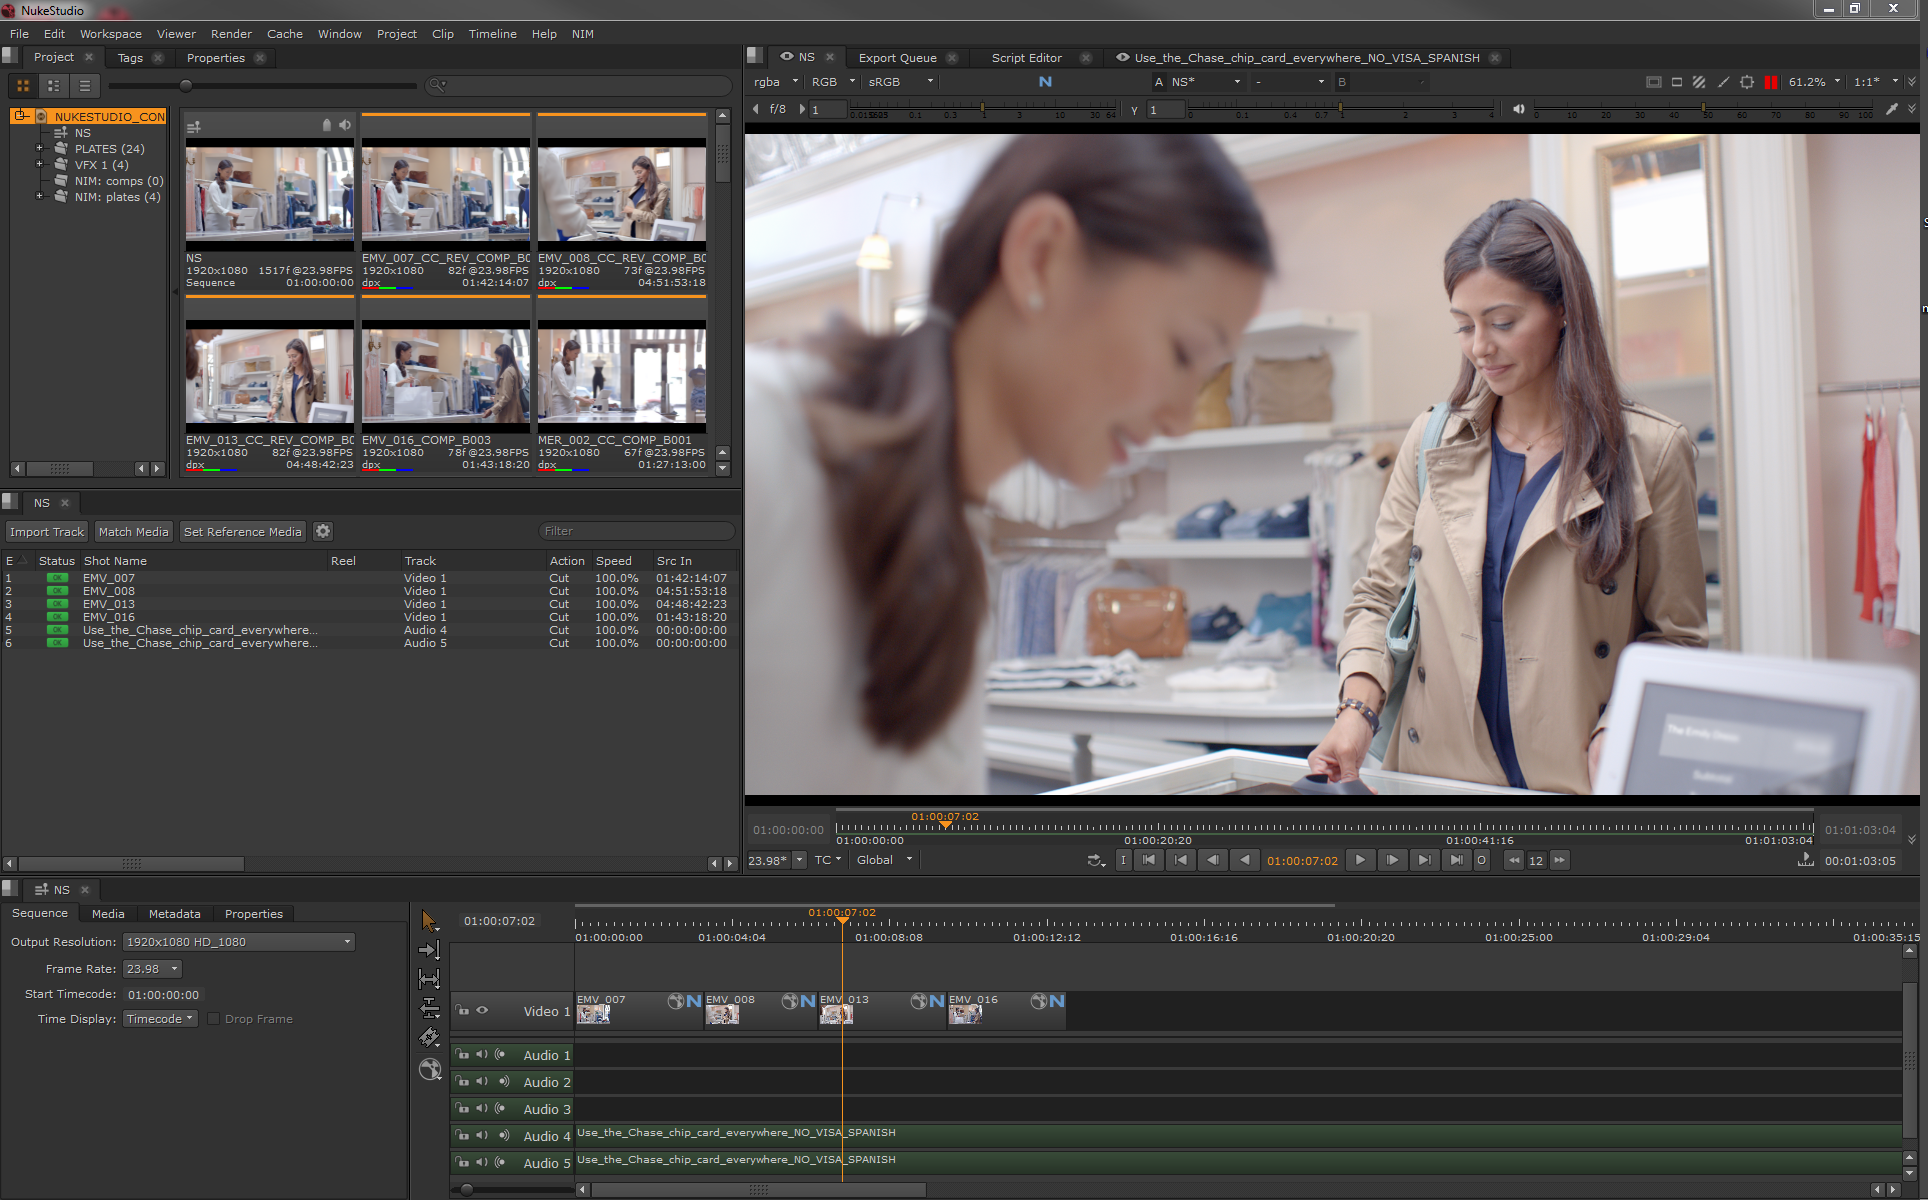
Nuke Studio
NIM provides functionality within NukeStudio to create new shots in NIM, export shot information to NIM, and publish exported elements including renders and nuke projects to NIM shots.
For an in depth look at the NIM Nuke Studio Connector functionality, check out the video here:
NIM - NukeStudio Connector from NIM Labs on Vimeo.
Additional NIM videos can be found here: https://nim-labs.com/videos
Installation
The following procedures describes how to install the NukeStudio NIM connector. The connector creates a NIM menu in the main NukeStudio menu bar as well as a timeline context menu and an export processor labeled NIM: Process as Shots. The script and the following installation procedures have been tested with NukeStudio 9.0v7 and later.
The NIM Connector folder structure is as follows:
nim             <-- NIM_CONNECTOR_ROOT
    css
    img
    nim-core
    plugins
In the following examples [NIM_CONNECTOR_ROOT] is the path to the top level NIM scripts folder.
Replace all instances of [NIM_CONNECTOR_ROOT] with the actual path to the folder.
init.py
NukeStudio uses two init.py files to create the various UI integrations.
The default paths for these files are in the following locations:
.nuke Folder Location
Windows: |
drive:/Users/[USERNAME]/.nuke |
OSX: |
~/.nuke |
Linux: |
~/.nuke |
Startup Folder Location
Windows: |
drive:/Users/[USERNAME]/.nuke/Python/Startup |
OSX: |
~/.nuke/Python/Startup |
Linux: |
~/.nuke/Python/Startup |
Copy the file [NIM_CONNECTOR_ROOT]/plugins/Nuke/install/init.py to your .nuke folder location
Copy the file [NIM_CONNECTOR_ROOT]/plugins/Nuke/install/Python/Startup/init.py to your .nuke/Python/Startup folder location
Edit the .nuke/init.py and .nuke/Python/Startup/init.py files to update the [NIM_CONNECTOR_ROOT] with the proper path to your studios NIM connector folder.
NOTE: Be sure to use forward slashes “/” for all directory separators in the path
If you have an init.py file already at either location, copy the contents of the corresponding init.py file to the end of the existing file, updating the paths as instructed.
NOTE: If you do not see the .nuke folder, either you have not run NukeStudio or Nuke for the first time or you may need to enable viewing of hidden files.
If a .nuke/Python/Startup directory does not exist you can manually make the needed folder structure in the correct location.
The next time Nuke is started, a NIM menu should appear in the NukeStudio main menu. If you don’t see the NIM menu, it’s likely that the init.py files are in the wrong location or the path to the NIM_CONNECTOR_ROOT is incorrect.
Export Presets
NIM ships with a default export template for the NIM: Process as Shots export processor.
To install copy the folder [NIM_CONNECTOR_ROOT]/plugins/Nuke/TaskPresets/Processors/nimShotProcessor.NimShotProcessor to the TaskPresets/Processors folder in your local .nuke folder location.
Setting Preferences
If you have already installed and launched other NIM Connectors your connection preferences will already be saved in the nim.prefs file.
The NIM preferences are in the following locations:
Windows: |
drive:/Users/[USERNAME]/.nim |
OSX: |
/Users/[USERNAME]/.nim |
Linux: |
/home/[USERNAME]/.nim |
If this is the first time accessing a NIM Connector, after launching Nuke a dialog box will appear to enter the path of the NIM API.
Enter the path as follows:
http://[hostname]/nimAPI.php
where [hostname] is the address you have assigned to the NIM server.
API Keys
NIM API keys are an optional security feature that restricts API access with time limited per user keys. Requiring API keys restricts all API access to only those users with an API key.
If Require API Keys is enabled in ADMIN/Security - Options, users will be presented with a dialog box the first time they attempt to use a NIM Connector. API keys are unique to each user. Enter the NIM API key provided to you by your NIM administrator. For more information on enabling NIM API Keys please refer to the API Keys section of the documentation. For information on creating user API keys please refer to the Users Grid section of the Administration documentation.
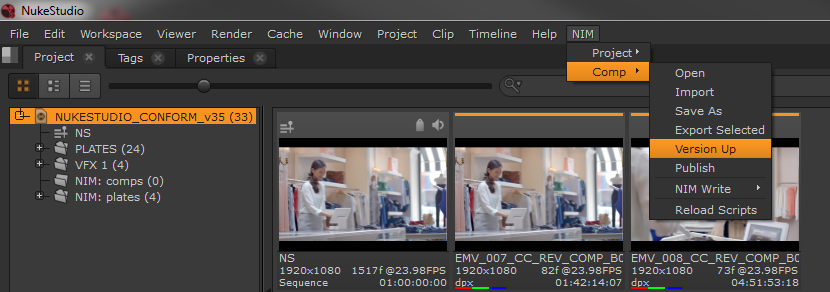
Project / Comp Menu
The main NIM menu within NukeStudio has two main categories:
Project - Used to save NukeStudio project files for sequences (.hrox)
Comp - Used to save Nuke project files for individual comps (.nk)
NIM Project Menu
The NIM Project menu contains file operations to load, save, and version NukeStudio project files to NIM.
Open
Use OPEN to load an existing NIM version.
- NIM will automatically handle path translations for files saved using different operating systems.
Path translation settings are defined in the Server Administration section of NIM
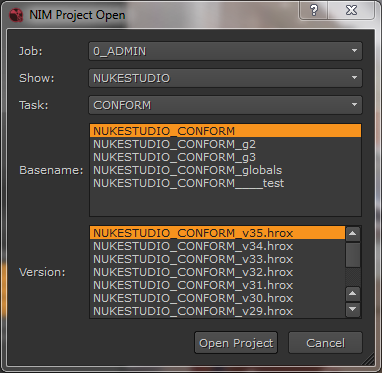
The following steps outline the workflow to open a file:
- Job:
Files are loaded by first selecting the job from a list of jobs the user is assigned to.
- Show:
Select the show on the job from the Show dropdown.
- Task:
- Tasks show all tasks that have been made available to the current application.
This is defined in the Task Types Administrative section of NIM
- Basenames:
The available basenames for the selected task appear in the basename list.
Select the desired basename from the list
Choosing a basename will load all working versions in the versions list.
- Versions:
The version list displays the version file name.
Select the working version from the Version list.
Click the OPEN button to load the version.
Save As
- Use SAVE AS to:
Start a new basename
Save a project file into an existing basename
If saving into an existing basename you will be prompted to either:
Save the file into the existing basename as the latest version.
Start a new basename by adding a tag.

Follow these steps to save a file:
- Project:
Displays the currently selected project to be saved.
- Job:
Files are loaded by first selecting the job from a list of jobs the user is assigned to.
- Server:
- Select the project server to save the file to.
The project servers are defined in the NIM job under Production / Config
- Show:
Select the show on the job from the Show dropdown.
- Task:
Tasks show all tasks that have been made available to the current application. This is defined in the Task Types Administrative section of NIM
Select the Task type from the Task dropdown.
- Basenames:
A list of available basenames are displayed.
- To save into an existing basename:
Select the basename from the basename list
Enter a comment in the Note field
- Click SAVE AS
The filename will be named automatically and versioned up in the current basename.
- The version information will be logged into NIM on the corresponding Show including:
Filename
File Path
Owner
Date
Version
Note
- To create a new basename:
Enter a Tag to append to the basename ( OPTIONAL )
Enter a comment in the Comment field
- Click Save Project
- A new folder with the Task Folder name will be created under the NIM SHOW_ROOT
Task Folder names are defined in the Task Types Administrative section of NIM
A new folder will be created for the basename under the Task Folder with the basename as the name
All versions of this basename will be saved to the basename folder
- The file will be named according to the following convention
- File naming is defined as:
Show: showname_taskShortName_version
- Adding a tag to a basename will append the tag in the following convention:
Show: showname_taskShortName_tag_version
- The version information will be logged into NIM on the corresponding Show including:
Filename
File Path
Owner
Date
Version
Note
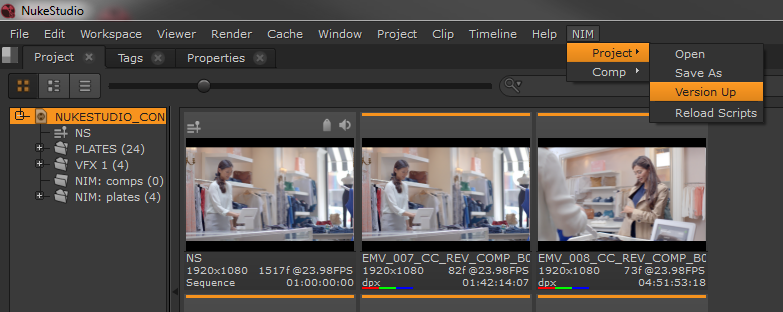
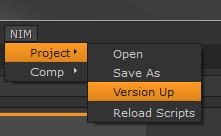
Version Up
To version up a file that is already part of a NIM version stream, choose VERSION UP from the NIM menu.
A dialog box will appear with the currently selected project to be saved and an entry to add a note.
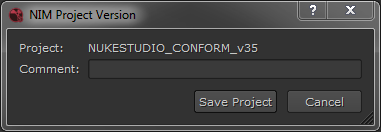
Enter the note and click OK.
The file will be saved to the appropriate location.
The filename will be automatically versioned up.
- The version information will be logged into NIM on the corresponding Show including:
Filename
File Path
Owner
Date
Version
Note
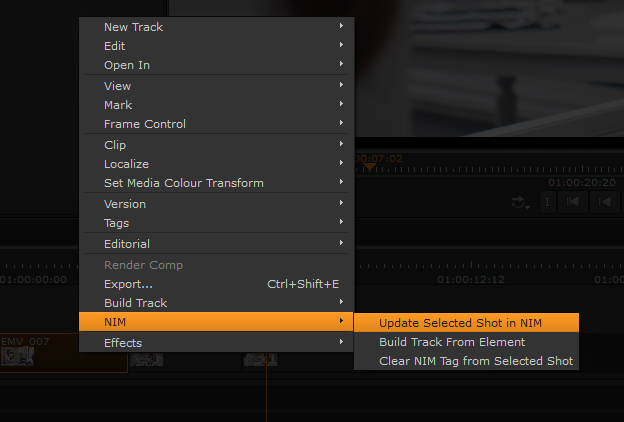
Timeline Menu
Right clicking on a clip or a group of clips in a sequence will bring up the Timeline context menu.
- Within this menu is the NIM Timeline menu which includes options for:
Update Selected Shots in NIM
Build Track From Elements
Clear NIM Tags from Selected Shots
Update Selected Shots in NIM
- Updating selected shots in NIM will update the selected NIM show with the current shot information including:
Start & End time
Duration
Handles
Shot Icon
To update shots in NIM select a shot or a group of shots, right click, and select NIM / Update Selected Shots in NIM.
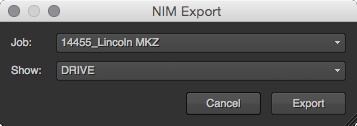
- You will be presented with a dialog box with three dropdowns.
Job - the job containing the desired show
Show - the show to update the shots in
After selecting the Job and Show click the export button.
- NukeStudio will connect to NIM and look for corresponding shots by two methods:
Existing NIM Tag information
Matching shot names
If either of these cases exist NIM will update the shots with the corresponding information as well as update the shot icon.
If a shot is NOT found in the selected show, a new shot will be created in the show with the corresponding information and a new shot icon. Additionally the track item on the timeline will be tagged with a NIM tag containing the matching NIM shot information.
Note
Timeline track items can only be associated with a single shot in NIM.
To change a track items associated NIM shot clear the NIM Tag from the track item.
Build Track From Elements
Building a track from elements will create a new track in the current sequence with the latest published elements in the corresponding NIM shots.
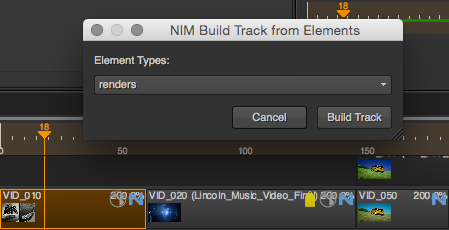
To build a track, select a shot or a group of shots, right click, and select NIM / Build Track From Elements.
- You will be presented with a dialog box to choose the NIM Element Type.
NIM Element Types are defined within the Administrative section of NIM
Select the desired Element Type from the dropdown and click Build Track.
NukeStudio will communicate with NIM to find the most recently published elements for each corresponding shot and will construct a new track with these elements.
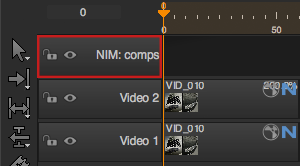
- The new track will be labeled with a prefix of NIM: and a suffix of the selected element type:
eg. NIM: renders
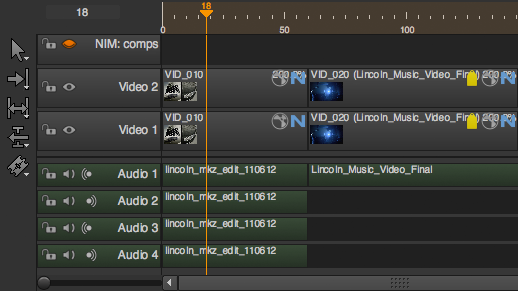
NIM Tags
All clips that have corresponding NIM information are marked with ![]() Tag.
Tag.
The NIM tag included metadata for the NIM show and shot ID as well as corresponding output directories if a NIM project structure has been defined.
Clear NIM Tags from Selected Shots
Selecting this menu item will remove all NIM Tags from any selected shots on the timeline.
Export
In addition to using Update Selected Shots in NIM to create shots, you can include NIM shot creation as part of the NukeStudio export process.
- The NIM NukeStudio Connector adds a shot processor type called:
NIM: Process as Shots
To use the NIM: Process as Shots export processor, select a shot or a group of shots from a sequence, right click and select, Export.
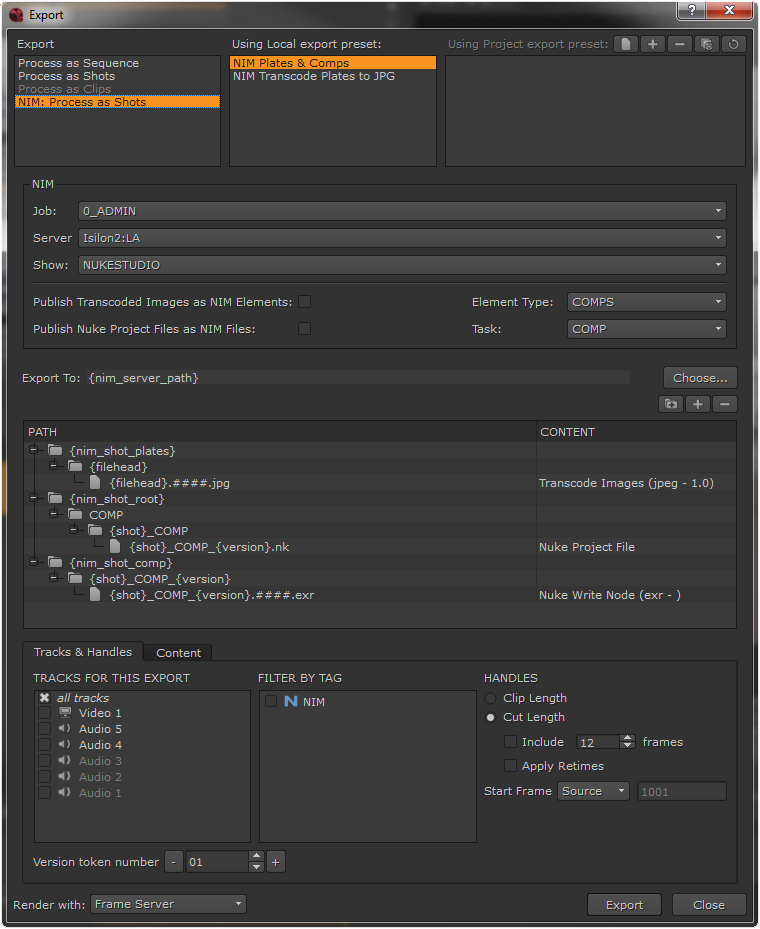
Select the NIM: Process as Shots button from the list of export processors.
- NIM ships with two example Local export presets:
NIM Plates & Comps
NIM Transcode Plates to JPG
These example presets use the NIM project structure defined in the job to export items to their corresponding locations.
Use these presets as the basis for your own custom NIM export templates.
- Choose the appropriate NIM options and define NIM export keywords to create shots and published elemetns in the desired show.
NIM options and keywords are explained in more detail in the following sections
To export shots click the Export button at the bottom of the Export dialog.
- NukeStudio will connect to NIM and look for corresponding shots by two methods:
Existing NIM Tag information
Matching shot names
If either of these cases exist NIM will update the shots with the corresponding information as well as update the shot icon.
If a shot is NOT found in the selected show, a new shot will be created in the show with the corresponding information and a new shot icon. Additionally the track item on the timeline will be tagged with a NIM tag containing the matching NIM shot information.
- NOTE: Timeline track items can only be associated with a single shot in NIM.
To change a track items associated NIM shot clear the NIM Tag from the track item.
NIM Export Options
When using the NIM: Process as Shots export processor, you are presented with several custom NIM options at the top of the dialog.
The NIM options include:
Job - a dropdown to select the job to export the shots to
Server - a dropdown to select the NIM project server to export the shots to
Show - a dropdown to select the show to export the shots to
Publish Transcoded Images as NIM Elements - a checkbox to dertermine if NIM should publish any transcoded images as NIM Elements on the corresponding shots
Element Type - a dropdown to select the exported image NIM Element Type
Publish Nuke Project Files as NIM Files - a checkbox to dertermine if NIM should publish the exported Nuke Project Files as NIM Files on the corresponding shots
Task - a dropdown to select the exported Nuke Project File NIM Task Type

First select the NIM job to export the shots to.
The server and show dialog boxes will be updated with the servers and shows on the selected job.
Select an output project server to where the images will be written.
Now choose the show to create or update shots in.
Select Publish Transcoded Images as NIM Elements** if the corresponding transcoded images that will be created should be published to the NIM shot.
Select the NIM Element Type to assign to the newly created shot elements.
Select Publish Nuke Project Files as NIM Files if the corresponding transcoded images that will be created should be published to the NIM shot.
Select the NIM Task to assign to the newly created shot elements.
NIM Export Structure
The NIM NukeStudio Connector comes with an example template that uses your job’s NIM project structure information to export items. The connector users several custom keywords for NukeStudio export structures that define specific locations related to the job’s selected NIM project structure.

The NIM keywords include:
Keyword |
Description |
|---|---|
{nim_job_name} |
The name of the job in NIM |
{nim_job_number} |
The number of the job in NIM |
{nim_show_name} |
The name of the parent NIM show for the selected shots |
{nim_server_path} |
The full OS resolved path to the server project folder as defined in the Server administrative section of NIM |
{nim_show_root} |
The full OS resolved path to the SHOW_ROOT folder as defined in the NIM project structure |
{nim_shot_root} |
The full OS resolved path to the SHOT_ROOT folder as defined in the NIM project structure |
{nim_shot_plates} |
The full OS resolved path to the SHOT_PLATES folder as defined in the NIM project structure |
{nim_shot_render} |
The full OS resolved path to the SHOT_RENDERS folder as defined in the NIM project structure |
{nim_shot_comp} |
The full OS resolved path to the SHOT_COMPS folder as defined in the NIM project structure |
These keyword can be used the same as any native NukeStudio export keyword.
To view a full list of keyword, select the name of the item to change and right click to bring up the context menu. Choose Select Keywords to bring up a full list of available NukeStudio Keywords.