Job Overview
The front page of a job is the job overview with tabs for:
Job Details
Job Notes
Job Review
Job Details
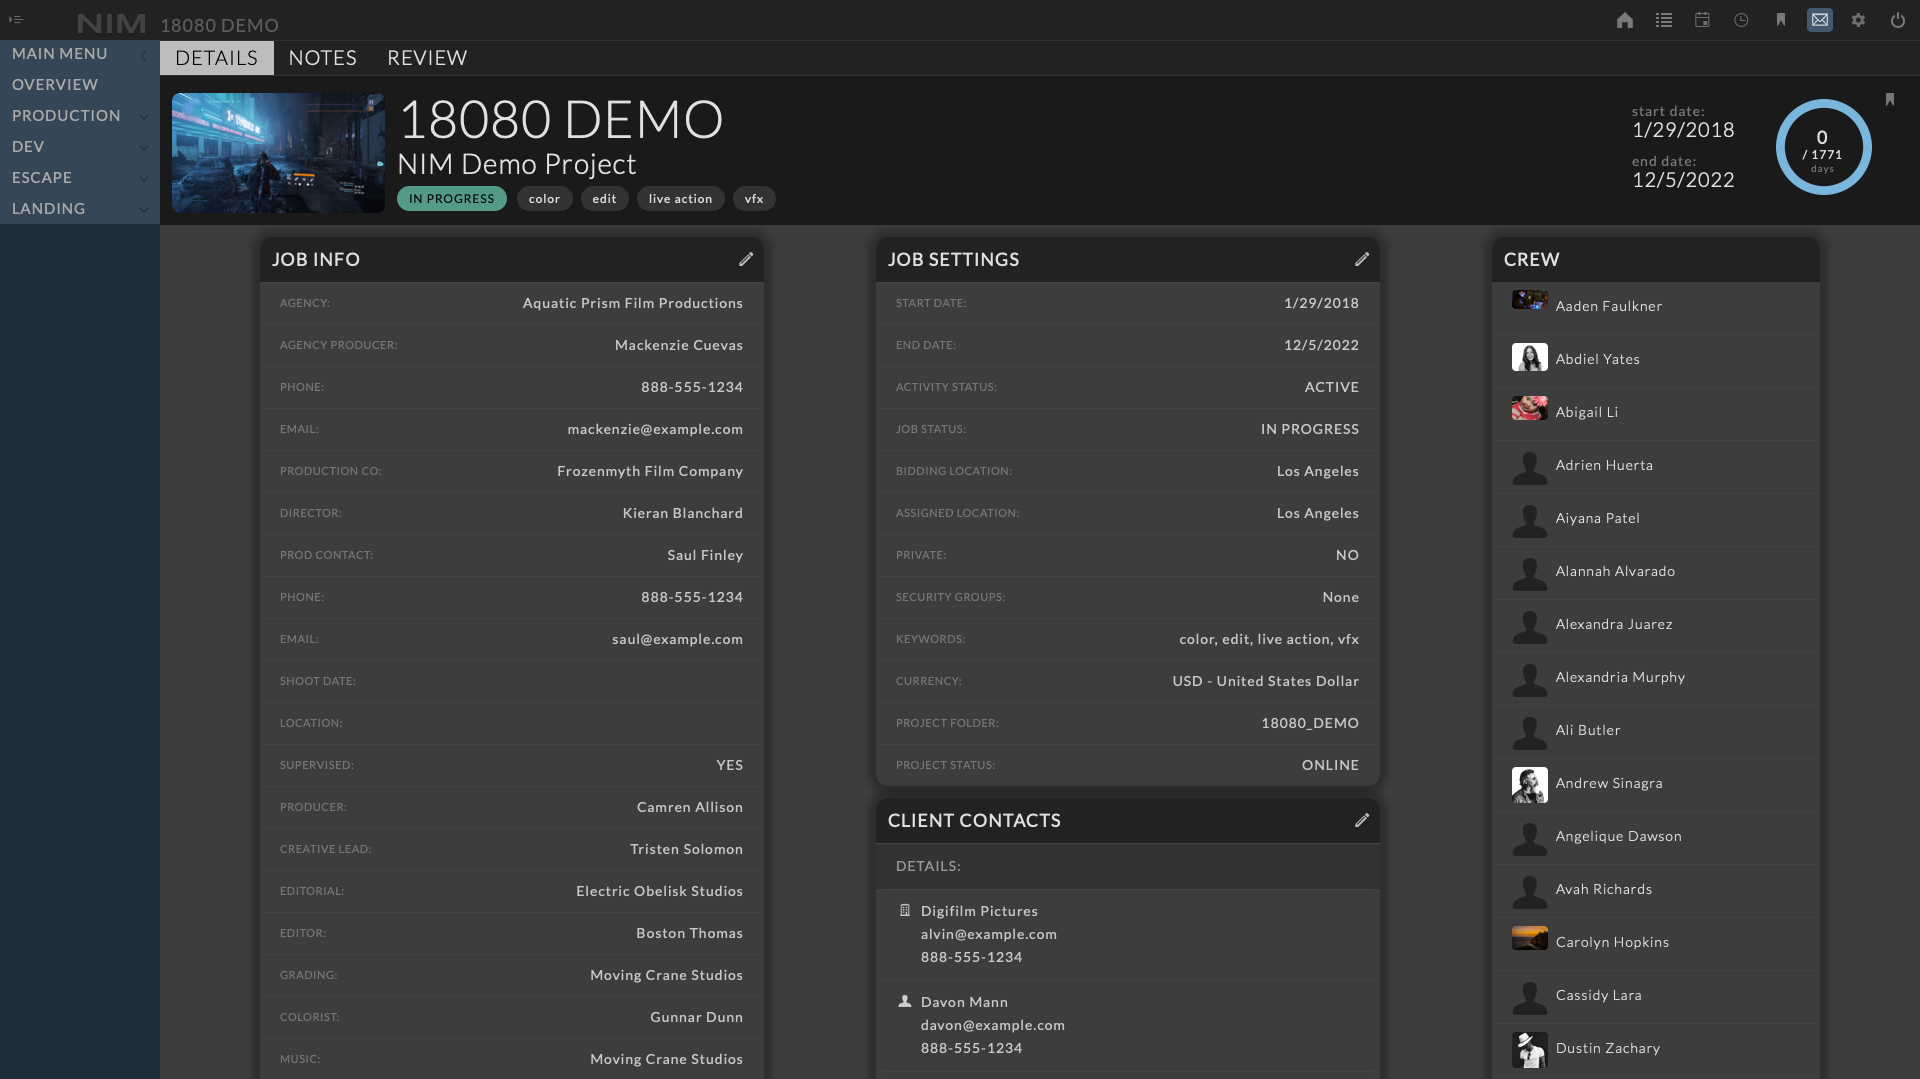
At the top of the Details tab is a dashboard with basic job information. Below the dashboard are panels containing job specific details for security, project settings, and relevant production information.
Dashboard
The main dashboard of the job overview displays the job icon, number, title, and description. These values can be adjusted in the Production > Config section of the job menu. For more information on editing these details please refer to the Job Configuration section of the documentation.

Job Bookmarks
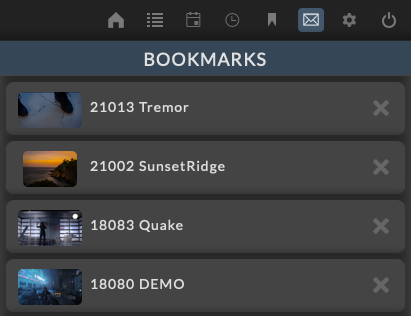
At the top right of the job details dashboard is the bookmark button. 
Clicking this button adds the job to the your list of bookmarks. Job bookmarks can be accessed via the NIM toolbar. Click on the bookmark button in the NIM toolbar to bring up your list of bookmarked jobs for quick job access.
Job Timeframe

At the far right of the dashboard is a chart showing the number of days scheduled for the job based on the jobs start and end date, as well as a countdown for the number of days left on the job.
Detail Panels
There are four sections under the details tab.
Job Info
Job Settings
Client Contacts
Crew
Clicking on the edit button on the editable sections will make them live to edit.
The information that is editable here is the same information that is available when working with jobs in the job list.
Job Info
The Job Info section includes default job fields and all custom fields. All fields in this section are optional and can be hidden via the Admin > Jobs - Options tab. The available field here are:
Agency |
The agency involved. |
Agency Producer |
The name of the agency producer. |
Phone |
The agency producers contact number. |
The agency producers email. |
|
Production Company |
The name of the production company. |
Director |
The director on the project. |
Production Contact |
The contact for the production company. |
Phone |
The contact number for the production company. |
The email contact for the production company. |
|
Shoot Date |
The production starting shoot date. |
Location |
The shoot location(s) |
Supervised |
Will the shoot be post supervised. |
Producer |
The studios producer on the project. |
Creative Lead |
The studios creative lead on the project. |
Editorial |
The editorial company assigned to the project |
Editor |
The editor’s name |
Grading |
The company handling color grading. |
Colorist |
The colorist’s name |
Music |
The music company assigned to the project. |
Mix |
The company handling the mix. |
Sound Design |
The company handling the sound design. |
Custom Job Fields |
Custom job fields created by the studio. These can be defined in the Admin > Jobs - Custom panel. For more information on job custom fields please refer to the Custom Job Fields section of the documentation. |
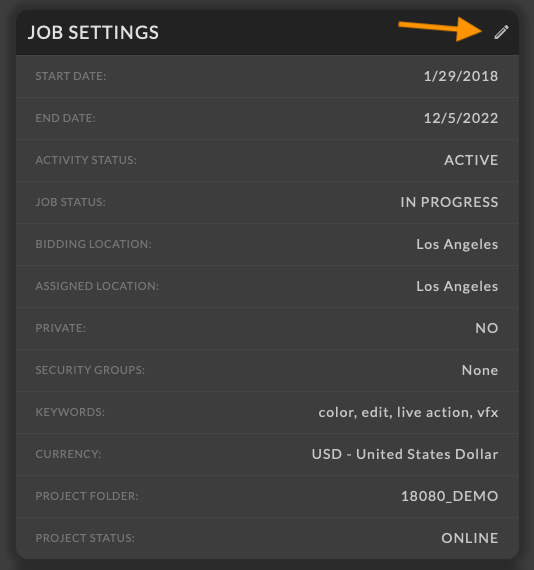
Job Settings
The job settings section contains data specifically related to the NIM job.
Start Date |
The start date of the job. This value is used to filter information when looking at calendars, schedules, task gantt charts, projections, and actualizations. This will not limit the data but will create a reference starting point. |
End Date |
The end date of the job. This value is used to filter information when looking at calendars, schedules, task gantt charts, projections, and actualizations. This will not limit the data but will create a reference ending point. |
Activity Status |
Determines if a job is Active or Inactive. Inactive jobs will be removed from dropdowns menus in other areas of NIM ie. Timecards |
Job Status |
Indicates whether or not the job is active. If the job is active it will show up in the dropdown menus of the NIM Connectors. This allows studios to manage/limit the job’s visibility independent of the job status. |
Bidding Location |
In facilities where one location / department may be bidding a job and another doing the actual work, NIM offers a way to define this. The bidding location is the location that bid the job, based on the list of locations available in Admin > Locations. |
Assigned Location |
The location assigned to do the work based on the list of locations available in Admin / Locations. The assigned location is used when allocating job actuals to a specific location in the studio actualizations. |
Private |
Private jobs are only available to users assigned to the crew. If the job is made private, you will instantly be added to the job. There must always be one users assigned to the crew of a private job. NIM ensures that you can not remove all crew members from a private job. Private jobs are indicated with a key icon: |
Security Groups |
You can add multiple security groups to a job. Only users who are in these security groups will have access to this job. Security groups are defined in the Admin > Security - Security Groups panel. |
Keywords |
You can add multiple job keywords to tag a job. The job keywords are defined in the Admin > Jobs - Keywords panel. |
Currency |
The currency of the job. This will determine the default currency for bids, expenses, and invoices created within the job, and the job actuals will be displayed in this currency. |
Project Folder |
Once a job has been brought online this is the name of the project folder. |
Project Status |
Displays if the job is ONLINE or OFFLINE. |

Crew Overview
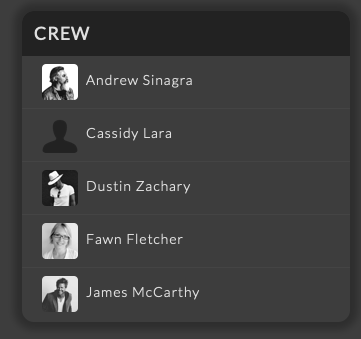
To the right of the detail panels is a quick view list of the crew assigned to the job.
Users can be added to the crew in the Production > Crew menu.
For more information on managing the job’s crew, please refer to the Job Crew section of the documentation.
Client Contacts
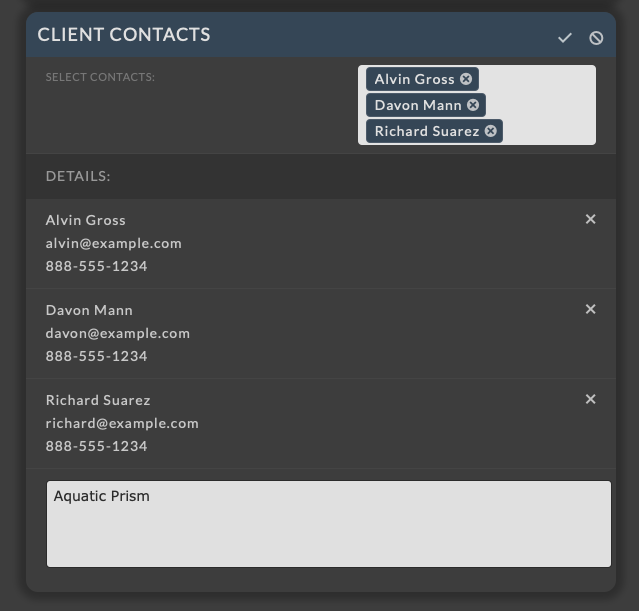
Contacts can be linked directly to jobs using the Client Contacts section of the Job Overview. Jobs that a contact is linked to will appear in the contact’s job list and be considered when calculating the contact’s margin in the Studio > Actuals - Client section.
To add a contact to a job, click on the  at the top right of the Client Contacts panel enter the edit mode for that panel. Click in the Select Contacts dropdown to select the contact you wish to add to the job. A list will appear of all available contacts. Clicking on the contact name in the dropdown list will add the contact to the the job. Multiple contacts can be added to the job by selecting additional contacts from the dropdown.
You can add additional details by typing in your own contact information in the supplied text field. Add any custom client information you require by typing directly in the text field. Click the checkmark at the top right of the Client Contacts panel to save the changes.
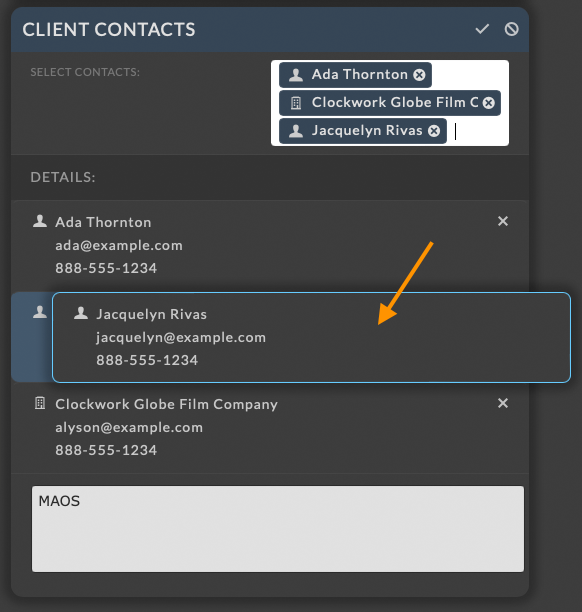
Contacts can be reordered by dragging and dropping each row within the UI. Hovering over a contact name will highlight a border around the contact row, indicating it can be dragged to a new position. To reorder the contacts, click and hold on the contact row and drag it to the desired position. Release the mouse button to drop the contact row in the new position.
To find out more about contact margins please refer to the Client Margins section.
For more information on managing the job’s client contacts, please refer to the Job Contacts section of the documentation.
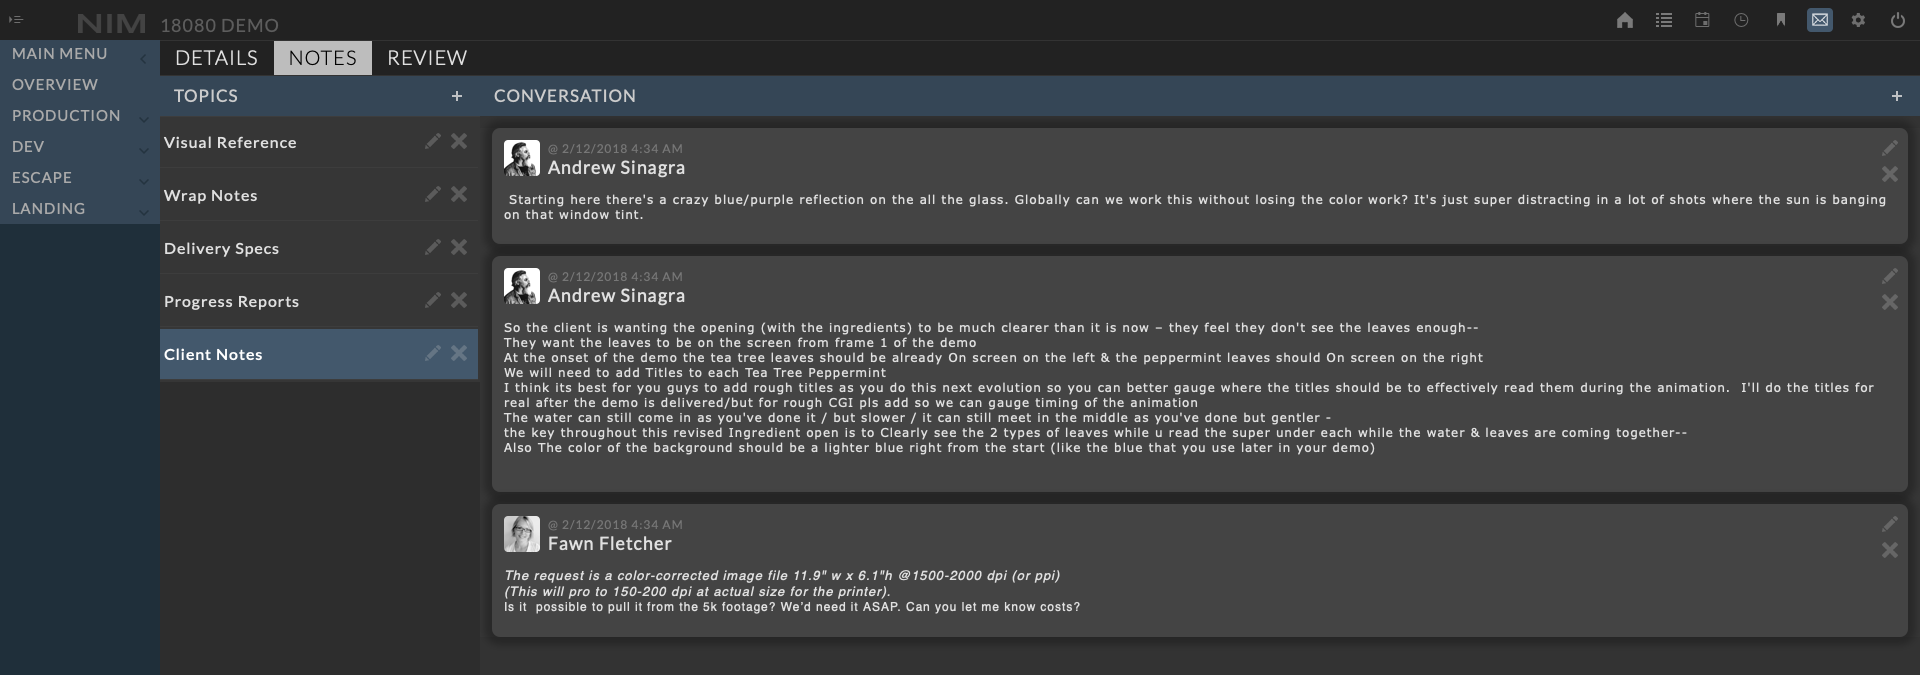
Job Notes
Job notes can be used to leave general notes on a job prior to and during production. Job notes are divided into groups via Topic and Conversations. Topics are a way to group notes within a conversation. Multiple topics can be created to group the conversations as needed.
Add Note
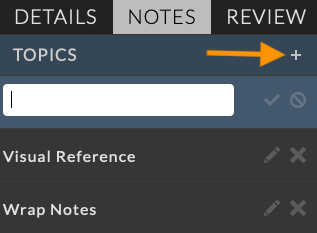
To add a note, you first need to create a Topic for the note.
Click the  in the Topics column on the left to create a new topic.
Enter a name for the new topic and click the checkmark to save it.
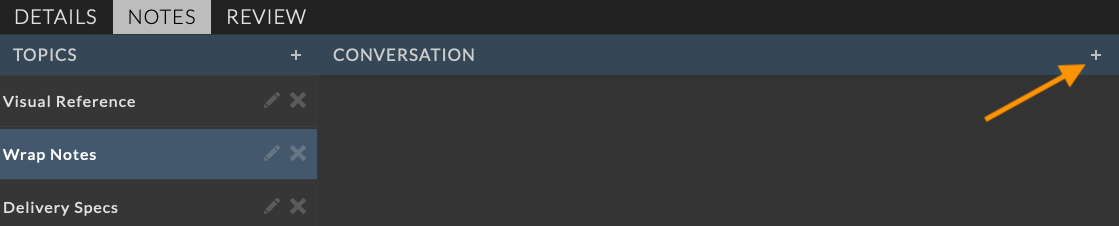
When a topic is selected, a appears on the right of the page, in the Conversation area. Clicking this button will create a new note in this topic. Text can be added and formatted in each note. Click the checkbox on the right to save the note. Click the Cancel button to return to the view mode without saving the note.
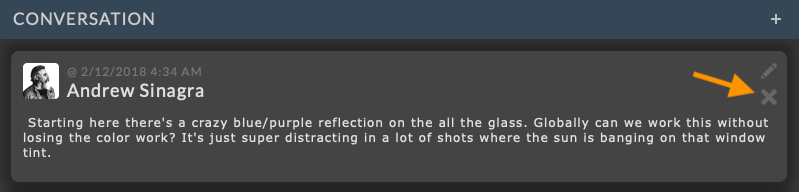
Edit Note
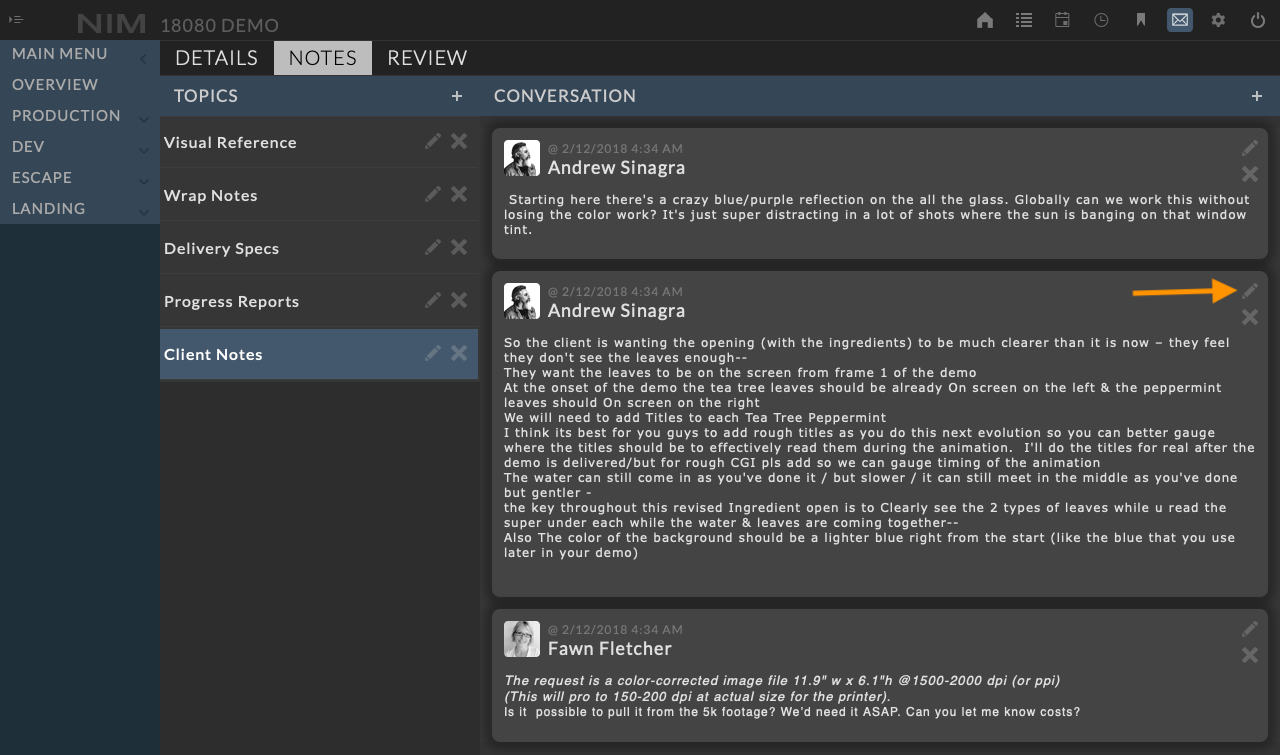
To edit a note, click the button at the top right of the note. Make the necessary changes and click the check mark to save. Click the Cancel button to return without saving changes.
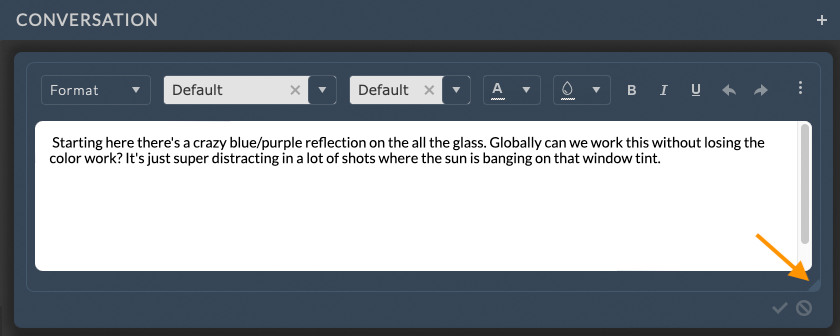
While editing a note, the text area can be expanded to fit the content you are entering.
To resize the text area, click and drag the resize handle at the lower right. Letting go of the resize handle will keep the text area at the new size.
Delete Note
Delete a conversation entry by clicking the  button next to the edit button at the top right of the note. You will be prompted to confirm deletion of the note.