NIM VM Migration
NIM 6.0 migrates the NIM VM operating system to Ubuntu 22.04 LTS. This provides multiple changes under the hood to improve performance and enable the groundwork for future NIM feature updates. Although the NIM 5.x operating system has reached its end of life, the VM will continue to operate exactly as it has in the past. Please note, there will be no further security updates available to support prior versions of the NIM VM operating system.
Note
All future NIM updates will be released for VMs running version 6.x+ and be incompatible with prior versions of NIM.
As with previous versions, the NIM VM is available in two formats:
Virtual Box - https://www.virtualbox.org
VMware - https://www.vmware.com
To find out which VM host software will fit your needs, please visit their respective sites.
The base operating system as well as supporting packages have been updated on the default NIM VM. These include:
Ubuntu 22.04 LTS
Apache 2.4.57
PHP 8.2.6
MySQL 8.0.33
Python 3.10.6
Note
We have also updated our UI library and related CSS. With this change, various UI elements have changed how they can be targeted. Please check any custom code implemented on your NIM VM for compatibility with the updated versions.
Migrating to NIM 6.0
There are two options to migrate your current NIM installation to NIM 6.0:
Option 1: Migrate your current NIM VM settings and data to a new NIM 6.0 VM. Please refer to the Migrate Existing VM to New VM section of the documentation for instructions on how to migrate your current NIM VM to a new NIM 6.0 VM.
Recommended - estimated time: 30 minutes
Option 2: Manually update your current NIM VM to NIM 6.0 specifications. Please refer to the Manually Update Existing VM section of the documentation for instructions on how to manually update your current NIM VM to NIM 6.0 specifications.
Advanced - estimated time: 2 hours
Important
Both migration options require that your NIM VM be running a minimum of NIM 4.0 before starting the migration. If you are running a version of NIM prior to 4.0, please update to NIM 4.0 before proceeding with the migration to NIM 6.0. Instructions on updating to NIM 4.0 from earlier versions can be found in the Migrating to NIM 4.0 section of the documentation.
Migrate Existing VM to New VM
The transition to NIM 6.0 can be completed via a migration to a new VM instead of the typical software update. We have provided tools to help simplify this process and copy your current NIM database to NIM 6.0. After following the below steps you should be able to login to NIM 6.0 and continue working right where you left off.
Estimated Time: 30 minutes
Step 1: Download NIM 6.0
Download the appropriate NIM 6.0 OVA, VirtualBox or VMware, from the downloads section of the NIM Client Portal at https://client.nim-labs.com.
Note
The OVA for each host application comes pre-installed with the corresponding host tools.
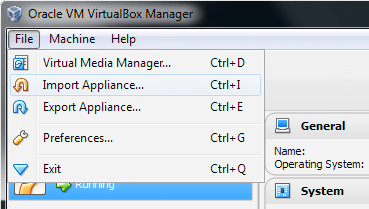
Step 2: Import NIM 6.0
Import the downloaded OVA into the corresponding host application. For help on installing an OVA, please refer to the Virtual Appliance section of the documentation.
Step 3: Start the NIM 6.0 VM and login with the default user credentials
username: nim
password: password
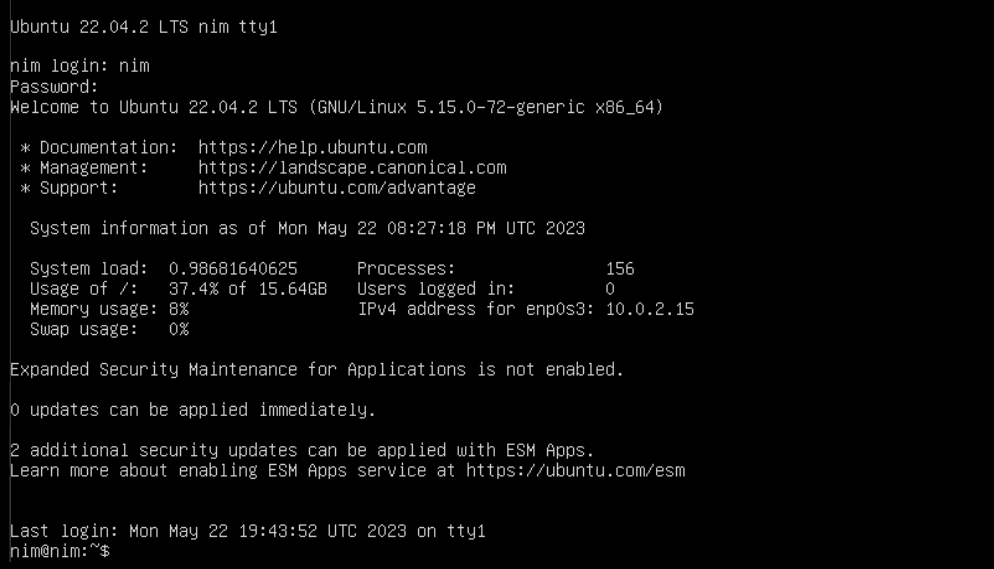
For help logging into the VM command line, please refer to the Login Credentials section of the documentation.
Step 4: Configure a temporary IP address
To make sure everything is up and running before switching over to NIM 6.0, you should configure a temporary IP address. This address will be used to access NIM 6.0 during setup, but can be updated at completion to your existing NIM 3.x IP address so all users and connectors will continue to access NIM as normal.
Set the NIM 6.0 IP address by using the following command on the VM command line:
sudo ~/nim-setup-networkYou will be asked to provide the following information:
IP Address - This should be a unique IP address on your network
Subnet Mask - Enter the subnet mask used for your network
Gateway - Enter the gateway IP address
DNS - Enter the IP address of the DNS used for your network
For additional information on configuring the VM network interface, please refer to the Networking section of the documentation.
Step 5: Connect Shared Folder & Mounted Servers
If you used VirtualBox Shared Folders or mounted servers on your original NIM VM, you will need to re-establish those connections on this new VM.
For Shared Folders, simply select the same folder paths used in the existing NIM installation.

If there were servers mounted directly on the existing NIM installation using the /etc/fstab file, please copy those settings to the NIM 6.0 /etc/fstab file.
For more information on using Shared Folders or Mount Points, please see the Mounting Servers section of the documentation.
Step 6: Setup NIM Media Path
The NIM Media Path for the NIM 6.0 installation needs to point to the same location as the existing NIM installation. Use the nim-media-path script to set the path:
sudo ~/nim-media-path "/path/to/media"To find the current path used for NIM media, enter the following command on the NIM VM command line:
ls -la /n/mediaExample Result:

The path returned after the –> is the path that is currently used. Use this value from your current NIM VM to set the NIM 6.0 media path.
Step 7: Custom Changes
Be sure to copy over any custom changes you may have made to your current NIM VM to the new NIM 6.0 VM including:
SSL certificates
Security settings ( nim-ssl )
Custom VM user/group accounts
Apache Custom User
Event Hooks
Reports
Create Folder Scripts
Step 8: Install NIM license files
In a web browser enter the temporary IP address you defined for NIM 6.0. This should bring you to the licensing page. You can use your existing license files (nim.lic and portal.nim) for NIM 6.0.
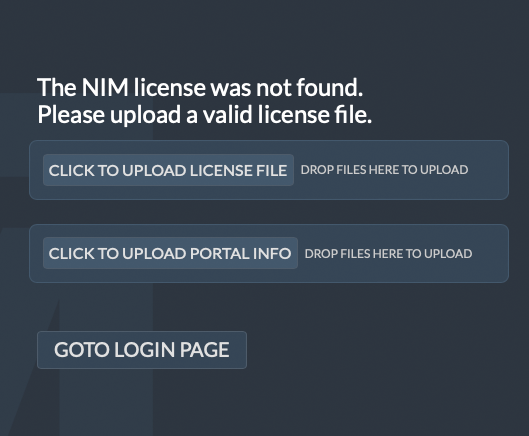
For more information on licensing NIM please refer to the Licensing section of the documentation.
Note
If you need new license files sent to you please contact support@nim-labs.com
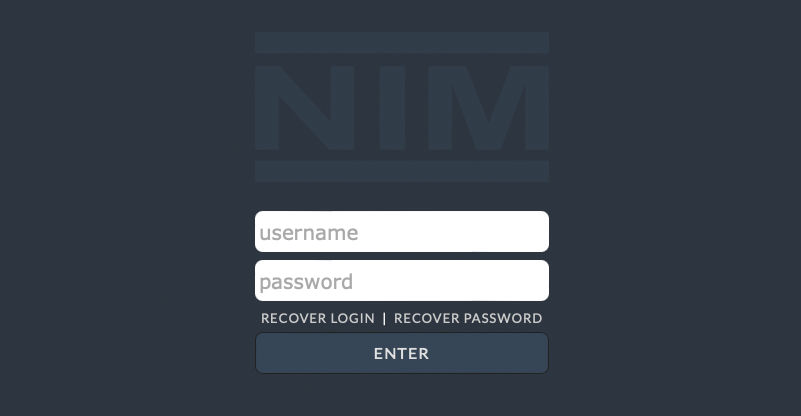
Step 9: Log in to NIM 6.0
Log in with the default user credentials to verify NIM 6.0 is active and accessible.
username: nim
password: password
Once logged in, goto the HELP/Licensing menu and verify the version is 6.0.x
After verifying the version, logout of NIM.
Step 10: Export your current NIM VM database
Login to your existing NIM VM command line and enter the following command:
sudo ~/nim-db-export "/home/nim/database-backups"This will create a file in “/home/nim/database-backups” of your existing NIM database. If you wish, you can change the export path to a more convenient location.
The created file will be named nim_db_export.date.sql where date will be the current date in YYMMDD format.
Step 11: Copy the exported .sql file to the NIM 6.0 VM
There are several options on how to copy this file over to the new NIM 6.0 VM. Use the method that works best for you.
SFTP - Use an SFTP application such as Transmit on OSX or FileZilla on Windows to connect to your current NIM VM and download the nim_db_export.date.sql file to your local computer. Then use the SFTP application to connect to the NIM 6.0 VM and upload the file.
Shared Server - Now that your project servers are accessible on both VMs, you can copy the export directly from it’s location to a shared location on the server using the command:
cp "/path/to/nim_db_export.date.sql" "/target/path/on/server"Replace the “/target/path/on/server” with a destination on the shared server that is accessible by the NIM 6.0 VM.
Now you can either copy the export local to the 6.0 VM or use this shared location to import the database in the next step.
Step 12: Import your NIM database export on the NIM 6.0 VM
Login to the new NIM 6.0 VM command line and enter the following command replacing the path with the actual path to the exported sql file:
sudo ~/nim-db-import "/path/to/nim_db_export.date.sql"Note
This may take a while depending on the size of your database. In testing, a large database of around 150MB took approximately 10 minutes to import. Your results may vary.
Step 13: Log in to NIM 6.0
At this point NIM has been updated with your existing database and you should be able to login with your normal user credentials.
Login and verify the following:
All data looks correct
Icons and review media are accessible
You are able to upload review media and/or icons
You are able to bring a job online
If any of these items are not functioning as expected, please review your steps and confirm that all folder permissions are correct.
Step 14: Update IP Address
Now that everything is copied over and working properly, set the NIM 6.0 IP address to that of your current NIM VM.
Note
Be sure to power down your current NIM VM or change the IP address prior to updating the NIM 6.0 IP as you will receive a network conflict if two VMs are on with the same address.
As in Step 4, set the NIM 6.0 IP address by using the following command on the VM command line:
sudo ~/nim-setup-network
Complete
Your NIM 6.0 VM is ready for production!
Access the new VM at the address you would normally login.
Important
Users may need to flush their browser cache prior to loading NIM 6 for the new version to work properly.
Additionally, please be sure to update your NIM connectors to the latest version!
If you have questions regarding the VM migration, please do not hesitate to contact support@nim-labs.com.
Manually Update Existing VM
The transition to NIM 6.0 can be completed via standard software updates on your current VM. A direct software update requires manual updating of the core operating system and system packages. We recommend this path for users who are comfortable using the VM command line and have an intermediate level of understanding of the Linux operating system. If you are not comfortable with these requirements, please refer to the Migrate Existing VM to New VM section of the documentation.
Estimated Time: 2 hours
Important
If you have made any custom changes to your NIM VM including configuration changes and package installations, you may encounter additional prompts throughout the installation process. Please be sure to read all prompts carefully and select the appropriate option for your installation.
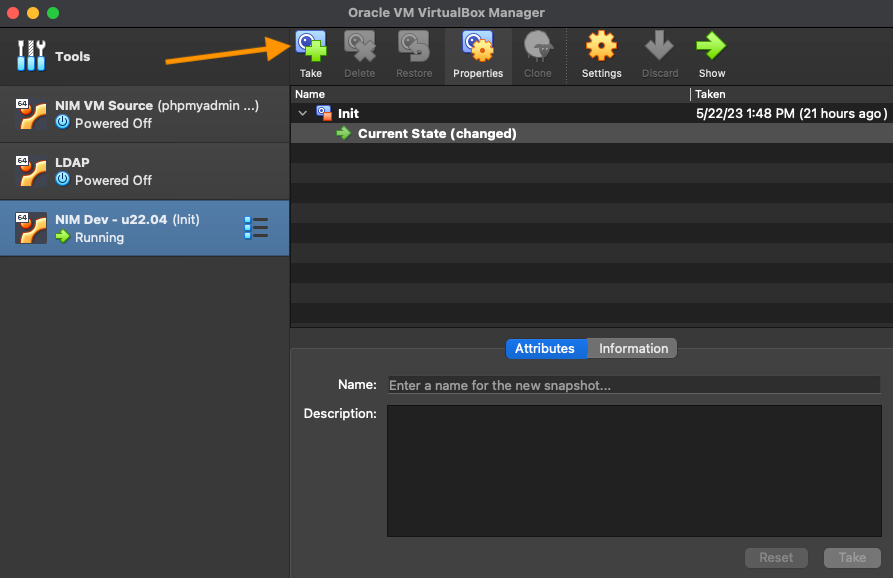
Step 1: Snapshot current VM
First, we want to take a snapshot of your current VM. This will ensure that you have a backup of your VM in case you need to revert the changes at any point during the update process. To take a snapshot, first shutdown your VM and then take a snapshot using your VM software.
If you are using VirtualBox, you can take a snapshot by selecting the VM and then clicking the Snapshots button in the top left corner of the window. Click the camera icon to take a snapshot.
Note
Your VM host software may have a different method for taking snapshots. Please refer to the documentation for your VM host software for more information.
Step 2: Upgrade existing packages
Now we are ready to update the existing packages on your VM. This will ensure that the latest versions of all packages are installed. Enter the following prompts on the VM command line to update the packages.
$ sudo apt update
$ sudo apt -y upgrade
$ sudo apt -y autoremove
$ sudo reboot
Step 3: Update OS to 20.04 LTS
The base operating system can not be updated directly to 22.04 LTS, so we will first update to 20.04 LTS and then to 22.04 LTS. Follow the prompts to complete the update.
$ sudo do-release-upgradeYou will be asked the following questions during the install process.Please answer with the value in [] as follows:Do you want to start the upgrade? Continue: [Y] Configuring libc6: Restart services during package upgrades without asking? [Y] Configuring lxd: LXD snap track? [4.0] Configuring phpmyadmin: Perform upgrade on database for phpmyadmin with dbconfig-common? [Yes] Configuration file `/etc/update-motd.d/91-release-upgrade` ==> Modified (by you or by a script) since installation: ==> Package distributor has shipped an updated version. What would you like to do about it? [Y] Configuration file `/etc/update-motd.d/90-updates-available` ==> Modified (by you or by a script) since installation: ==> Package distributor has shipped an updated version. What would you like to do about it? [Y] Remove obsolete packages? Continue: [Y] Restart required: To finish the upgrade, a restart is required. If you select 'y' the system will be restarted. Continue: [Y]Once your VM has restarted you will have successfully upgraded the OS and see Ubuntu 20.04 LTS at login. Now we can upgrade to 22.04 LTS.
Step 4: Update OS to 22.04 LTS
Now we will update the operating system to 22.04 LTS. Follow the prompts to complete the update.
$ sudo do-release-upgradeYou will be asked the following questions during the install process.Please answer with the value in [] as follows:Do you want to start the upgrade? Continue: [Y] You may encounter the following message about some services that could not be restarted. If you do receive this message, choose OK to continue with the upgrade. Configuring libc6:amd64 Failure restarting some services for GNU libc upgrade The following services could not be restarted for the GNU libc library upgrade: mysql You will need to start these manually by running `invoke-rc.d <service> start`. [OK] Configuring phpmyadmin: Deconfigure database for phpmyadmin with dbconfig-common? [No] Configuration file `/etc/logrotate.d/apache2` ==> Modified (by you or by a script) since installation: ==> Package distributor has shipped an updated version. What would you like to do about it? [Y] Configuration file `/etc/update-motd.d/95-hwe-eol` ==> Modified (by you or by a script) since installation: ==> Package distributor has shipped an updated version. What would you like to do about it? [Y] Remove obsolete packages? Continue: [Y] Restart required: To finish the upgrade, a restart is required. If you select 'y' the system will be restarted. Continue: [Y]Once your VM has restarted you will have successfully upgraded the OS and see Ubuntu 22.04 LTS at login. Now we can update the VM packages and configuration files.
Step 5: Update packages and reboot
Now we will download a script to handle the rest of the package updates and reboot the VM.
$ sudo wget -O /home/nim/tmp/nim6_package_installer.sh -L  https://bit.ly/nim6-package-installer
$ cd ~/tmp
$ sudo chmod +x nim6_package_installer.sh
$ sudo ./nim6_package_installer.sh

        Begin installation?
        [Y]

        Reboot now?
        [Y]
Upon reboot, your VM will now be successfully updated to be compatible with NIM 6.0. You can now proceed with the installing the NIM 6.0 update.
Step 6: Update VirtualBox Guest Additions (VirtualBox Hosts Only)
If you are using VirtualBox as your host software, you will need to manually update the VirtualBox Additions to the latest version. This will ensure that the host software will be able to communicate directly with the VM and provide services such as Shared Folders. To update the VirtualBox Additions, follow the steps below.
First you will need to locate the VirtualBox Additions ISO file, VBoxGuestAdditions.iso. This file is located in the VirtualBox installation directory on your host machine. The location of this directory depends on the host operating system.
On OSX, the VBoxGuestAdditions.iso file is typically located at:/Applications/VirtualBox.app/Contents/MacOS/VBoxGuestAdditions.isoOn Windows, the VBoxGuestAdditions.iso file is typically located at:C:\Program Files\Oracle\VirtualBox\VBoxGuestAdditions.isoOnce you have located the VBoxGuestAdditions.iso file, you will need to mount this file to the VM. To do this, open the VirtualBox application and select the VM you are updating. Then select the Settings option from the menu.In the Settings window, choose the Storage tab, then select the “Empty” storage device under “Controller: IDE”.Then click on the Select Optical Disk icon on the right side of the window.In the popup menu, select Choose A Disk File.Then navigate to the VBoxGuestAdditions.iso file, select it and click the Open button.Then click the OK button to close the Settings window.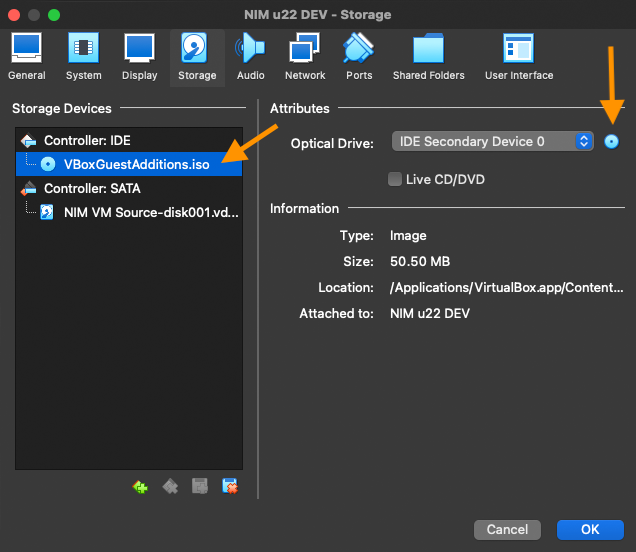 Next, follow the command line steps below to update the VirtualBox Additions.$ sudo mount /dev/cdrom /media $ cd /media $ sudo ./VBoxLinuxAdditions.run $ sudo reboot
Now you can go back to the Optical Drive settings in VirtualBox and unmount the VBoxGuestAdditions.iso file. Click on the “Select Optical Disk” icon on the right side of the window and choose “Remove Disk from Virtual Drive”. Then click the OK button to close the Settings window.
The VirtualBox Guest Additions update is now complete. You can now login to the VM and continue with the installation of NIM.
Step 7: Download and Install NIM 6.0 Update
Finally we will download and install the latest NIM 6 update. First we will download the latest NIM 6.0 update from the NIM Client Portal and copy it to the ~/nim_updates directory on your VM. Then we will run the installer. The name of the update file will vary depending on the version of NIM you are updating to.
$ cd ~/nim_updates
$ tar -xvf NIM_Update_v6-X-X-XXXXXX.tar
$ cd NIM_Update_v6-X-X-XXXXXX
$ sudo ./nim-update-local
Once the installation is complete, you will be ready to login to NIM 6.0.
Complete
Your NIM 6.0 VM is ready for production!
Important
Users may need to flush their browser cache prior to loading NIM 6 for the new version to work properly.
Additionally, please be sure to update your NIM connectors to the latest version!
If you have questions regarding the VM migration, please do not hesitate to contact support@nim-labs.com.