Timecard Management
All timecards can be managed through the studio and job timecard panels. Users with permission based access can use these sections to analyze timecards over a range of data, update existing timecards, create new timecards for other users, as well as change timecard approval status. In addition to the timecard calendar and list view available in User > Timecards, the management views include overview charts displaying time allocations, a day view for heat-map style selection, and a user grid for timecard totals.
Studio Timecards
Studio timecards provides a complete overview of all timecards entered by users in NIM.
To load the Studio Timecards section, select Studio > Timecards from the Main Menu.
Five views are available:
Overview |
Graphs displaying various allocations of time over the given filter parameters |
Calendar |
Displays all timecards in a standard calendar view |
Timecards |
Displays all timecards in a paginated list for filtering and export |
Days |
Contains a heat-map style view of users and days with daily timecard totals |
Users |
A grid view of user time with breakdowns of time types as well as total hours |
Timecard Filters
Filters shared by all studio timecard views are available at the top right of the panel.
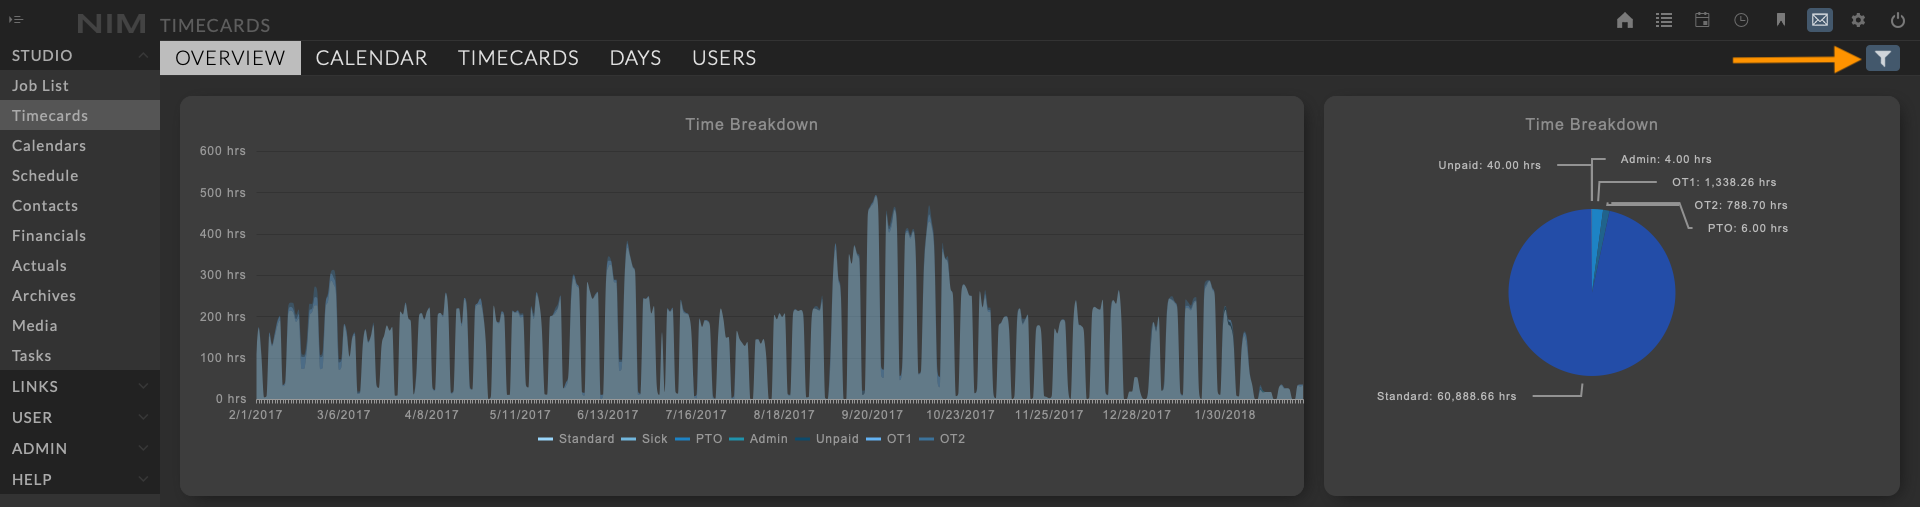
To open the filter options, click the filter button at the top right of the dashboard. When a filter is active, the filter button will be highlighted. Upon opening the filter panel, the active filters will be highlighted as well.
Multiple filters may be applied to focus the data to only the information needed.
Note
By default, the time filters are applied diplaying timecards for the current and previous month.
There are four filtering options:
Job
Location
User
Date (Start / End)
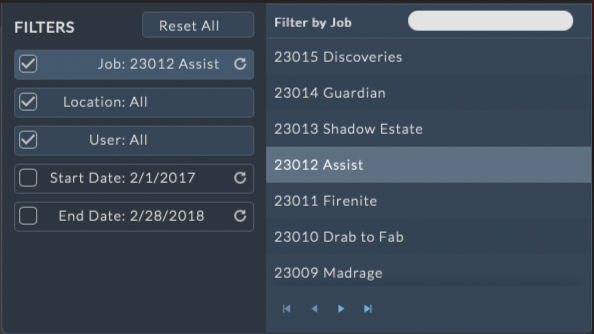
Job Filter
Studio Timecards may be filtered by a single job.
Clicking on the Filters / Job button from the filter list will expand the filter panel allowing the user to select a job.
Selecting a job in the list will immediately apply the filter.
Note
When filtering by job, the start and end date filters are disabled so all timecards on the job will be displayed. The time filters can be applied by clicking on the checkbox next to Start Date and End Date to re-enable the filter.
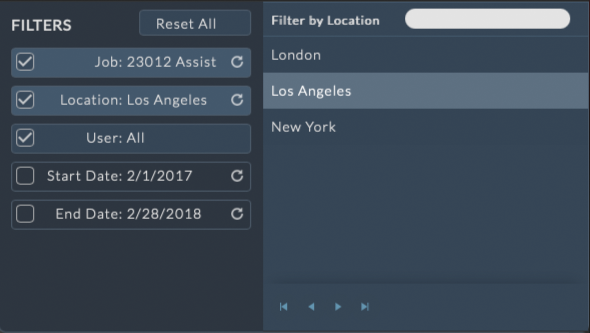
Location Filter
Studio Timecards may be filtered by a single location.
Click on the Filters / Location button from the filter list to reveal the location options.
Selecting a location in the list will immediately apply the filter.
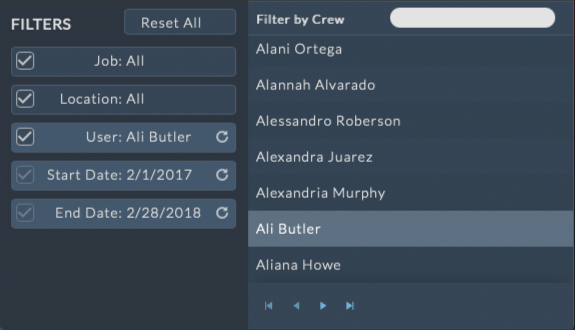
User Filter
Studio Timecards may be filtered by a single user.
Click on the Filters / User button from the filter list to reveal the user options.
Clicking on a user in the list will immediately apply the filter.
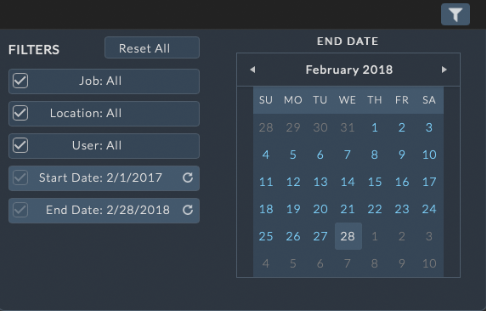
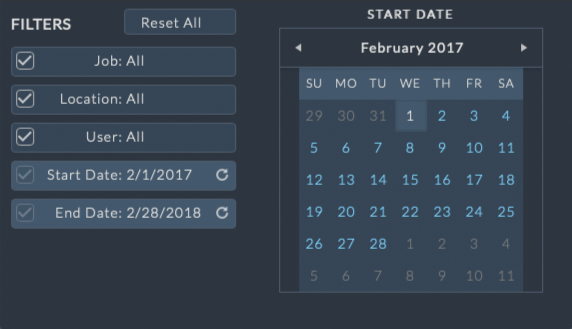
Date Filter
Studio Timecards may be filtered by date.
Click on the Filters / Start Date or End Date button from the filter list to reveal a mini-calendar for date selection.
Clicking on a date in the mini-calendar will immediately apply the filter.
Clearing Filters
Filters may be individually enabled and disabled by clicking the checkmark box to the left of each filter.
 - enables the filter
 - disables the filter
To reset all filters, click the Reset All button at the top of the Filter panel
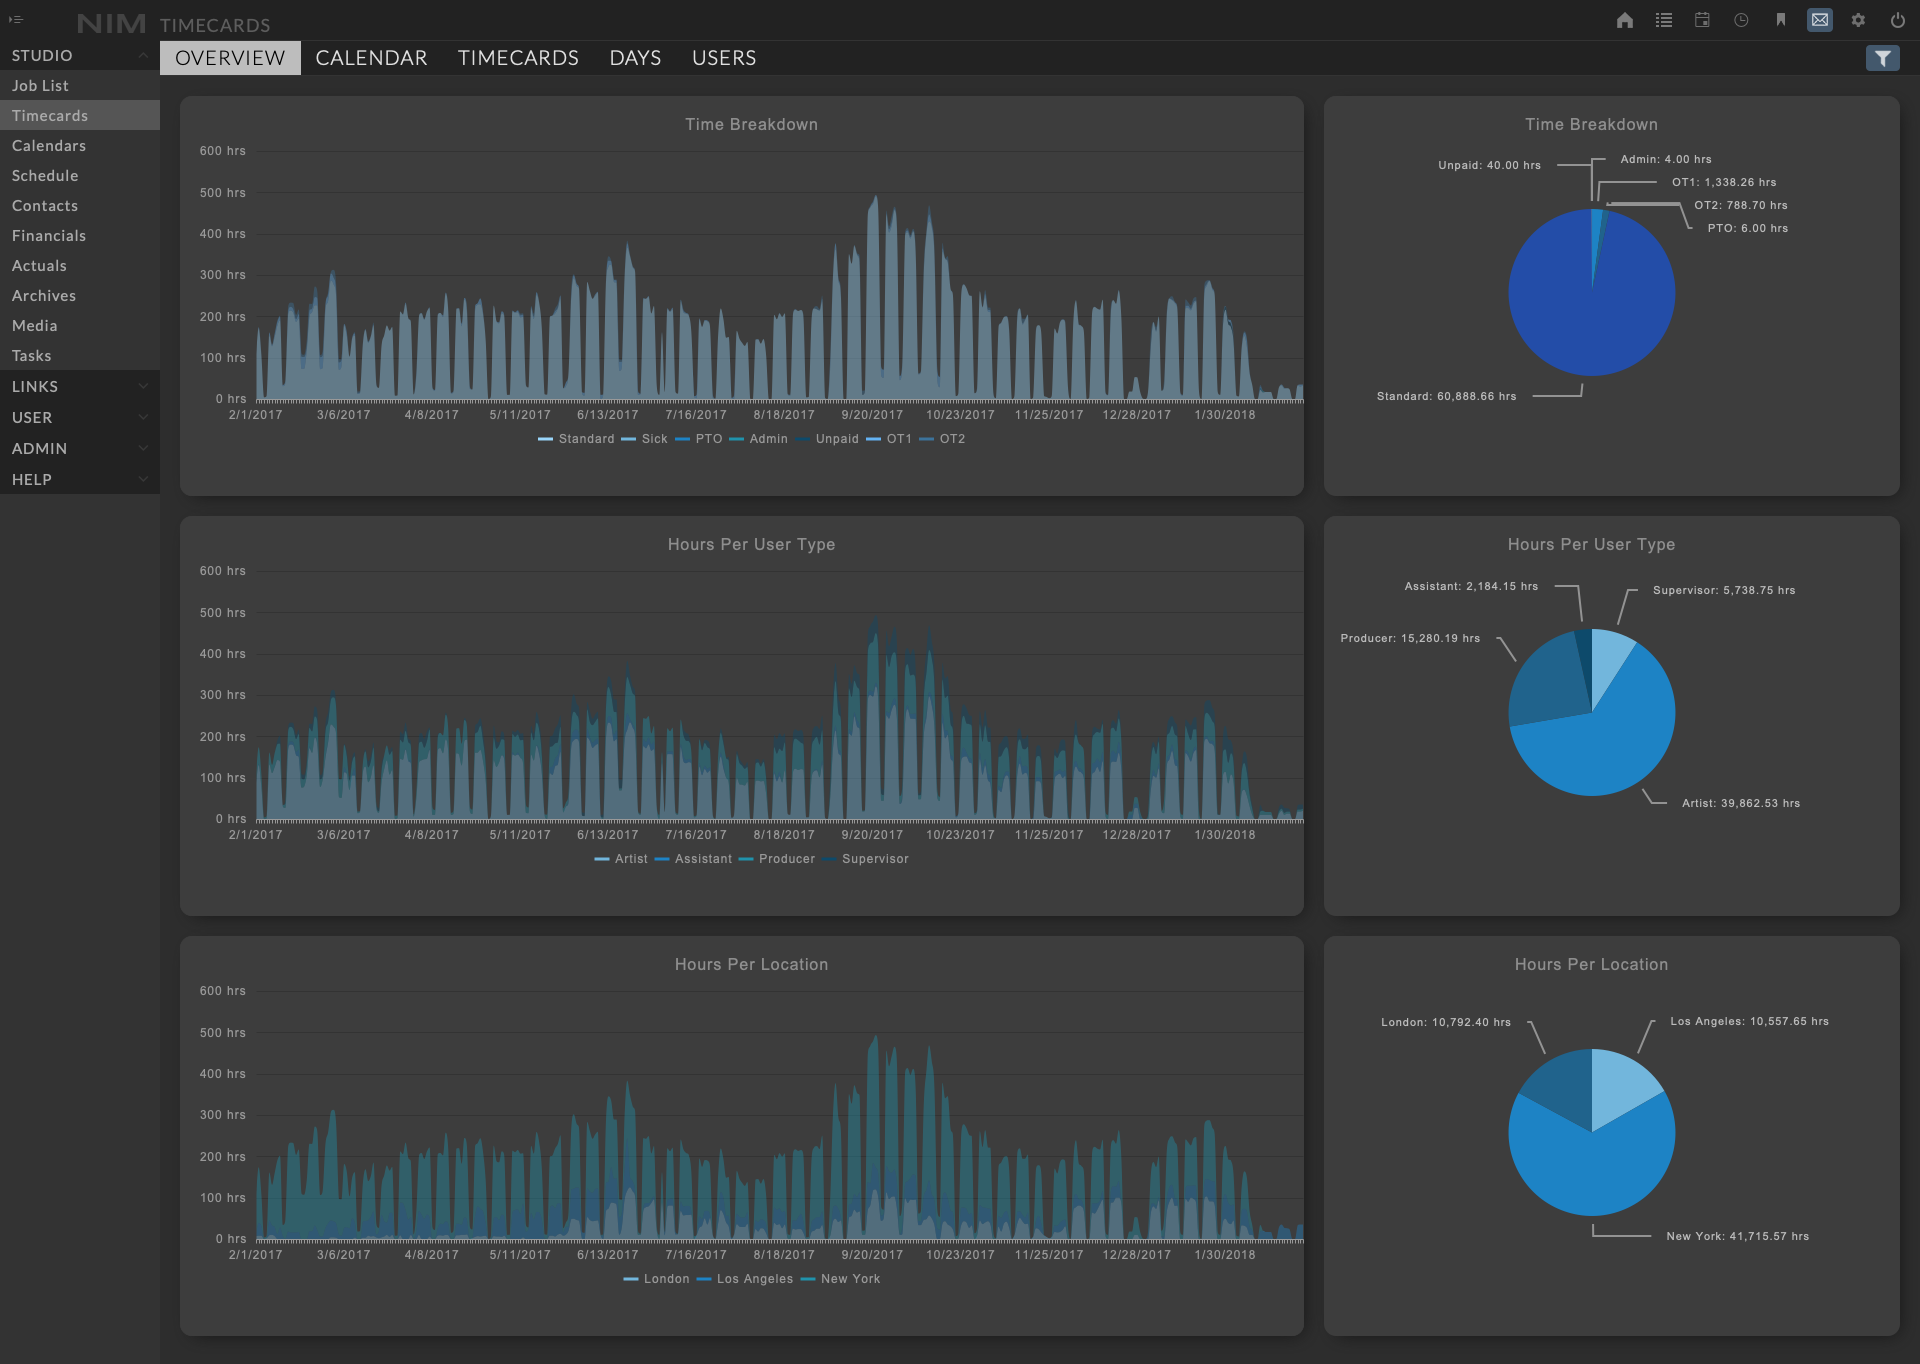
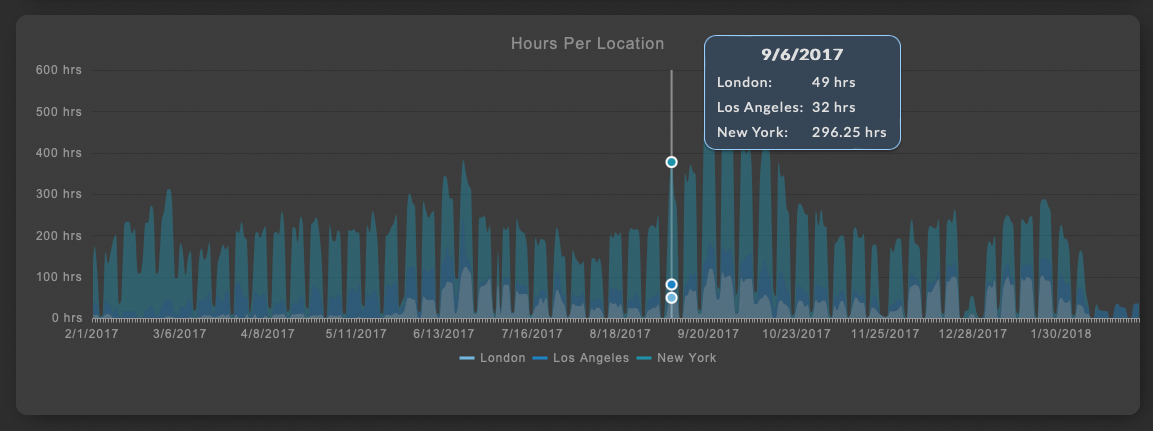
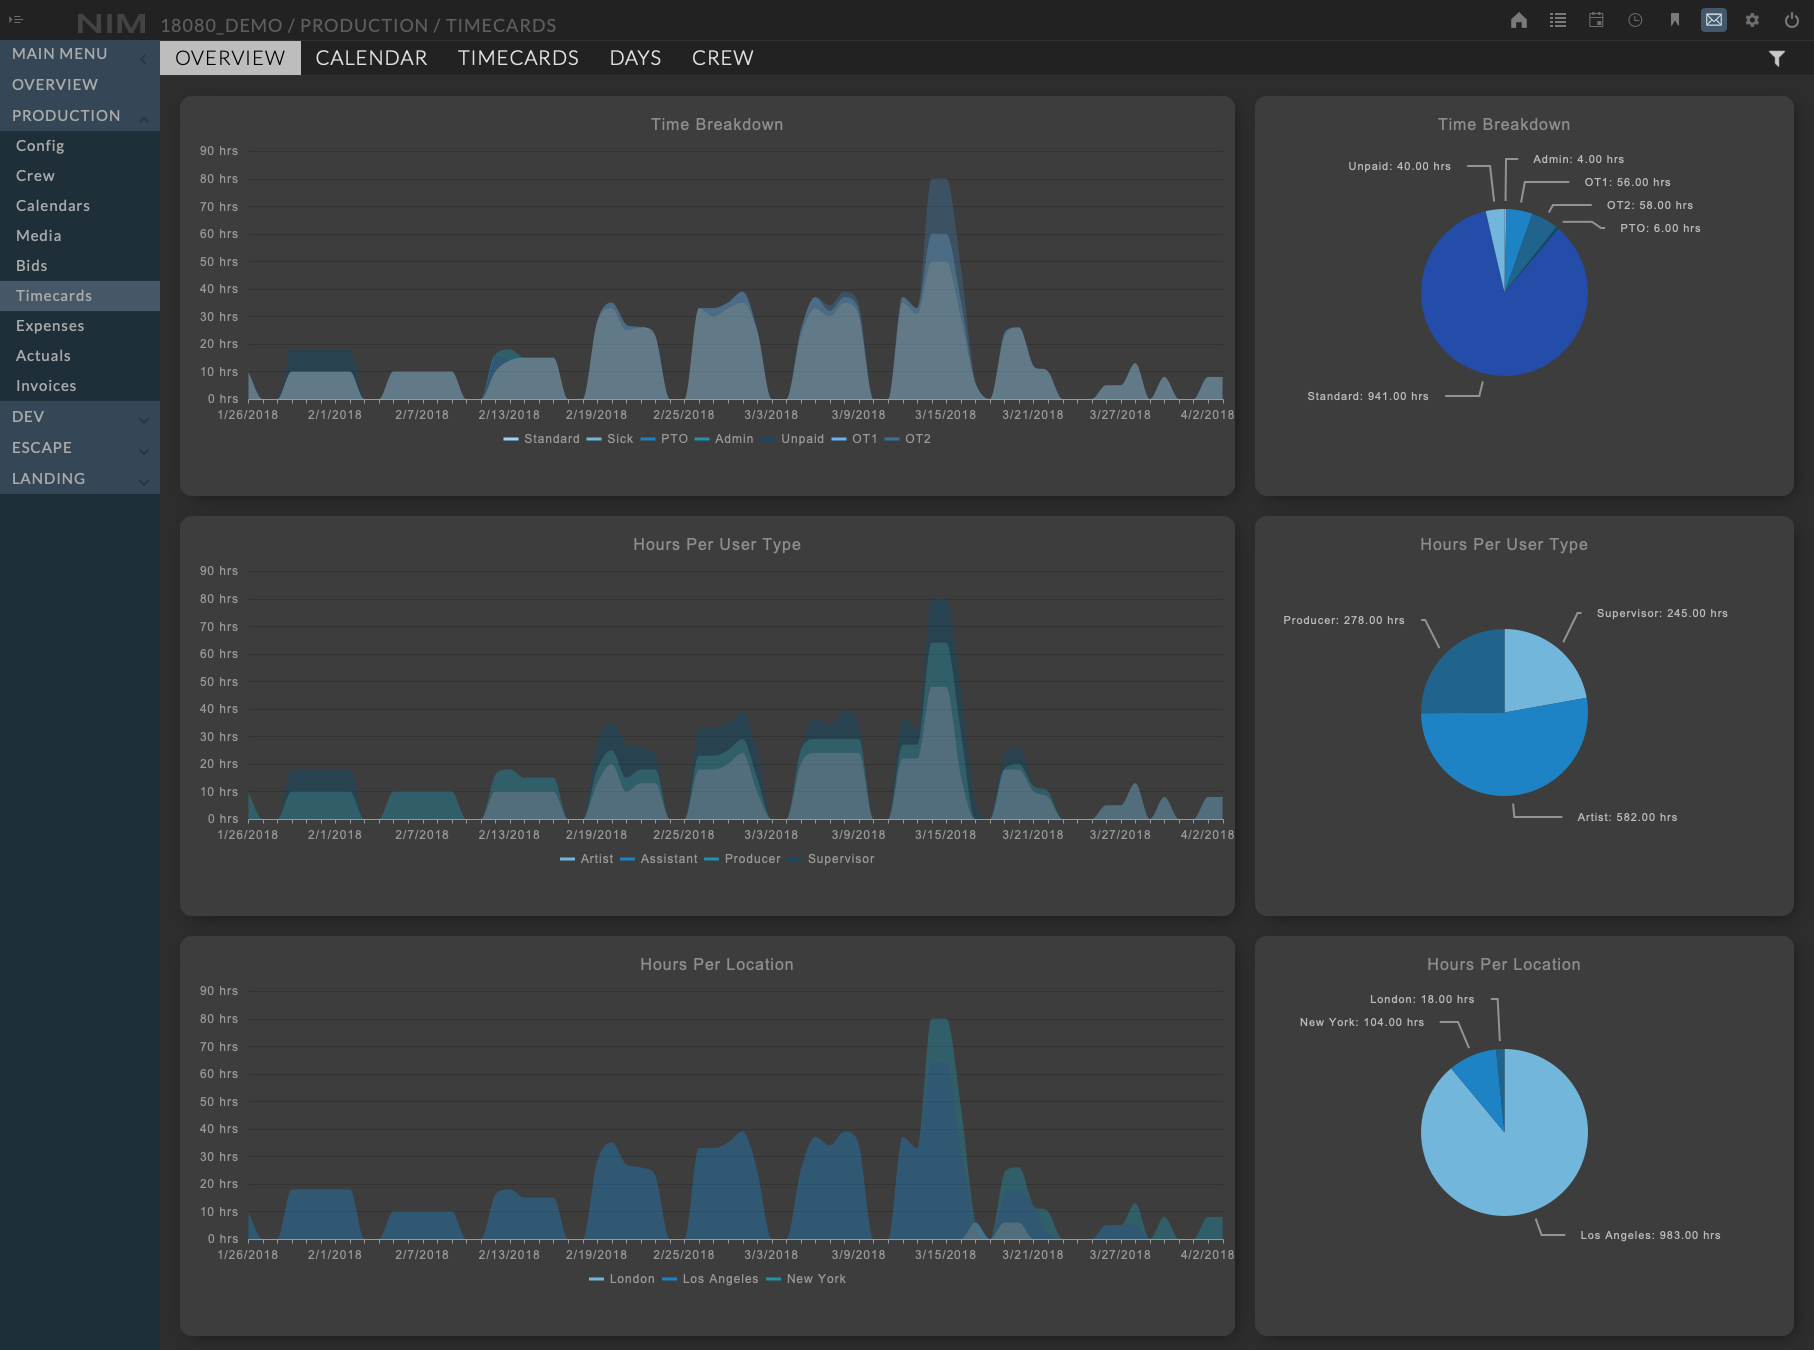
Timecard Overview
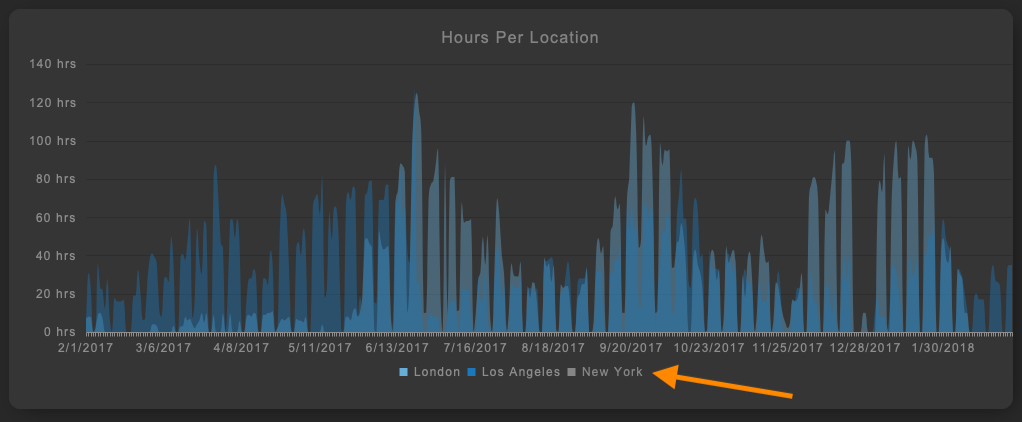
The Timecard Overview displays a series of charts depicting the breakdown of time for the given filter period.
Charts include:
Hours Per Time Type over time
Hours Per Time Type by percentage
Hours Per User Type over time
Hours Per User Type by percentage
Hours Per Location over time
Hours Per Location by percentage
Hovering the cursor over the chart will reveal detailed information about that particular area of data.
The chart may also be filtered by clicking on items in the chart legend. Hovering over the item name in the legend will highlight the corresponding section of the graph.
Clicking the item name will deselect that item. A deselected item will be greyed out in the legend and removed from the graph. Click the item name to re-display the data in the chart.
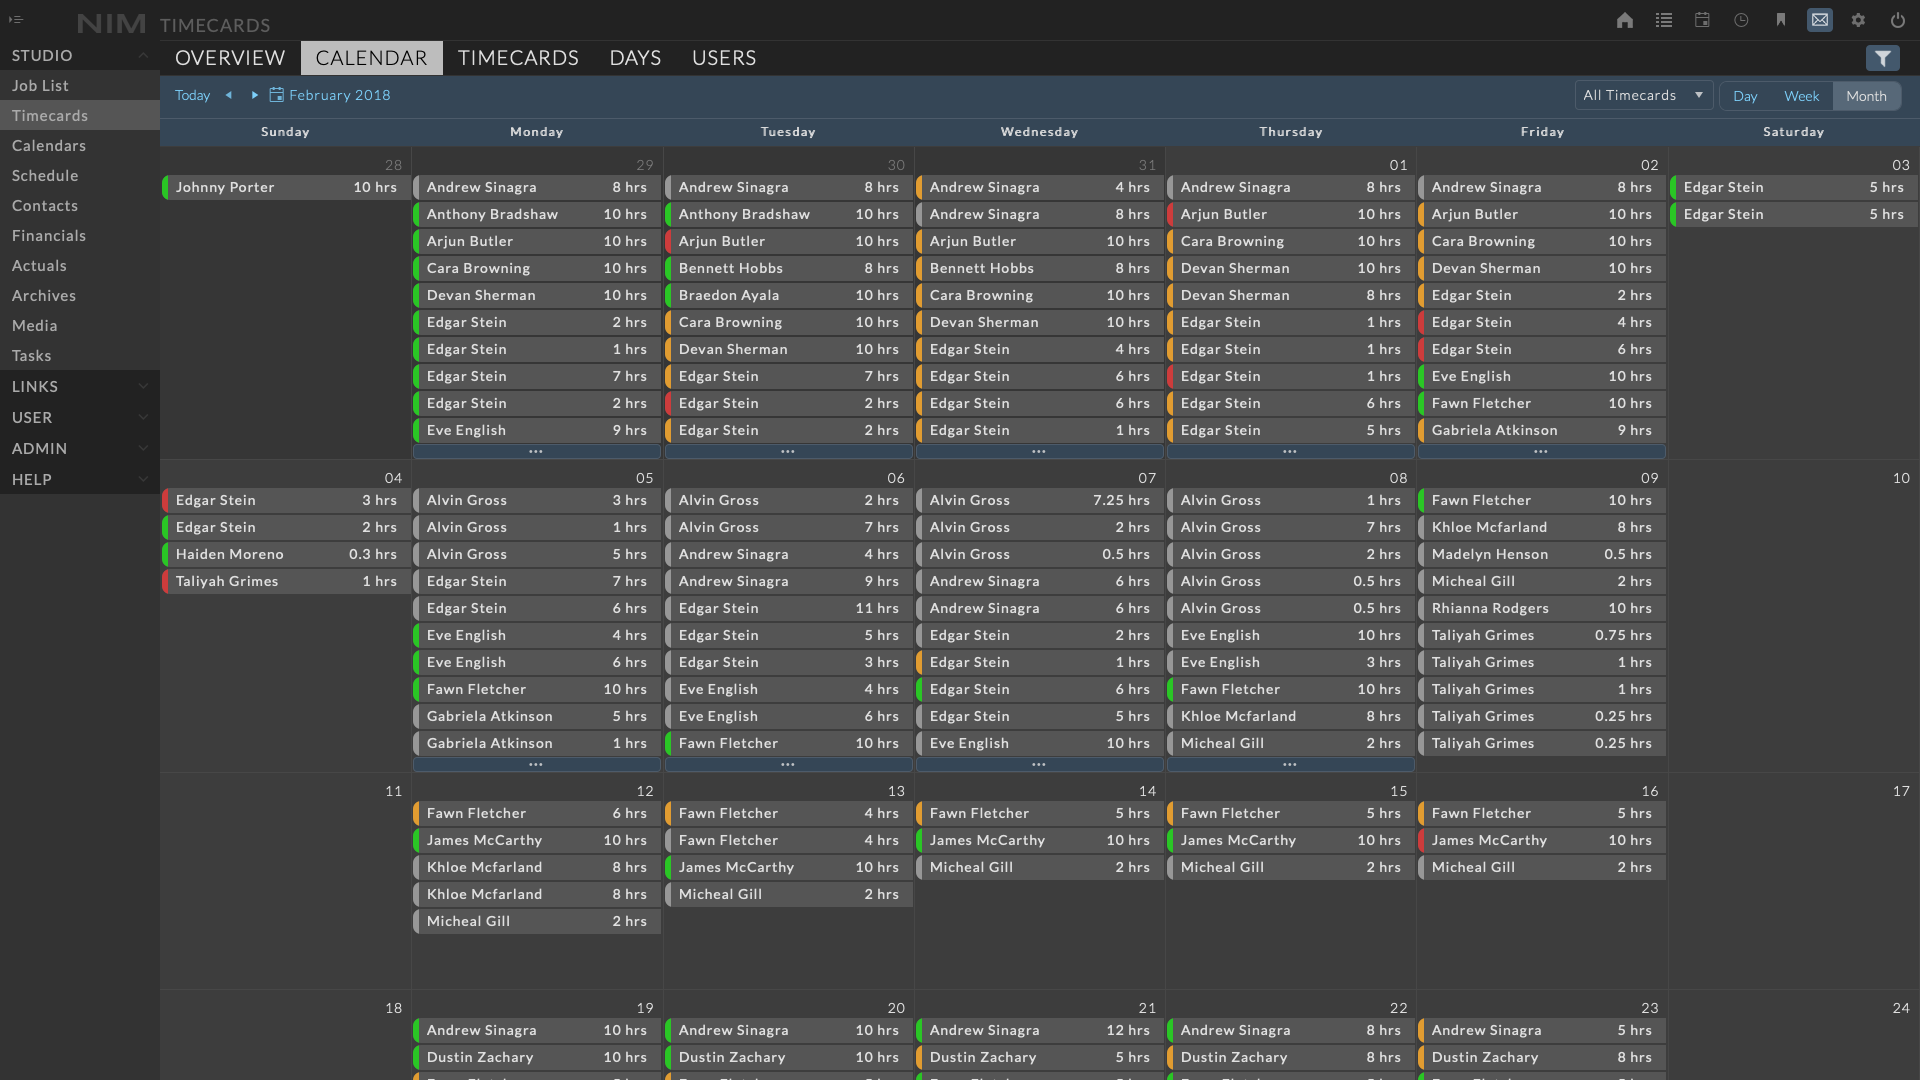
Timecard Calendar
The Calendar View displays the all timecards in a standard calendar.
Navigation
Navigation in the calendar view is done through the tools at the top left of the calendar.

Click the Today button to immediately jump to today’s date.
The left and right arrows move forward and back in time for the given view.
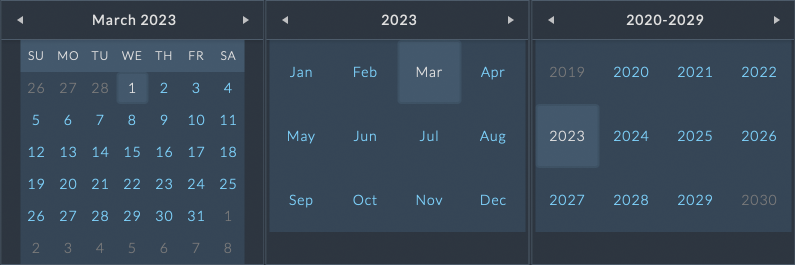
Clicking the Date at the right of the toolbar opens a mini calendar to quickly navigate to any day.

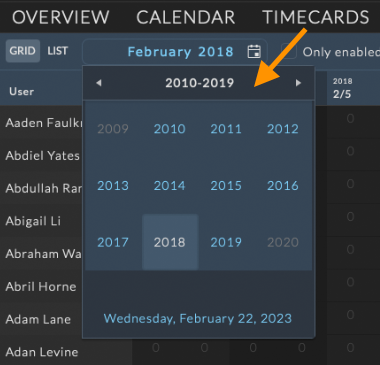
Inside the mini calendar, click the title bar to adjust the zoom level of the date range to select.
For example:
Clicking on March 2023 will zoom out the mini calendar to show a list of months.
Clicking on 2023 when viewing months will zoom out to show a list of years.
The calendar can be viewed by Day, Week, or Month depending on the selected view type.
To change the calendar view click on the corresponding view type at the top right of the calendar.
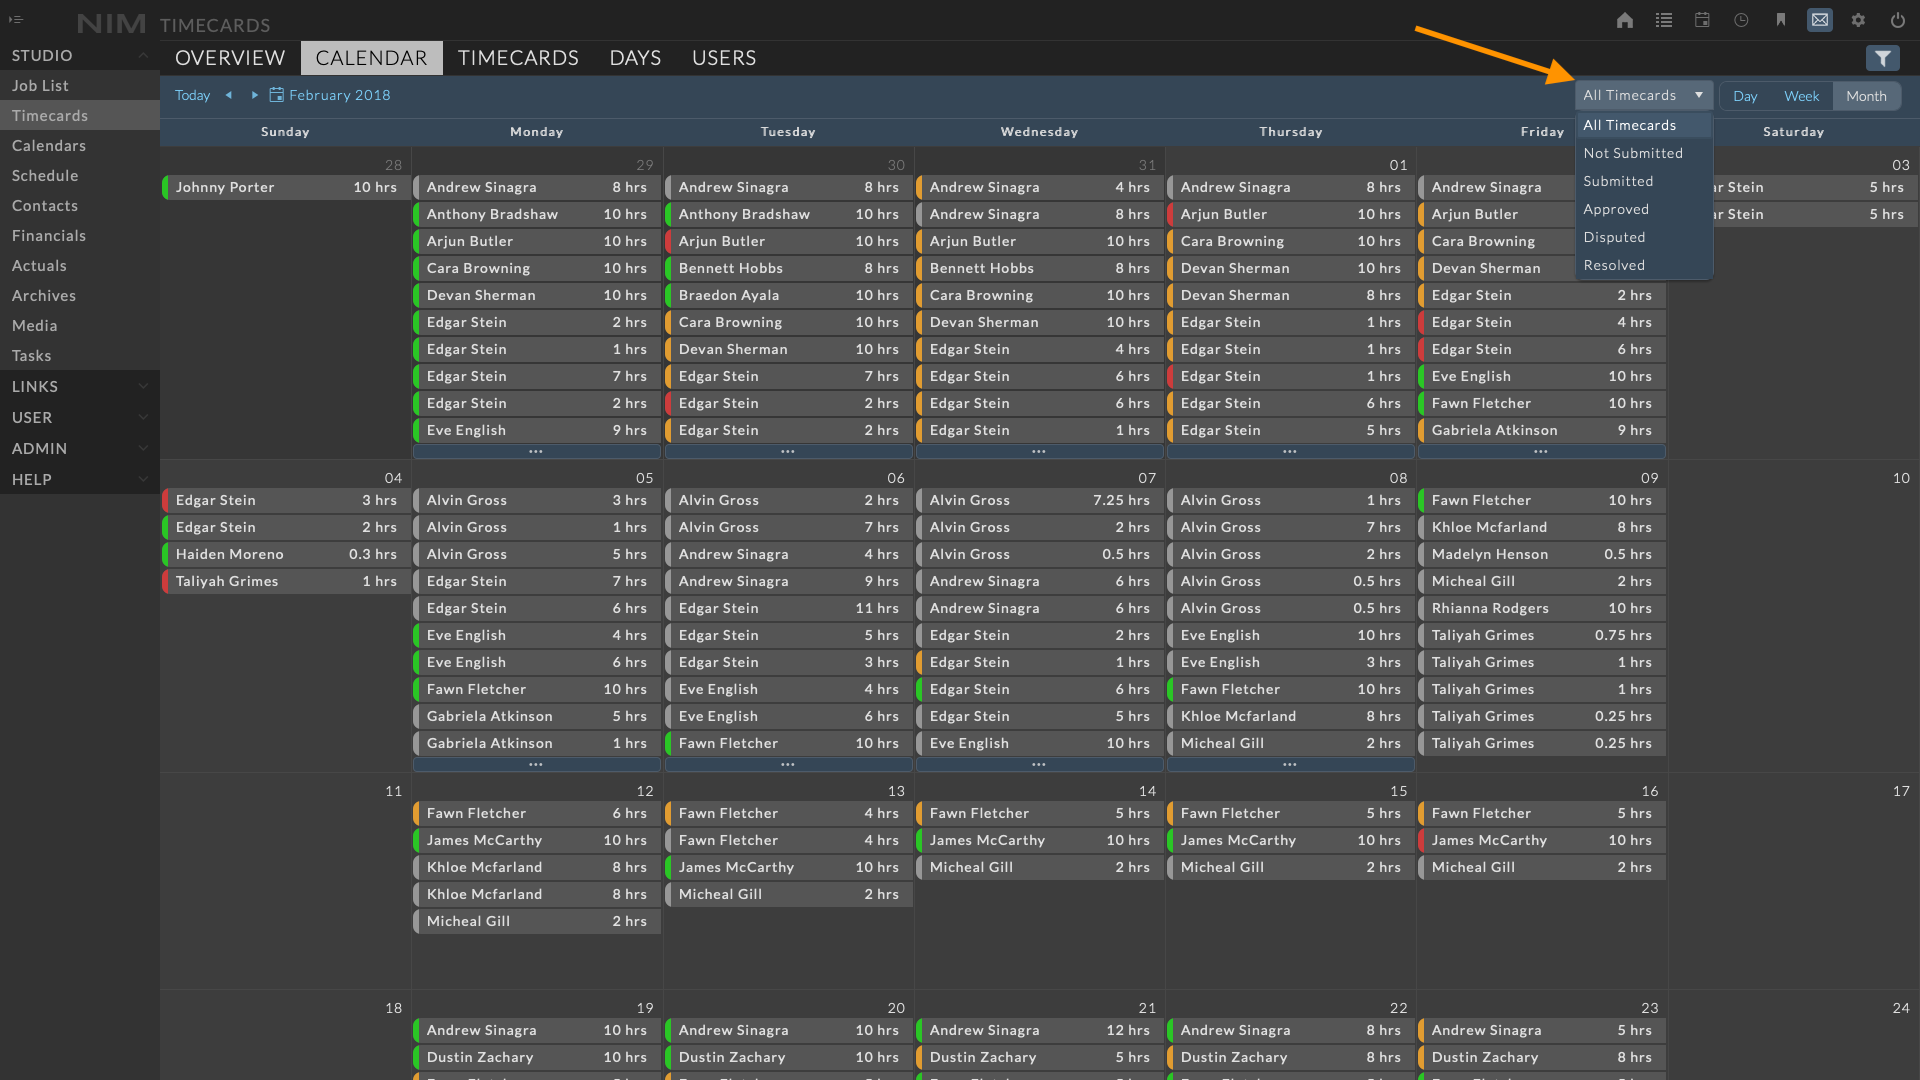
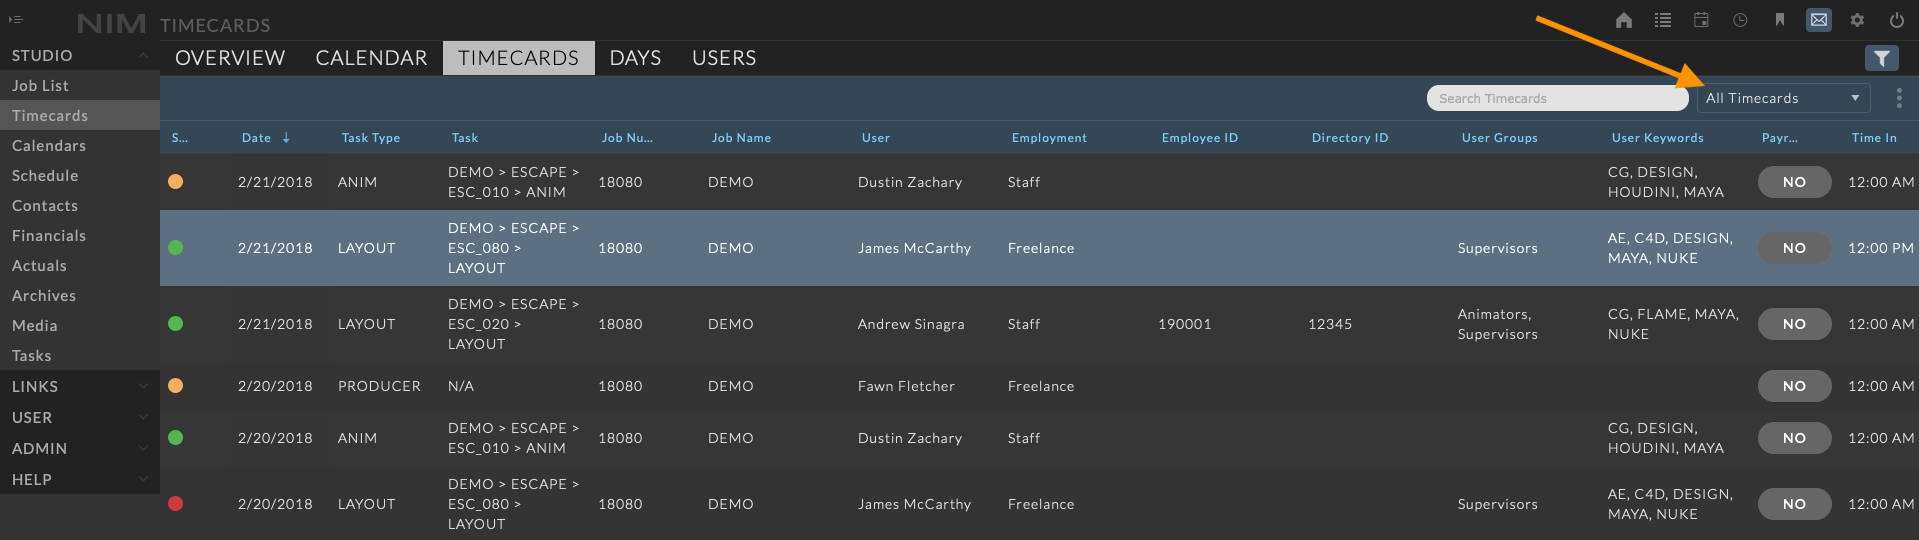
Status Filter
In any of the calendar views, timecards can be filtered by the submission status dropdown located at the top right of the panel.
Adding a Timecard
New timecards can be added from the Calendar View by double clicking on the date for the desired timecard in either the Week or Month view.
The timecard info panel will open in edit mode to enter the details for the new timecard.
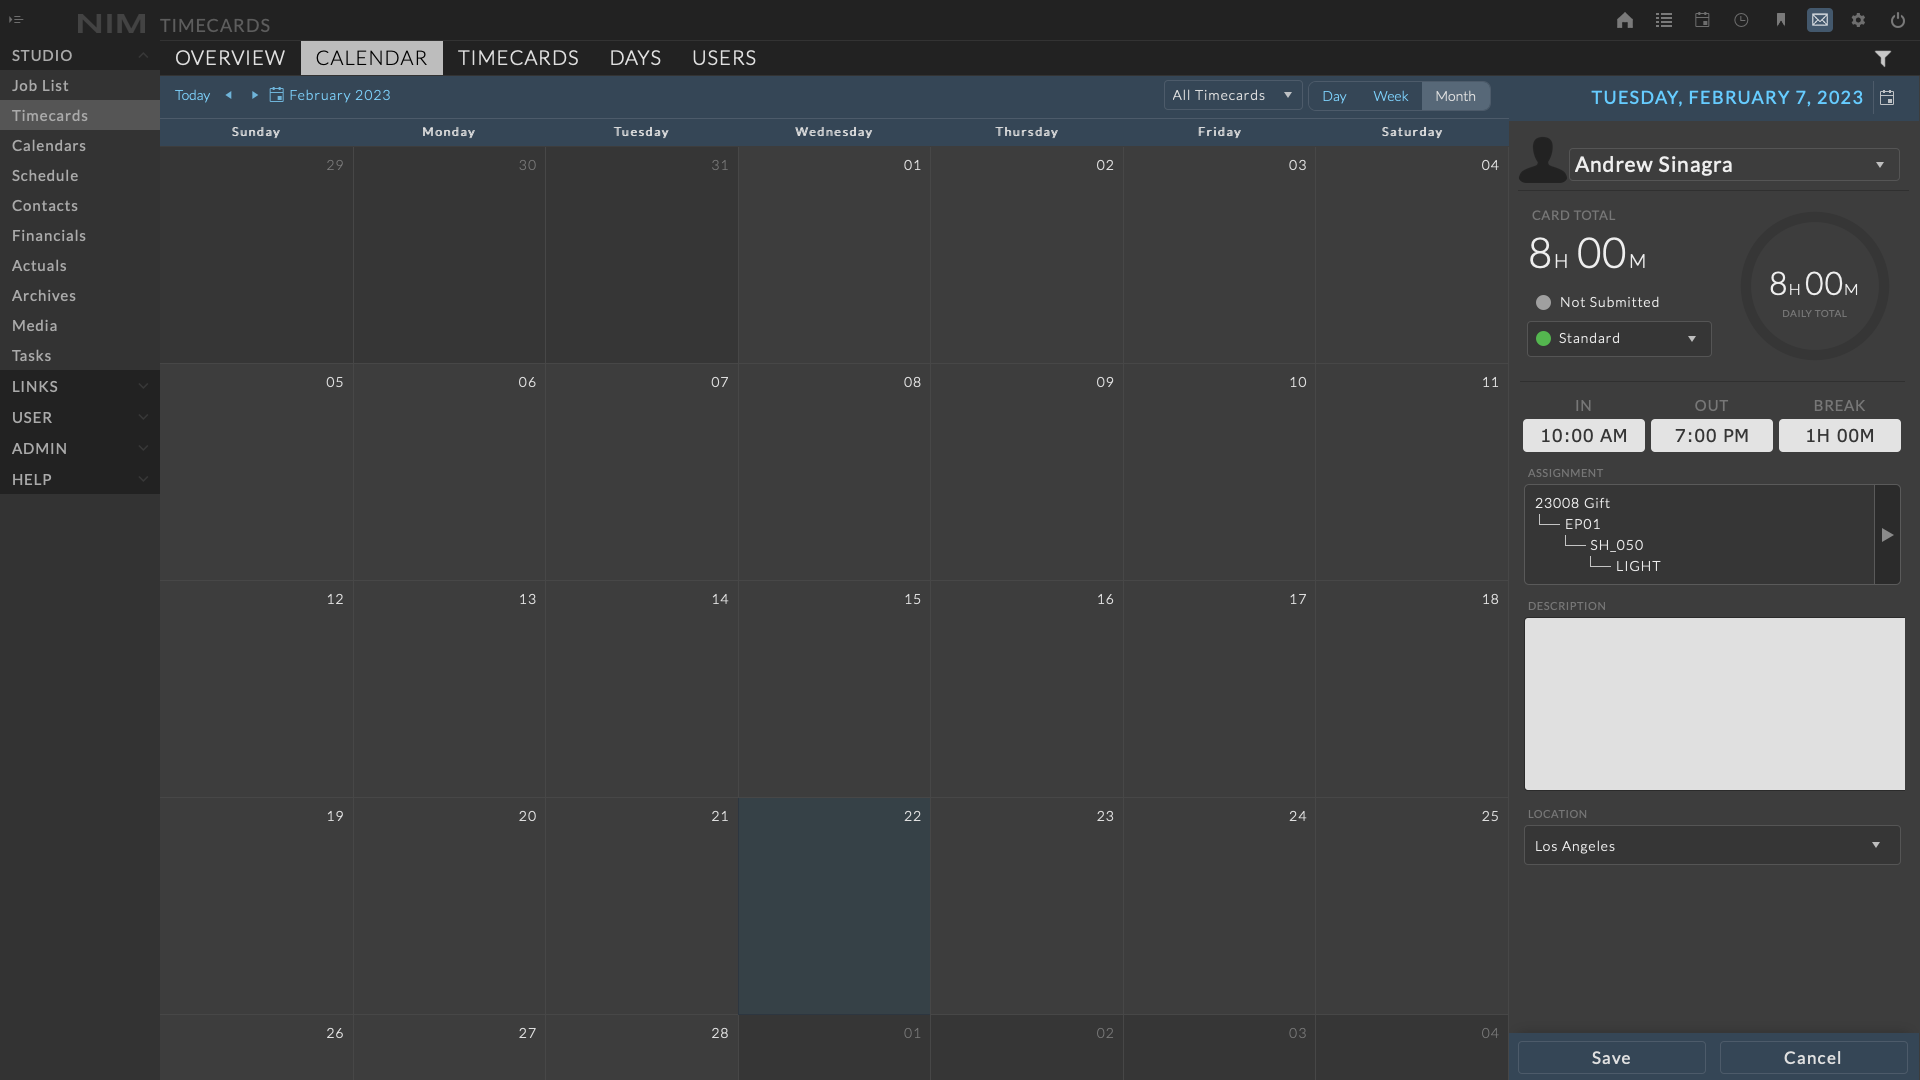
Month View
The month view displays user timecards one month at a time with per day timecards.
The color at the left of each timecard indicates the submission status.
Information includes the user’s name and the total hours for the timecard.
Clicking on a timecard will open the timecard info panel to the right of the calendar. The selected timecard will be highlighted.
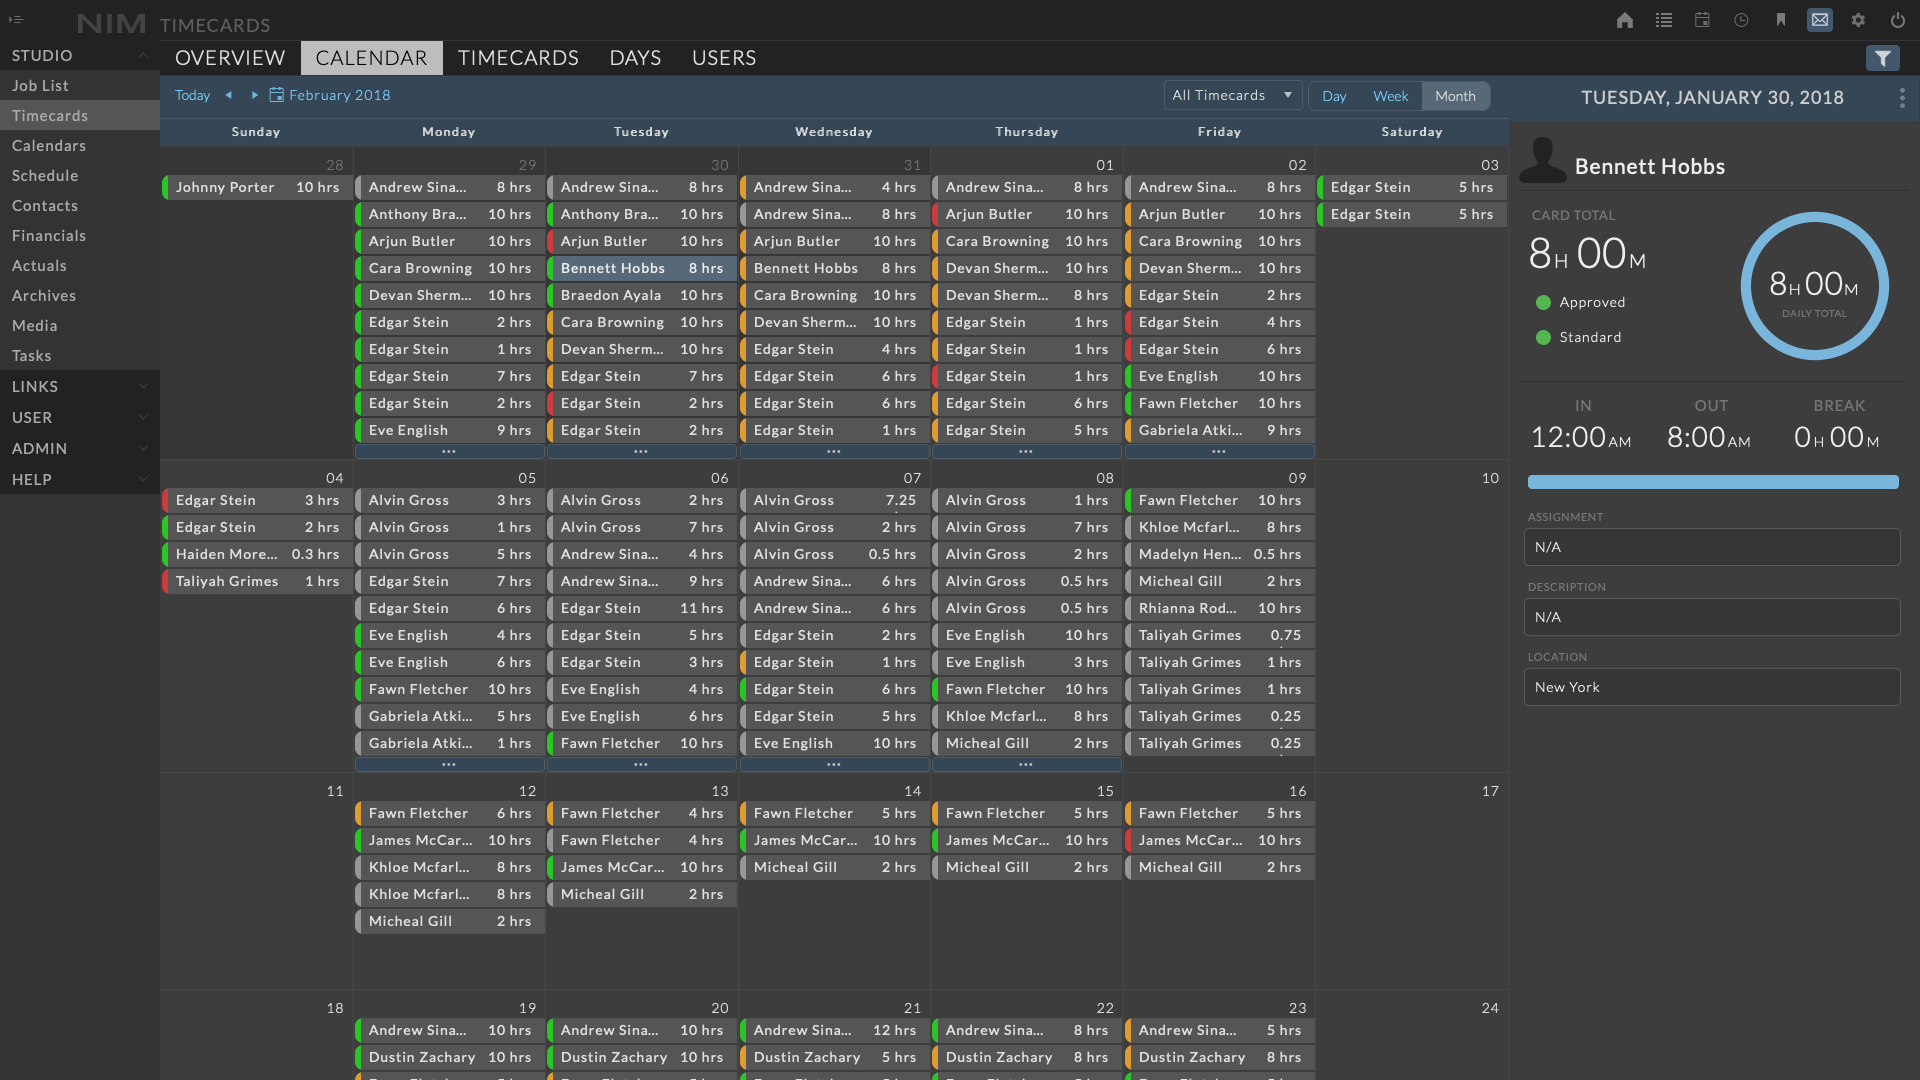
For more information on editing timecards please refer to the Timecard Info Panel section of the documentation.
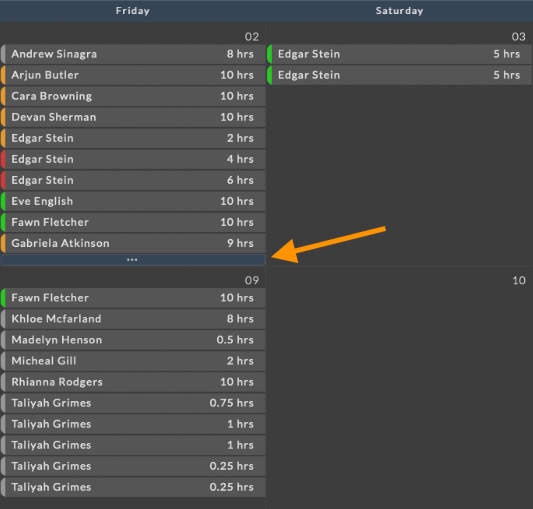
When a date contains more timecards than they day can display, a bar at the bottom of the date with a ... symbol is displayed. Clicking on this bar will load the day view with the full list of timecards for the day.
Week View
The week view displays user timecards one week at a time with per day timecards.
The color at the left of each timecard indicates the submission status.
Information includes the user’s name and the total hours for the timecard.
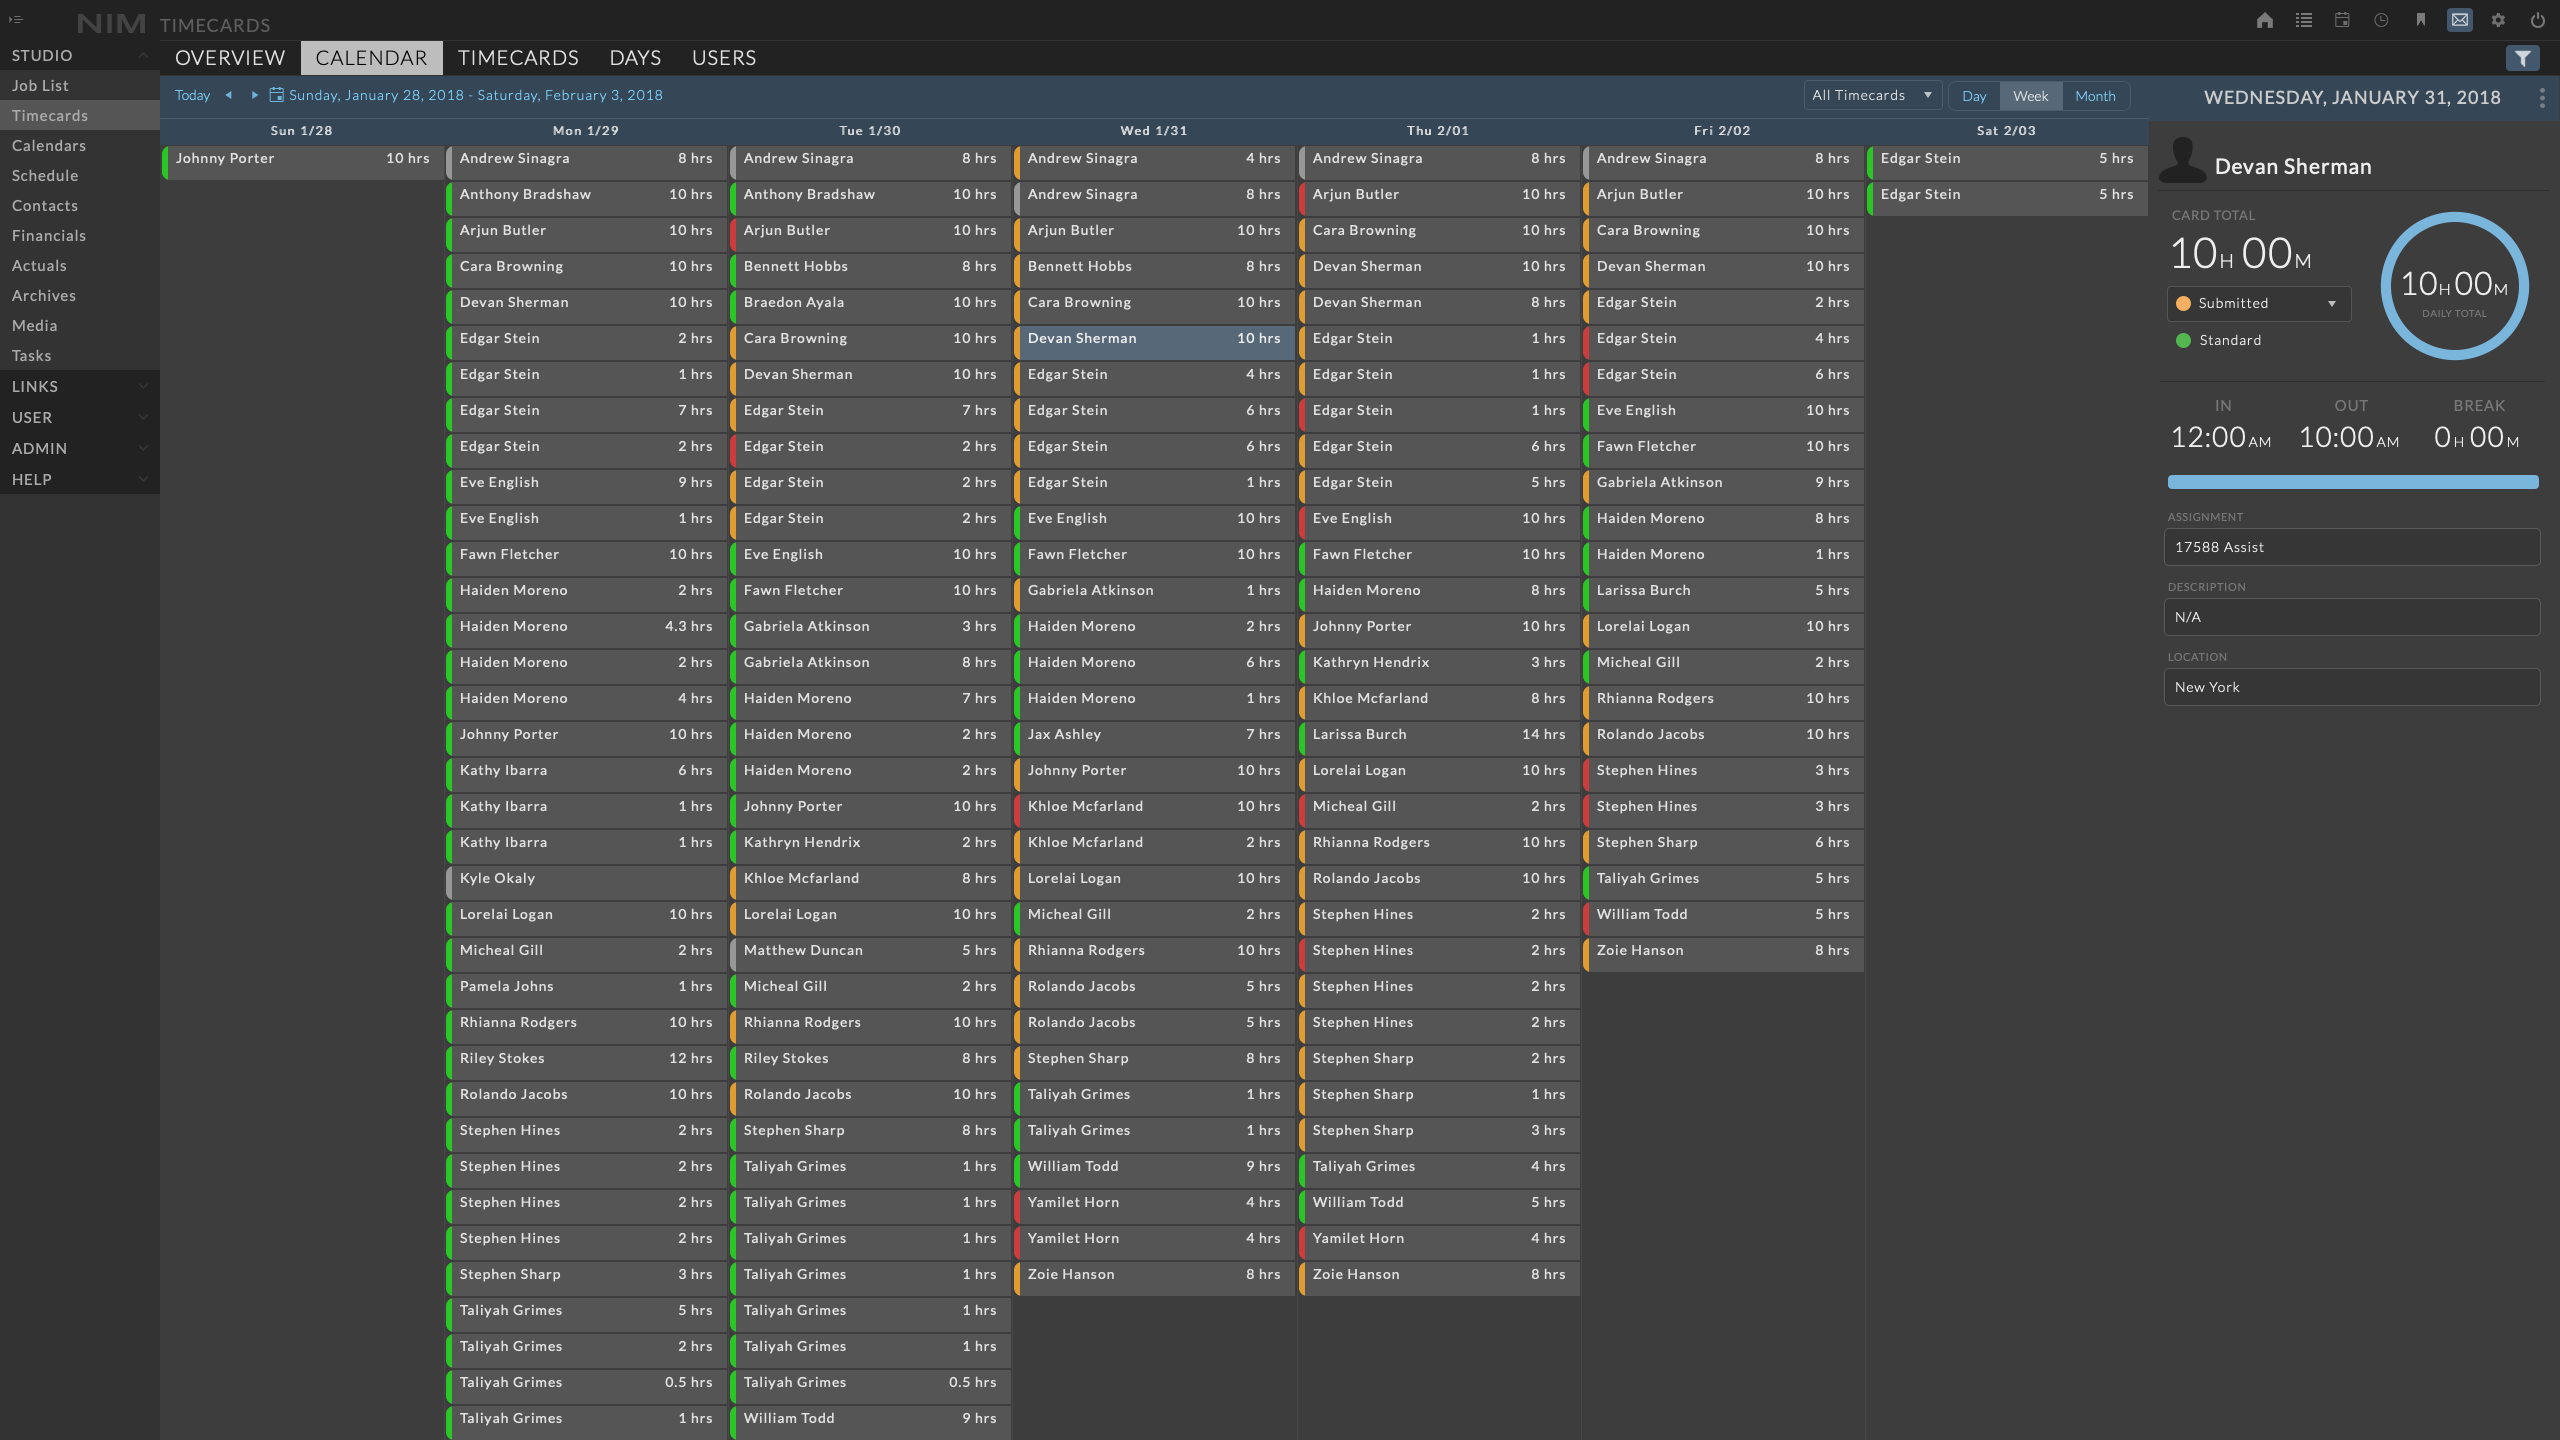
Clicking on a timecard will open the timecard info panel to the right of the calendar. The selected timecard will be highlighted.
For more information on editing timecards please refer to the Timecard Info Panel section of the documentation.
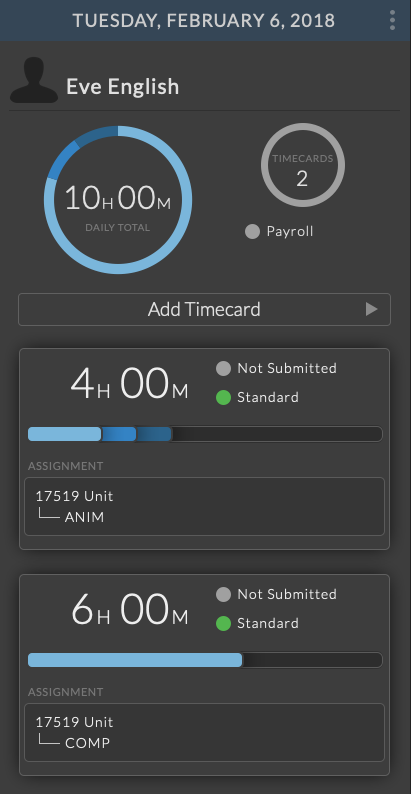
Day View
The day view displays user timecards one day at a time.
The color at the left of each timecard indicates the submission status.
Information available in the day view includes:
User’s Name
Total Hours
Job
Task
Location
Description
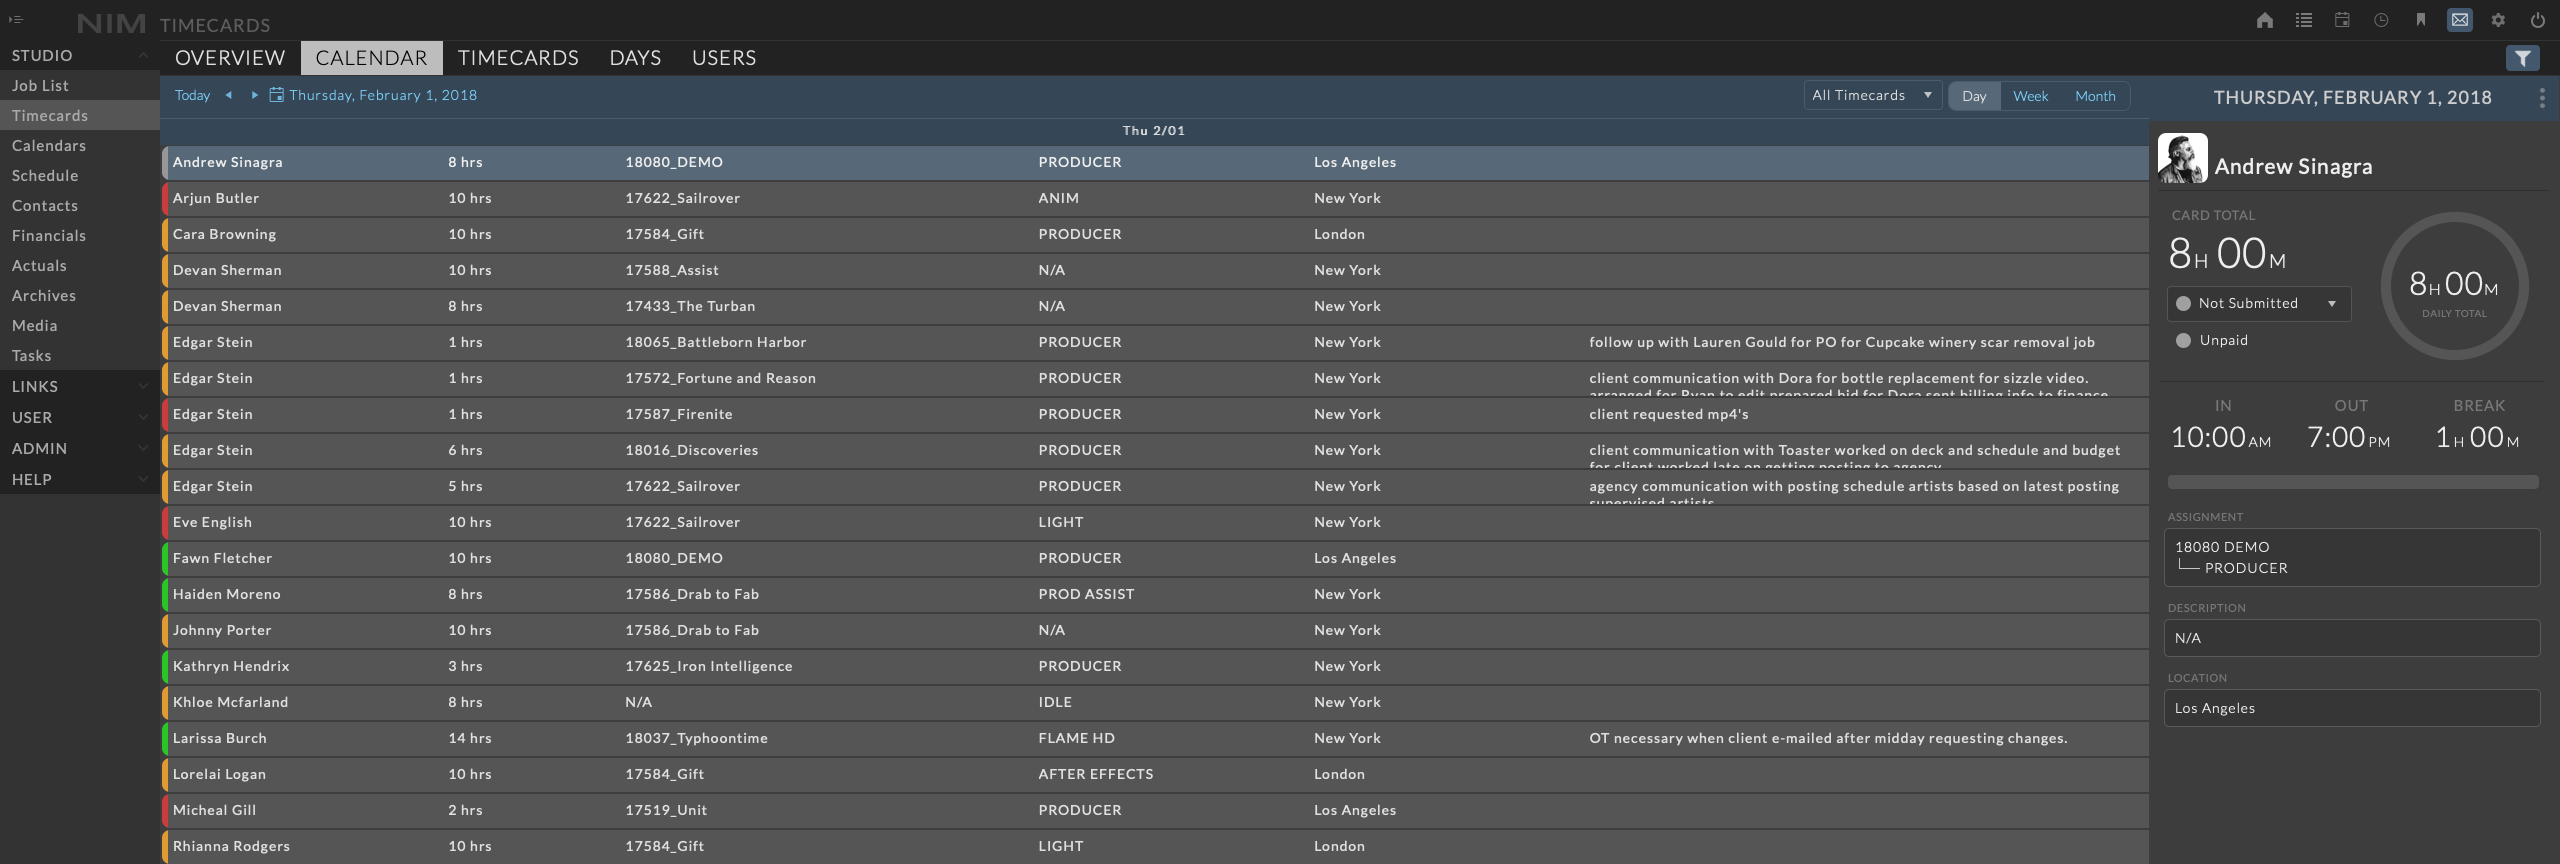
Clicking on a timecard will open the timecard info panel to the right of the calendar. The selected timecard will be highlighted.
For more information on editing timecards please refer to the Timecard Info Panel section of the documentation.
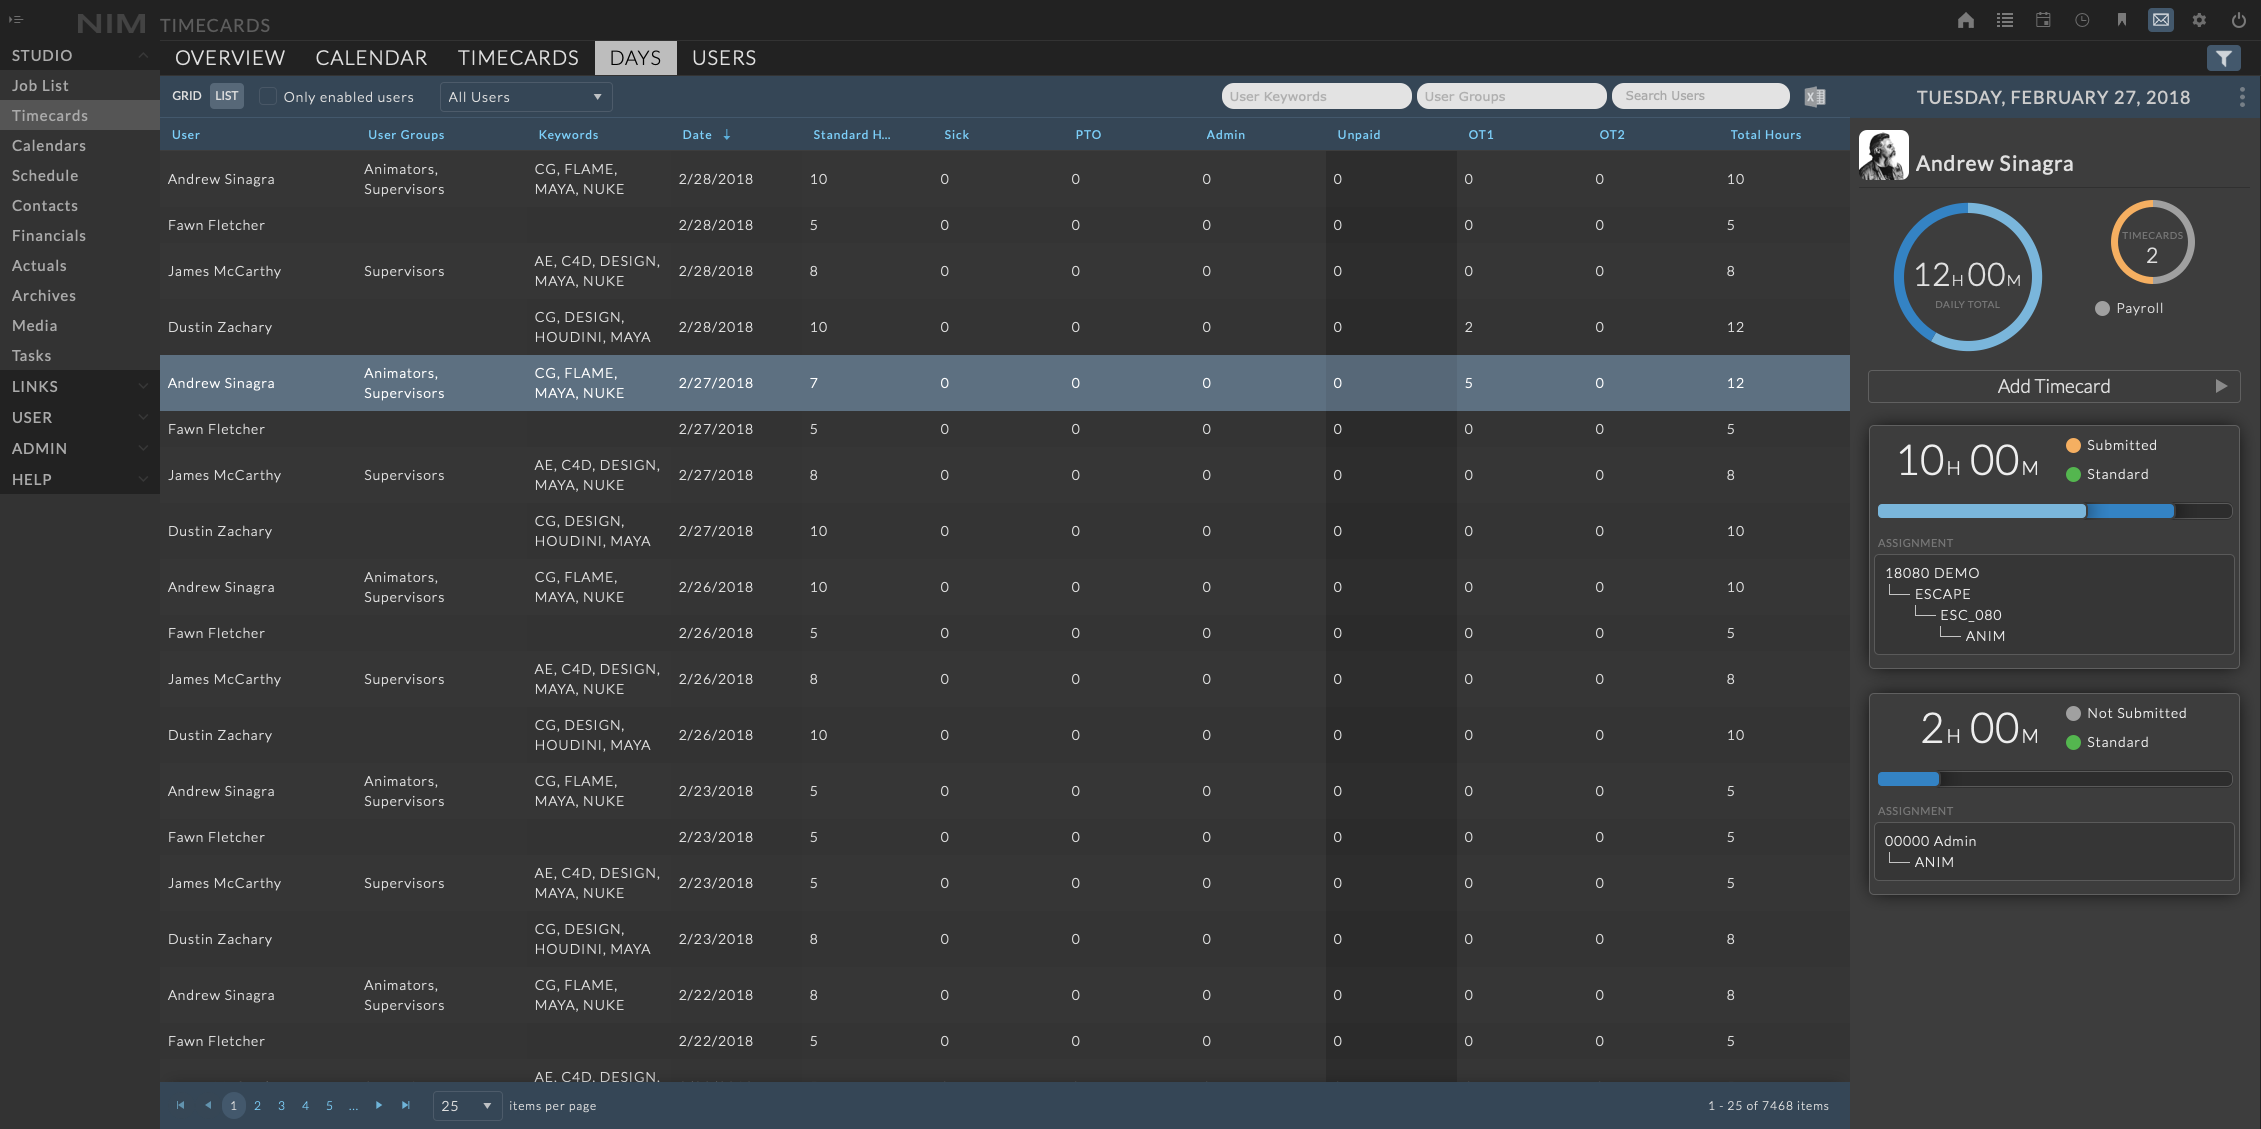
Timecard List
The list view displays all timecards in a paginated list with advanced functionality to add and edit a range of timecards simultaneously.
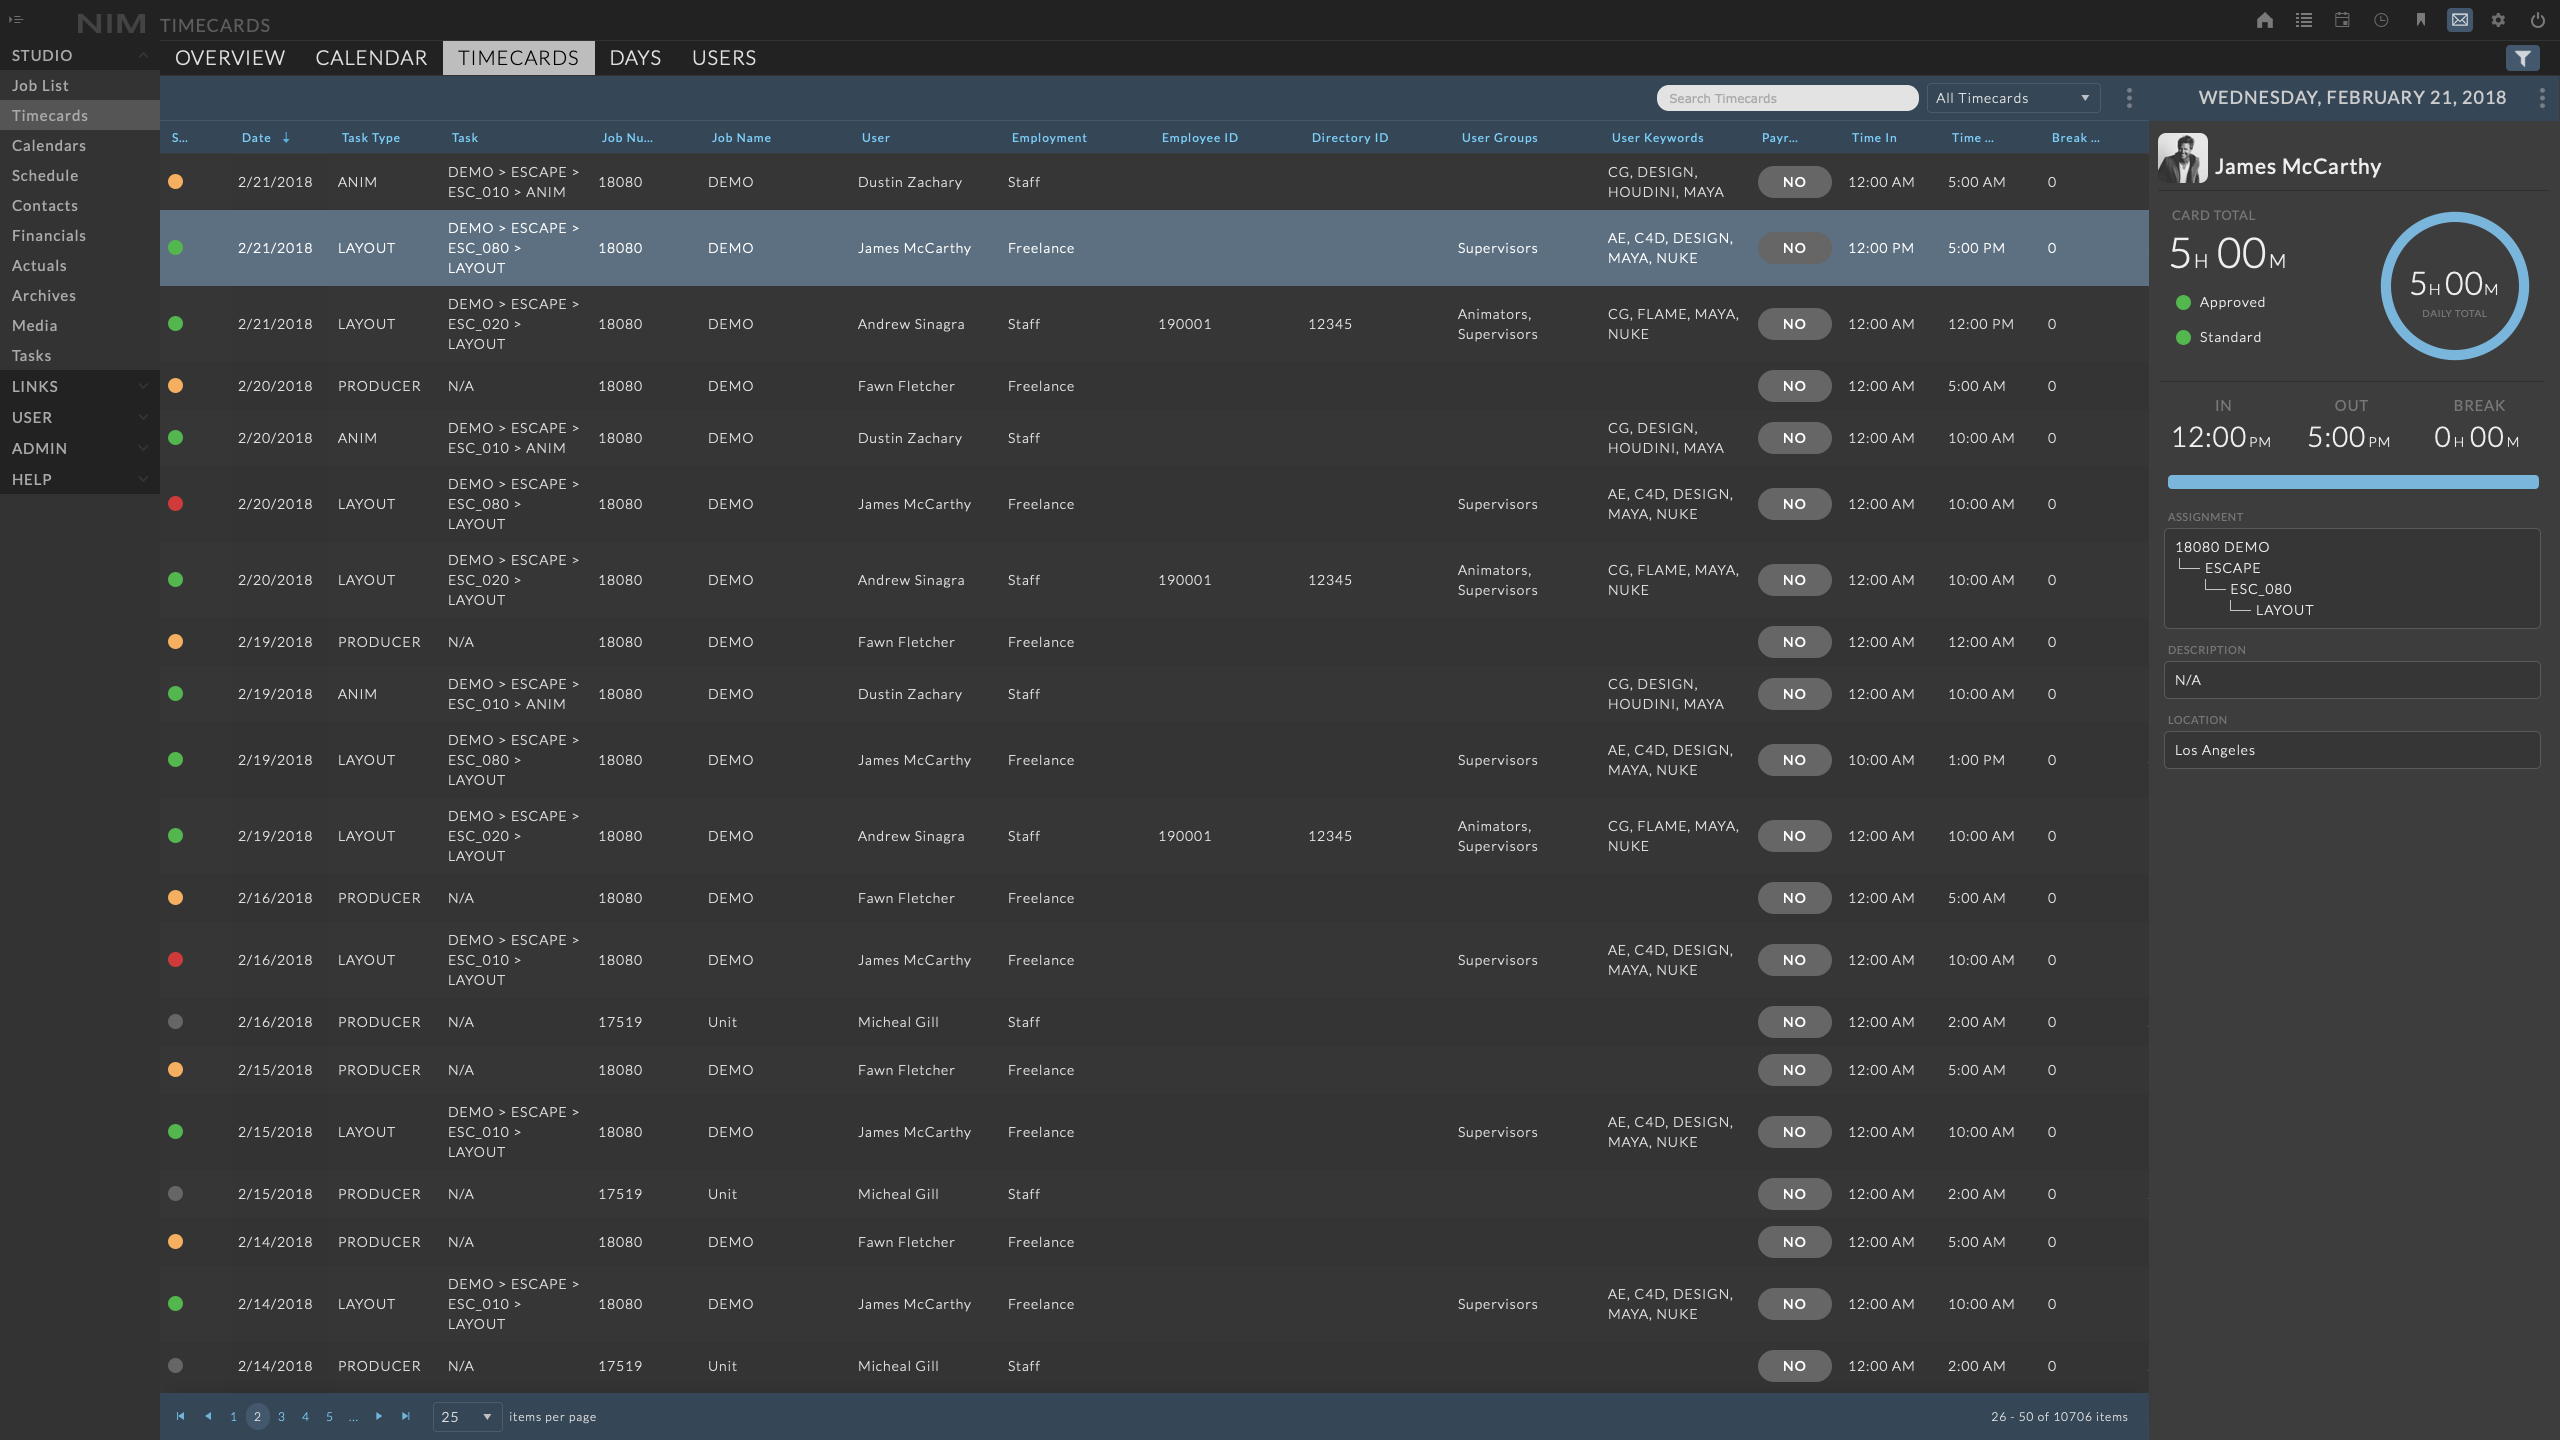
The list view displays all timecard data as well as any associated job name, number and custom fields.
Note
If a timecard is using Payroll rules, the RT, OT1, OT2, and Non-billable columns will be greyed out and only the total hours will be displayed.
Clicking on a row will select the timecard and open the timecard info panel for further editing. For more information on editing timecards please refer to the Timecard Info Panel section of the documentation.
Status Filter
In the timecard list view, timecards can be filtered by the submission status dropdown located at the top right of the panel.
Multi-Card Edit
To edit multiple timecards simultaneously, click on the first timecard to be edited. Then Shift-click a second shot to select all timecards in-between, or Ctrl-click / Command-click to add non-consecutive timecards.
The Timecards Details panel will appear from the right.
Click on the ellipsis menu in the timecard info panel and choose “Edit” to update the timecard information.
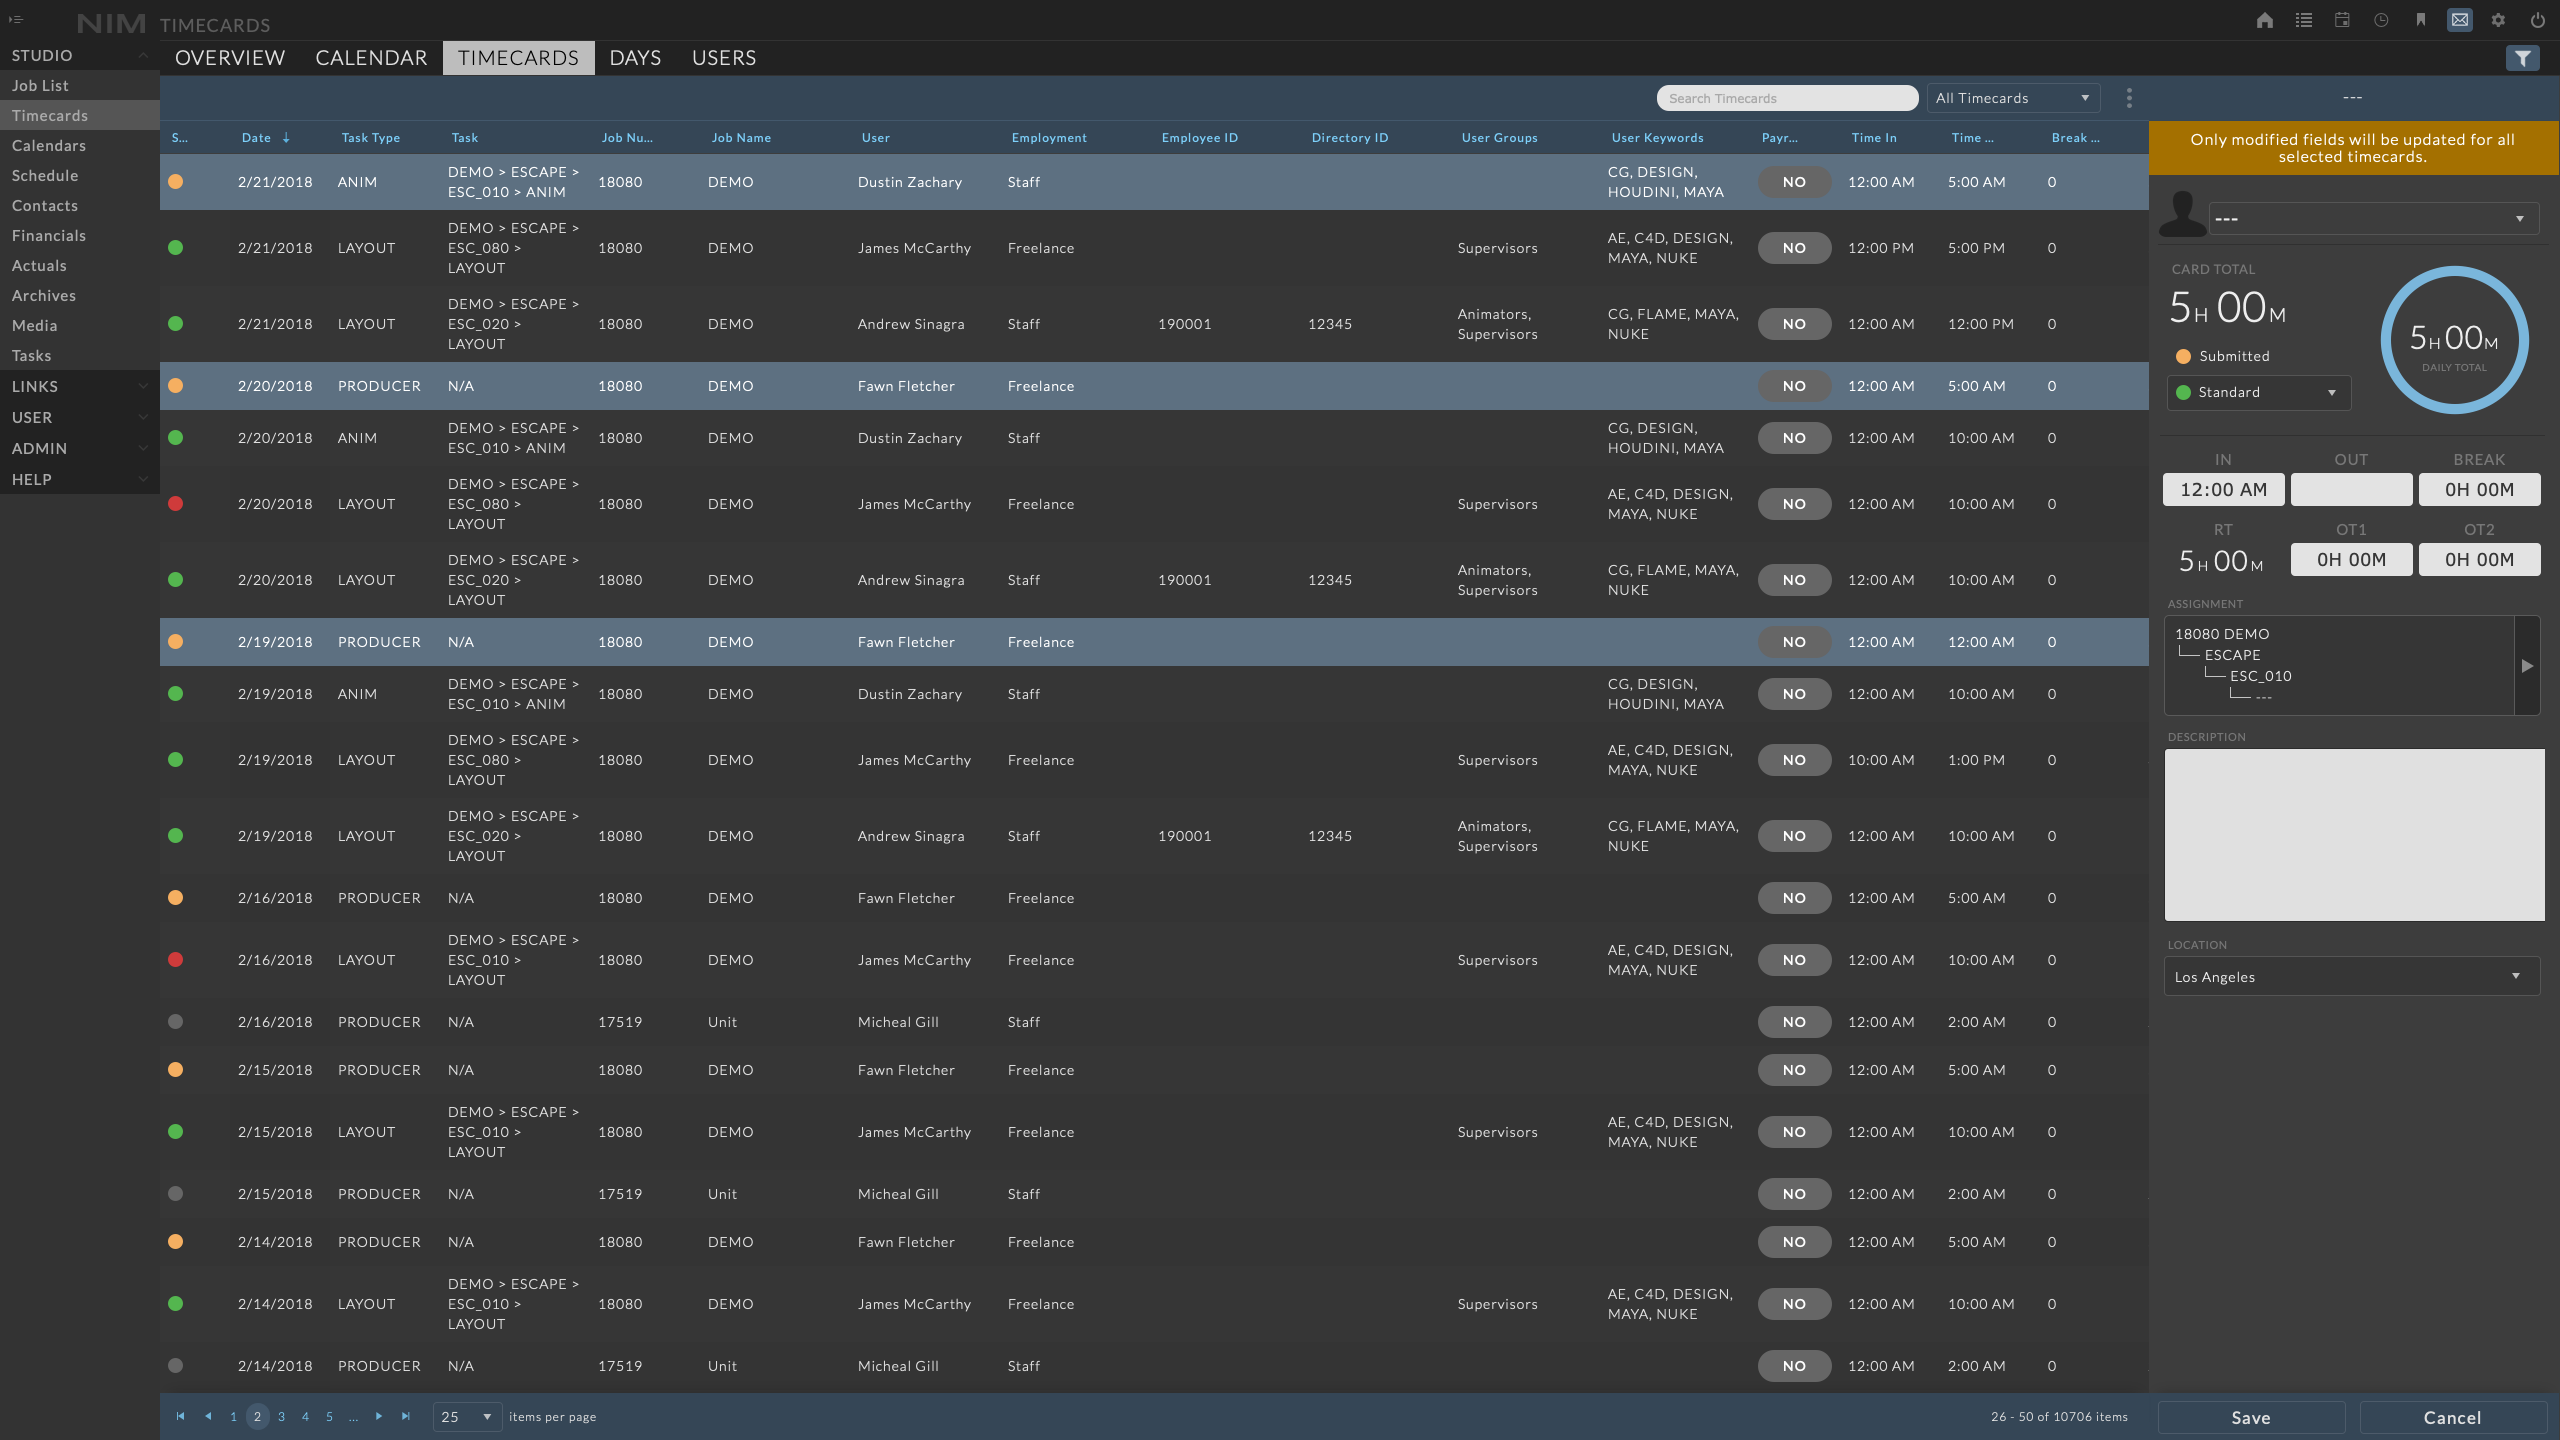
At the top of the panel a reminder is included stating:
Only modified fields will be updated for all selected timecards.
Fields with matching values will be displayed as normal.
Fields with dissimilar values will be denoted as
---
Any value may be changed in the timecards, however there are some things to keep in mind while editing multiple timecards.
Changing the value of dissimilar fields will over-write all of the timecards with the new value.
Modifying the date will change all timecards to exist on the same day.
Note
When multi-selecting timecards, if timecards with different submission statuses are selected, the option to edit the timecards may be restricted. For example, if a “Not Submitted” and a “Submitted” timecard are selected, by default editing will not be available as “Submitted” timecards can not be modified without elevated permissions.
Adding a Timecard
New timecards can be added from the List View by clicking the ellipsis menu at the top right of the header and select “Add Timecard”.

The timecard info panel will open in edit mode to enter the details for the new timecard.
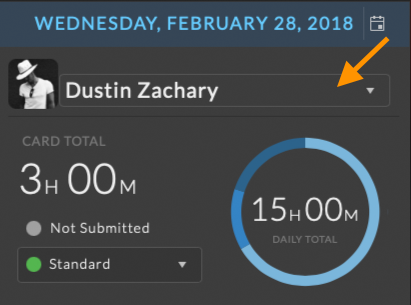
When in a studio or job timecard view, an additional field is available to select the user.
Click the user’s name to expand the full list of users to select from.
Type in the search field to filter the items in the user list.
For more information on editing timecards please refer to the Timecard Info Panel section of the documentation.
Multi-Card Entry
The List View includes an advanced timecard entry that allows for a range of timecards to be generated at once.
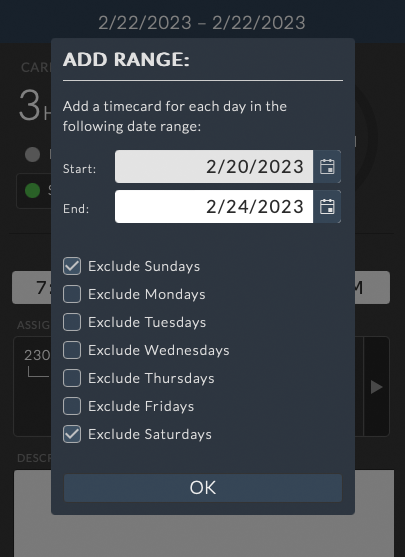
To add multiple timecards over a range of dates, click the ellipsis menu and select Add Range.
The timecard info panel will open and a popup will appear allowing you to selected the start and end date range. Options to exclude days from the range are available by checking the corresponding boxes.
After the range is set, click the OK button to edit the timecard details.
Saving the timecard will create identical timecards for every date in the range, not including any days marked to be excluded.
Note
By default “Exclude Saturdays” and “Exclude Sundays” is selected
Submit For Approval
Timecards can be submitted to a user for approval by selecting Submit Timecards from the ellipsis menu. The submit timecards panel will open to the right of the list view with 3 options to choose for submission:
Selected
Date Range
Pay Period
|

|
|
Note
Multi-select a range of timecard prior to choosing Submit Timecards, to use the “Selected” option. Alternatively, choose a date range by selecting a given week, or if a pay period start date has been established for your studio, then choose by Pay Period.
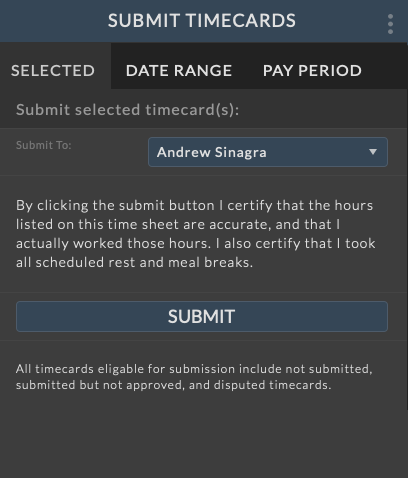
Submit Selection

Click on the timecard to submit for approval from the timecard grid. To select multiple timecards, click on the first timecard desired, then Shift-click a second timecard to select all timecards in-between, or Ctrl-click / Command-click to add non-consecutive timecards.
Once the timecards have been selected click on the ellipsis menu and choose Submit Timecards to load the submission panel.
Select a user to submit the timecards to for approval from the “Submit To” dropdown and click the submit button.
When the timecards are successfully submitted you will receive the following notification: Timecards successfully submitted for review.
Submit Date Range
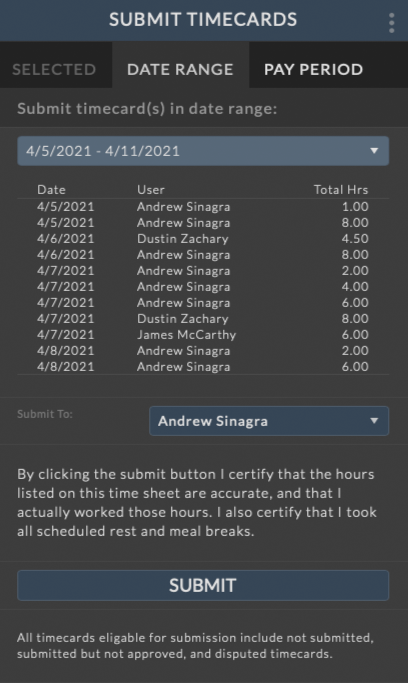
A range of timecards can be submitted for approval. Click on the “Date Range” dropdown and choose a time period to submit timecards. Each range constitutes one week and can be defined as Monday-Sunday or Sunday-Saturday as defined in the Admin > Timecards - Options settings.
After a range is selected, the timecards within the range will be displayed below the dropdown.
Select a user to submit the timecards to for approval from the “Submit To” dropdown.
If the selected timecards are correct, click the submit button.
When the timecards are successfully submitted you will receive the following notification: Timecards successfully submitted for review.
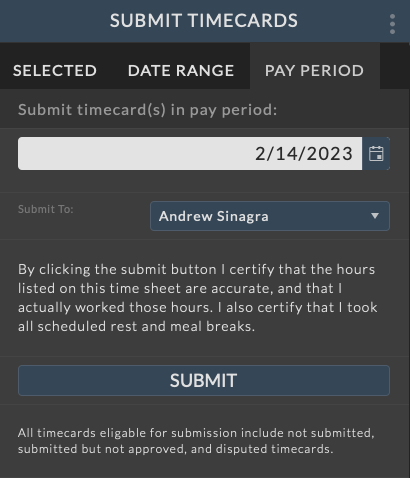
Submit Pay Period
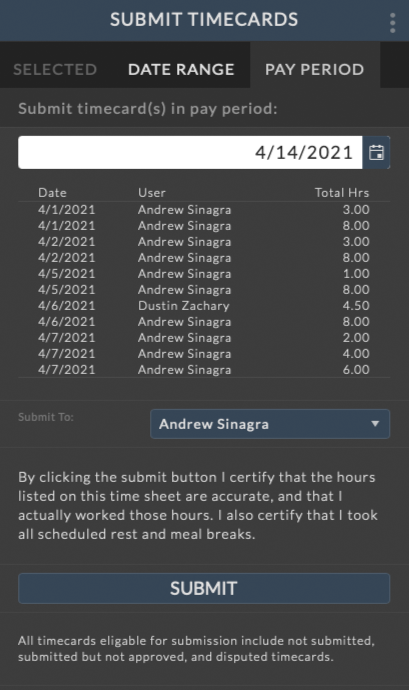
All timecards that fall within a given pay period can be submitted for approval. Click on the “Pay Period” date selector and choose a date from the calendar. The pay period the selected date falls within will be used as the range to submit timecards.
After a pay period is selected, the timecards within the range will be displayed below the date selection.
Select a user to submit the timecards to for approval from the “Submit To” dropdown.
If the selected timecards are correct, click the submit button.
When the timecards are successfully submitted you will receive the following notification: Timecards successfully submitted for review.
Export to Excel
The timecard grid can be exported to Excel using the Export to Excel ellipsis menu option. Any filters that have been applied to the grid will be respected in the export.
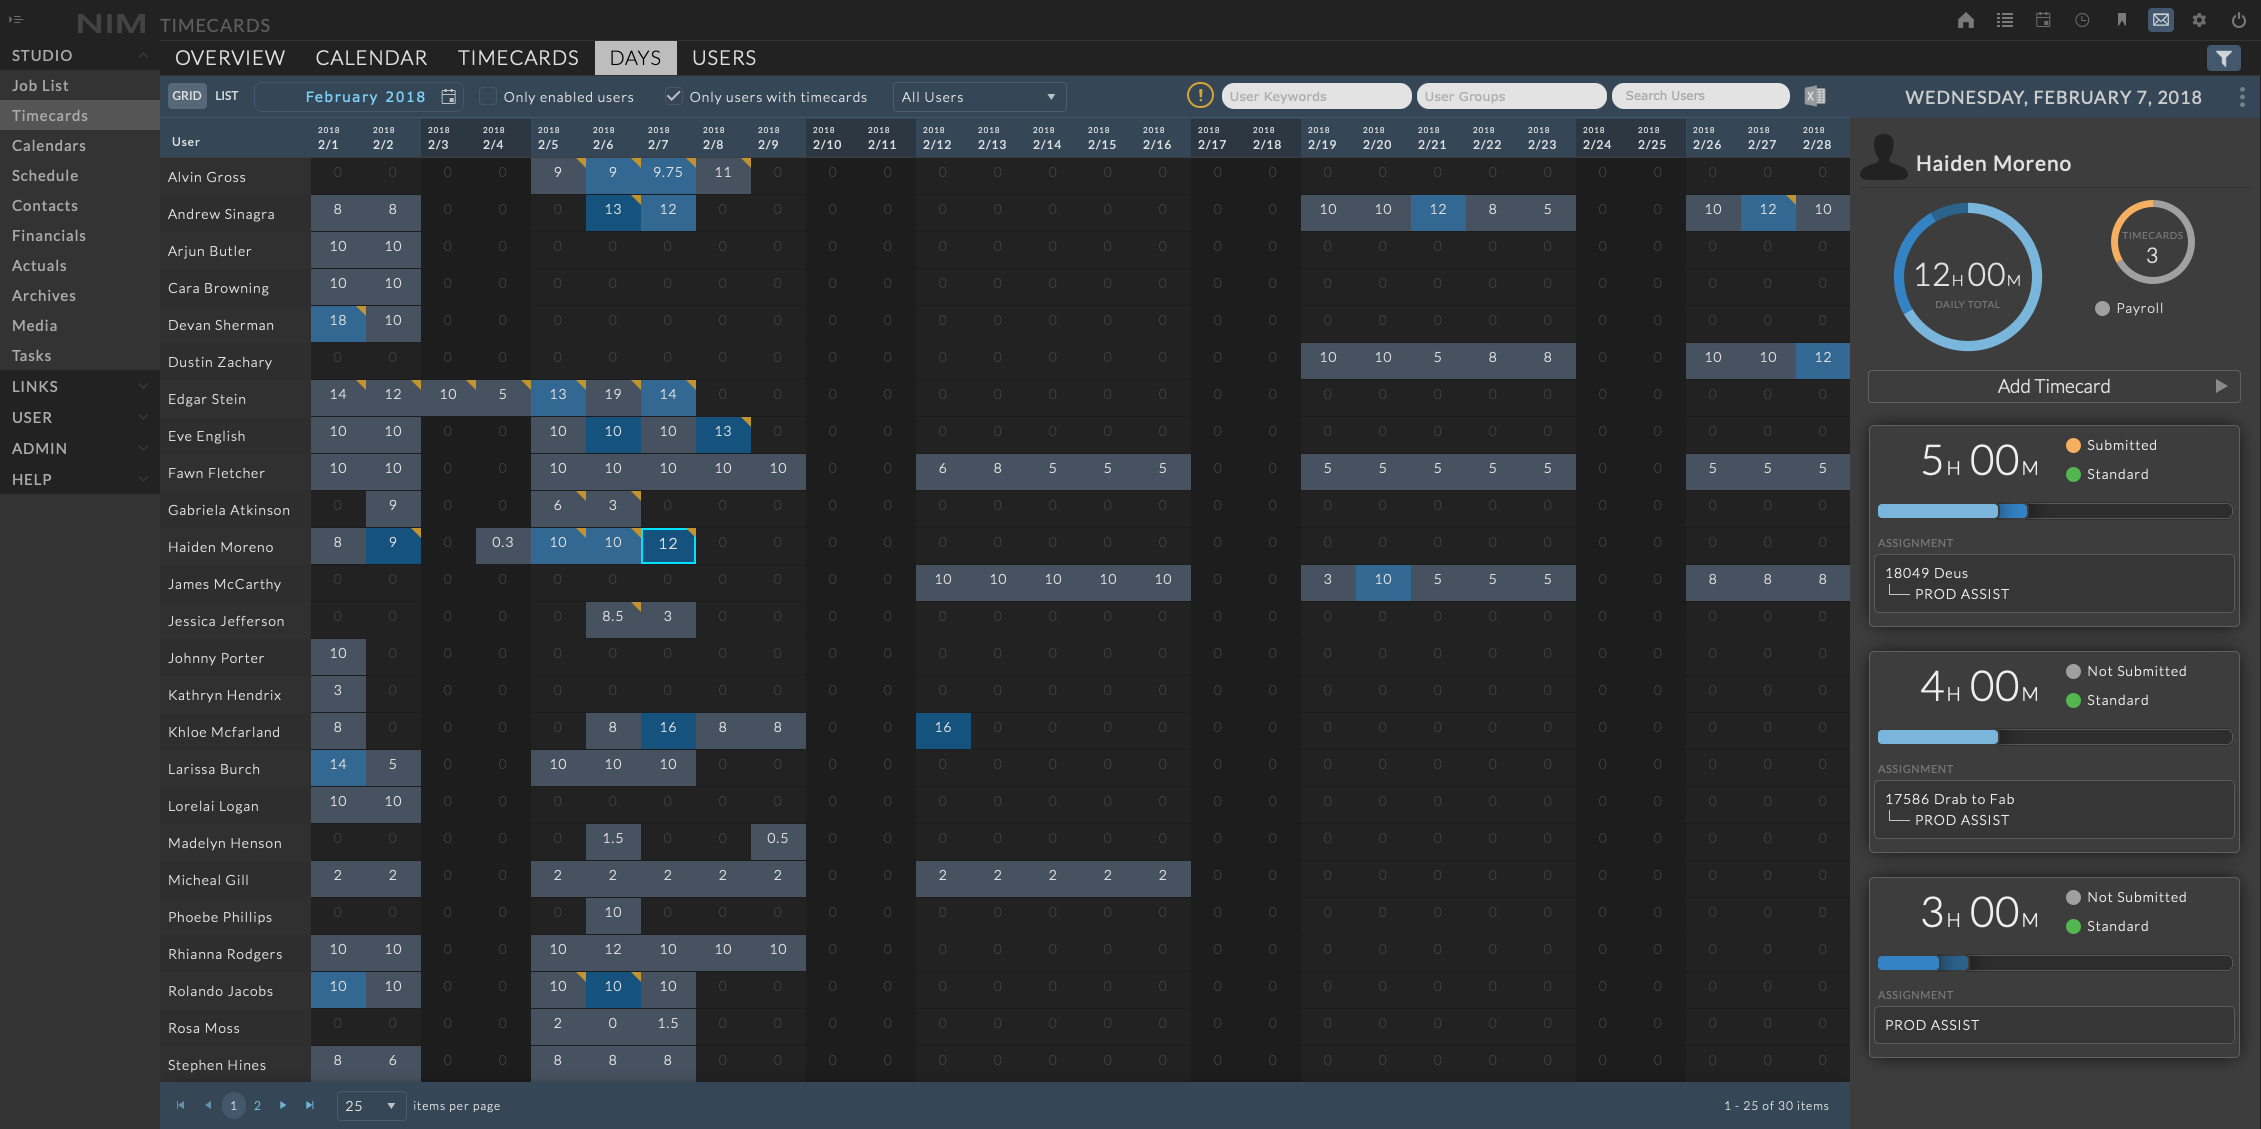
Timecard Days
The day view offers a quick way to see the total hours per day each user has logged across all jobs, add or edit user timecards, change the allocation of overtime rates for non-Payroll timecards, as well as approve individual timecards.
Day Grid
In the day grid, one month at a time is displayed, with one row per user and one column per date. Each cell shows the total number of timecard hours entered per user.
Navigation
Navigation in the day grid is done through the date selector at the top left of the view.

Clicking the date opens a mini-calendar to quickly navigate to any month.
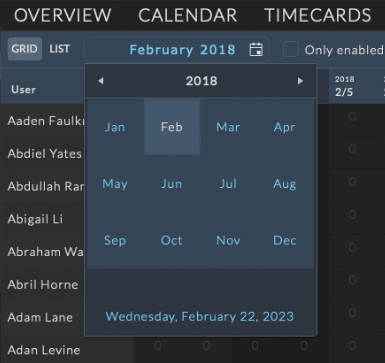
As with other mini-calendar selectors, clicking the title bar will zoom out to a higher level of selection.
Filters
A series of filters are available in the day grid toolbar to refine the users displayed in the view.

The filters include:
Only Enabled Users |
Limits the list of users to those whose NIM accounts are flagged as enabled |
Only Users with Timecards |
Limits the list of users to those who have entered timecards during the selected month |
User Employment |
Refines the list of users to All or those marked as Staff or Freelance |
User Keywords |
Limits the list of users to those tagged with the selected keywords |
User Groups |
Limits the list of users to those that are part of the selected user groups |
Search Users |
Limits the list of users to those whose name matches the search criteria |
Cells
Cells are color coded depending on the timecard information for the day as follows:

|
No timecards hours |

|
Regular Time Hours |

|
Overtime Rate 1 Hours |

|
Overtime Rate 2 Hours |

|
Denotes a day that has two or more timecards on different jobs with at least one card with overtime rates |

|
Denotes a day that has had the total hours adjusted based on timecard rules. |

|
Denotes a day that has been set to override timedcard rules that would change the total hours |

|
Currently selected day |
Note
For days denoted with a corner tag, the day must meet the following conditions:
User has timecards for two or more different jobs on this day
At least one of the timecards contains hours allocated to overtime rates
At least one of the jobs meets the current filter parameters
Clicking on a cell will select the current day’s timecards for the user. The daily timecard UI will open to the right of the view where modifications can be made as needed.
To add a new timecard on the day, click the Add Timecard button. The view will slide over with a new timecard in edit mode. Enter the necessary data and click Save to save your changes, or click cancel to return to the daily view without creating a new timecard.
To edit an existing timecard, click on the timecard details. The timecard info panel will slide over to reveal the specific timecard details. Click on the ellipsis menu to edit or delete the timecard, or click the < arrow at the top left of the view to return to the daily timecard view.
To close the timecard info panel, click the ellipsis menu and select Close from the popup.
For more information on editing timecards please refer to the User Timecards section of the documentation.
Note
If a timecard has been submitted, approved, or resolved it will not be editable without elevated permissions.
Export to Excel
The day view can be exported to Excel using the Export to Excel ellipsis menu option. Any filters that have been applied to the grid will be respected in the export.
Day List
In the day list, each row represents a single day per user. Clicking any row in this list will open the timecard info panel to review and edit a user’s timecard, similar to selecting a cell in the day grid.
Filters
A series of filters are available in the day list toolbar to refine the users displayed in the view.

The filters include:
Only Enabled Users |
Limits the list of users to those whose NIM accounts are flagged as enabled |
User Employment |
Refines the list of users to All or those marked as Staff or Freelance |
User Keywords |
Limits the list of users to those tagged with the selected keywords |
User Groups |
Limits the list of users to those that are part of the selected user groups |
Search Users |
Limits the list of users to those whose name matches the search criteria |
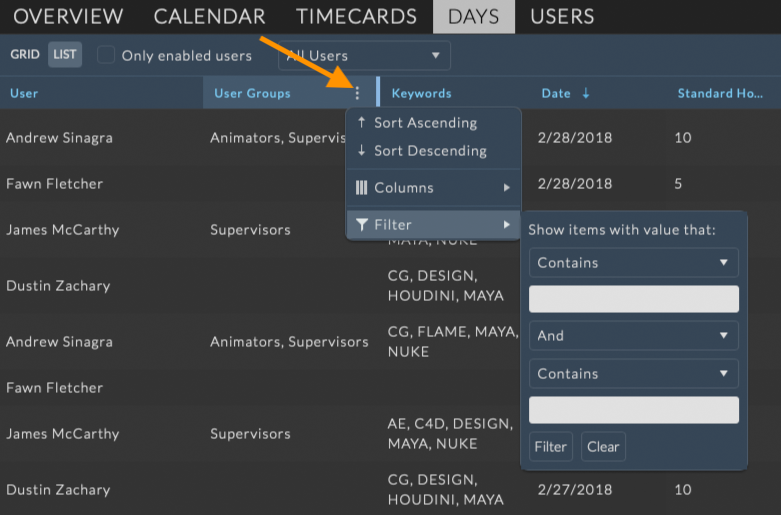
Additionally, each column can be individually filtered using the column menu options.
Export to Excel
The day view can be exported to Excel using the Export to Excel ellipsis menu option. Any filters that have been applied to the grid will be respected in the export.
Timecard Users
The timecard users view displays the total amount of time for each user over the selected filter period. As this view covers the entire range of timecards, individual timecard selection and editing timecard information is not available.
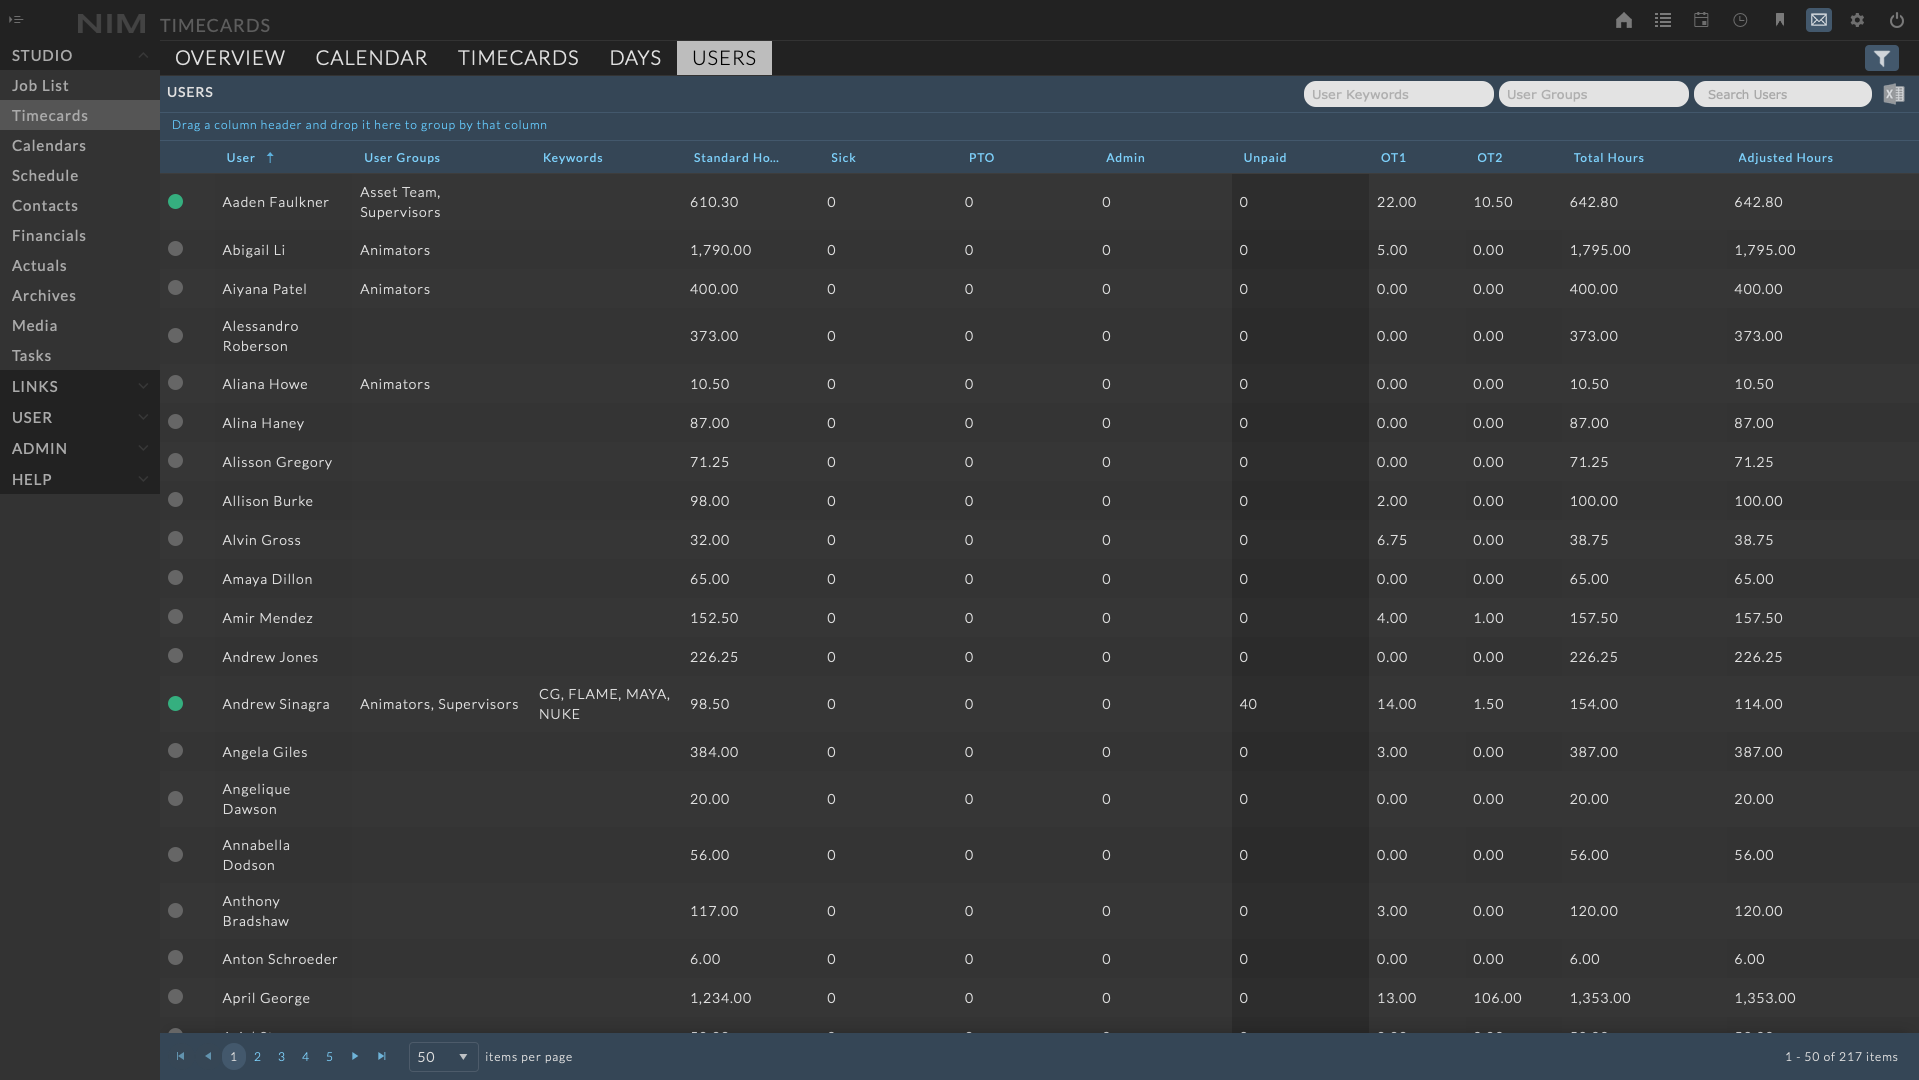
Available information includes:
Enabled Status |
Indicator displaying the users “Enabled” status in NIM |
User |
The users full name |
User Type |
The user type as defined on the user’s account |
Employment |
The employment status as defined on the user’s account |
User Groups |
The user groups the user is a member of |
Keywords |
User keywords that have been added to the user |
Standard Hours |
The total number of standard rate hours for the filtered time period |
Time Types |
Additional time types will each have their own columns with totals. A non-billable time types column will have a darker background color. |
OT1 |
The total number of overtime rate 1 hours for the filtered time period |
OT2 |
The total number of overtime rate 2 hours for the filtered time period |
Total Hours |
The total number of all hours for the filtered time period |
Filters
A series of filters are available in the users toolbar to refine the information displayed in the view.

The filters include:
User Keywords |
Limits the list of users to those tagged with the selected keywords |
User Groups |
Limits the list of users to those that are part of the selected user groups |
Search Users |
Limits the list of users to those whose name matches the search criteria |
Additionally, each column can be individually filtered using the column menu options.
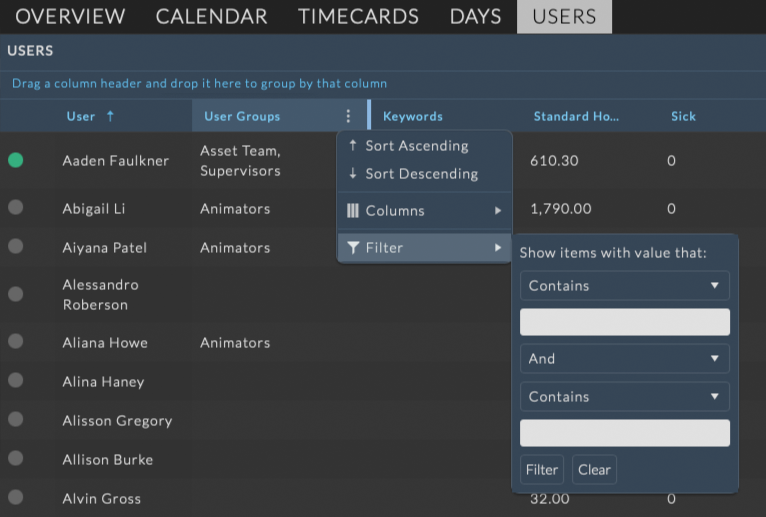
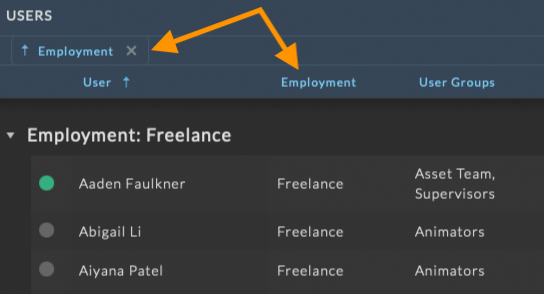
The Users grid contains the functionality to group users by the information in any column. To group the users, drag and drop a column header to the bar labeled Drag a column header and drop it here to group by that column.
Job Timecards
The Job Timecards section contains identical views to Studio Timecards displaying all timecards associated with the selected job. To load Job Timecards, select Production > Timecards from the Job Menu.
For more information on navigating and using data with the Timecard views, please refer to the Timecard Management section of the documentation.
Timecard Approvals
Timecards include a 5 stage, color-coded, approval process by which uses can lock timecard details and approve for actualization.
In the NIM approval workflow, users will enter timecards as they work. At the end of the billing period, the users submits their timecards to a user authorized to approve timecards for approval. The person that received the timecards can then dispute or approve the submitted timecards as needed. When a timecard is submitted, it is locked until its status is updated. Once a timecard is approved, it is locked and no further changes can be made. Approving a timecard can additionally notify an accounting or payroll department that the timecards have been approved and to proceed with payment. If a timecard is disputed, it is sent back to the submitting user for changes. With additional user permissions a timecard can be disputed after approval by a higher authority. When a user’s timecards are using a Payroll rate, they will additionally have the option to be “Resolved”. This process is fully accompanied by email notification to alert all users in the process of any required action needed to be made.
Approval Status
The five color-coded stages of approval are:
Color |
Status |
Description |
|---|---|---|
|
Not Submitted |
Timecards that have not been submitted can be edited and/or deleted at any time. |
|
Submitted for Approval |
Timecards that have been submitted for approval are locked and can not be modified or deleted. |
|
Disputed |
Timecards that have been disputed are available for modification and deletion, as well as re-submission. |
|
Approved |
Timecards that have been approved are locked and can not be modified. |
|
Resolved |
Timecards that have been resolved via Payroll are permanently locked and can not be modified. |


Note
The Resolved status is only used if a timecard has been resolved via Payroll
Optional permissions for Edit or Delete Submitted Timecards are available to allow modification to submitted but not approved timecards.
Optional permissions allows for users to Edit, Dispute, or Delete Approved Timecards providing an overriding approval.
Individual Approval
Individual timecards can be approved directly on the timecard by clicking the “Submitted” status and choosing “Approve” or “Dispute” from the status dropdown.
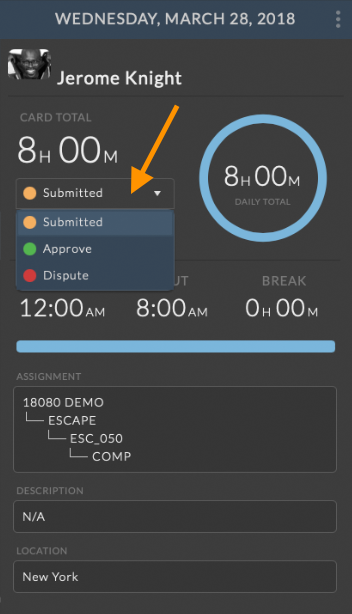
Click the current timecard status to update to Approved or Disputed. When selecting “Approve”, a notification will appear stating that further changes to the timecard can not be made once the timecard is approved. Click APPROVE to approve the timecard.
Select “Dispute” from the timecard status dropdown to dispute the timecard. The dispute dialog will appear requesting a reason for the dispute. Enter the reason for the dispute in the textbox and click DISPUTE to dispute the timecard.
Clicking outside of the Approval/Dispute popup will close the popup without taking action.
Group Approval
When a user has permission to approve timecards, an additional Approvals option will appear in the User menu. Clicking on the Approvals option will load the Timecard Approvals view.

Timecards that have been submitted for approval will be displayed in this view grouped by user. Next to the users name will be the start and end date range of all currently submitted timecards, the total number of timecards, and the total number of hours submitted.

All submitted timecards can be approved or disputed at once by clicking the Approve All or Dispute All buttons on the user’s row.
When Approve All is selected, a dialog box will appear stating that further changes to the timecard can not be made once the timecard is approved. Click OK to approve the timecard.
If disputing a timecard, a dialog box will appear requesting a reason for the dispute. Enter the reason for the dispute in the textbox and click OK to dispute the timecard.
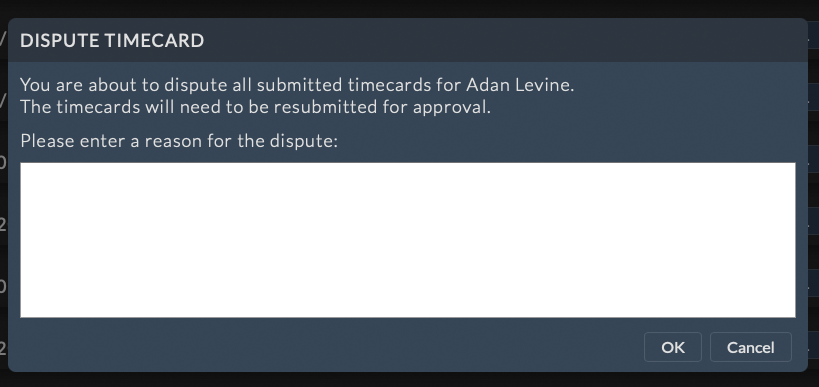
Note
This information will be shared with the user who’s timecard is being disputed.
To expand the row and see all of the submitted timecards click the  button to the left of the user’s name. All of the submitted timecards for the user will be displayed. Timecards may be selected individually, or multi-selected to approve or dispute as needed. Selecting a timecard will load the timecard details.
Email Notification
Email notifications will be sent for all Submission, Approval, and Disputed status changes if enabled in Admin > Timecard - Options. For more information on the timecard approval notification options please refer to the Timecards administration section of the documentation.
Submitting Timecards |
An email will be sent to the person who the timecards were submitted to along with any CC and BCC defined email addresses in the Admin > Timecard - Options. |
Approving Timecards |
An email will be sent to the person whose timecard was approved along with any CC and BCC defined email addresses in the Admin > Timecard - Options. |
Disputing Timecards |
An email will be sent to the person whose timecard was disputed with the dispute note along with any CC and BCC defined email addresses in the Admin > Timecard - Options. |
Example email received when timecards have been submitted for approval:
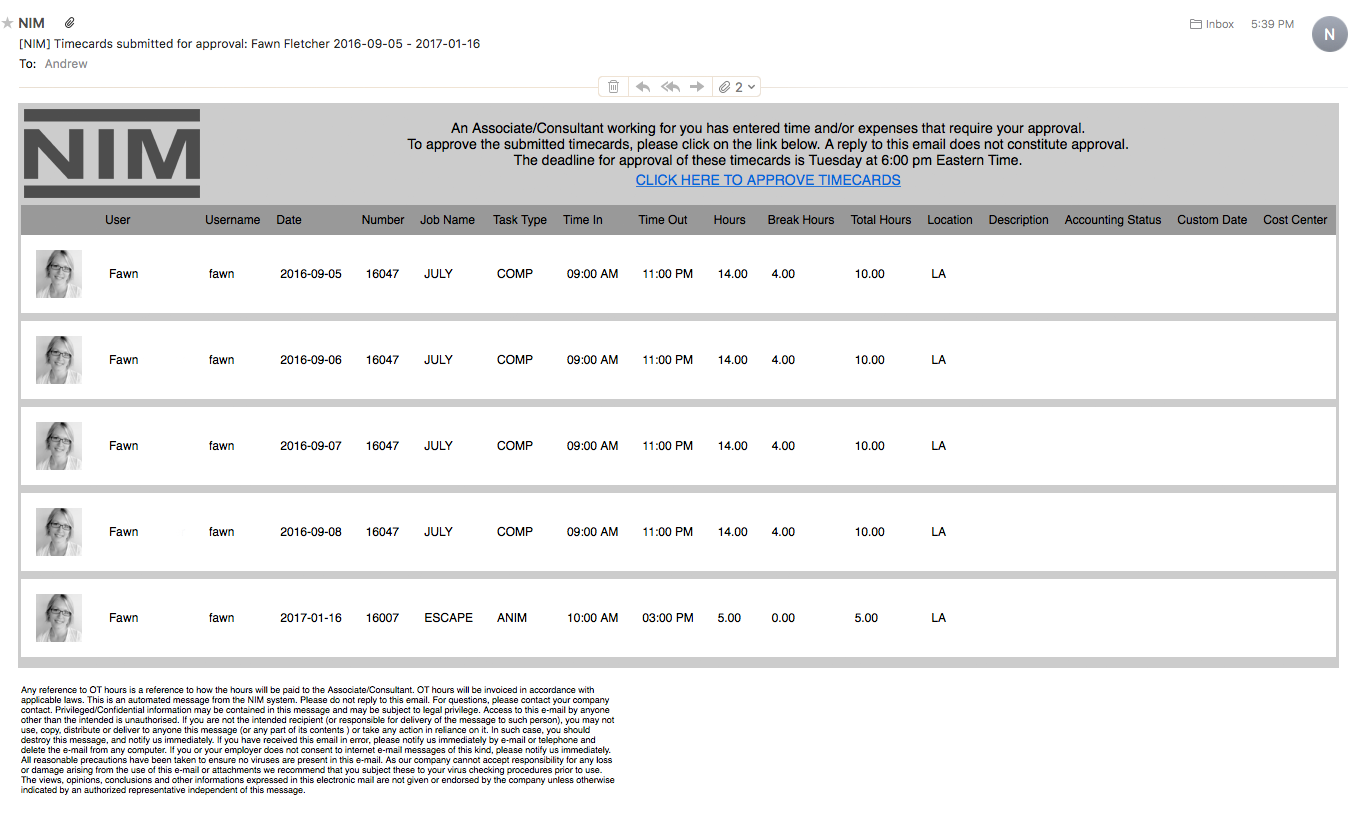
Note
Timecards will be grouped into a single email for each actual submission.