Job List
Jobs are the hub of NIM and a starting point for any new project. They act as a parent to all related information including bids, expenses, invoices, timecards, tasks, files, and more.
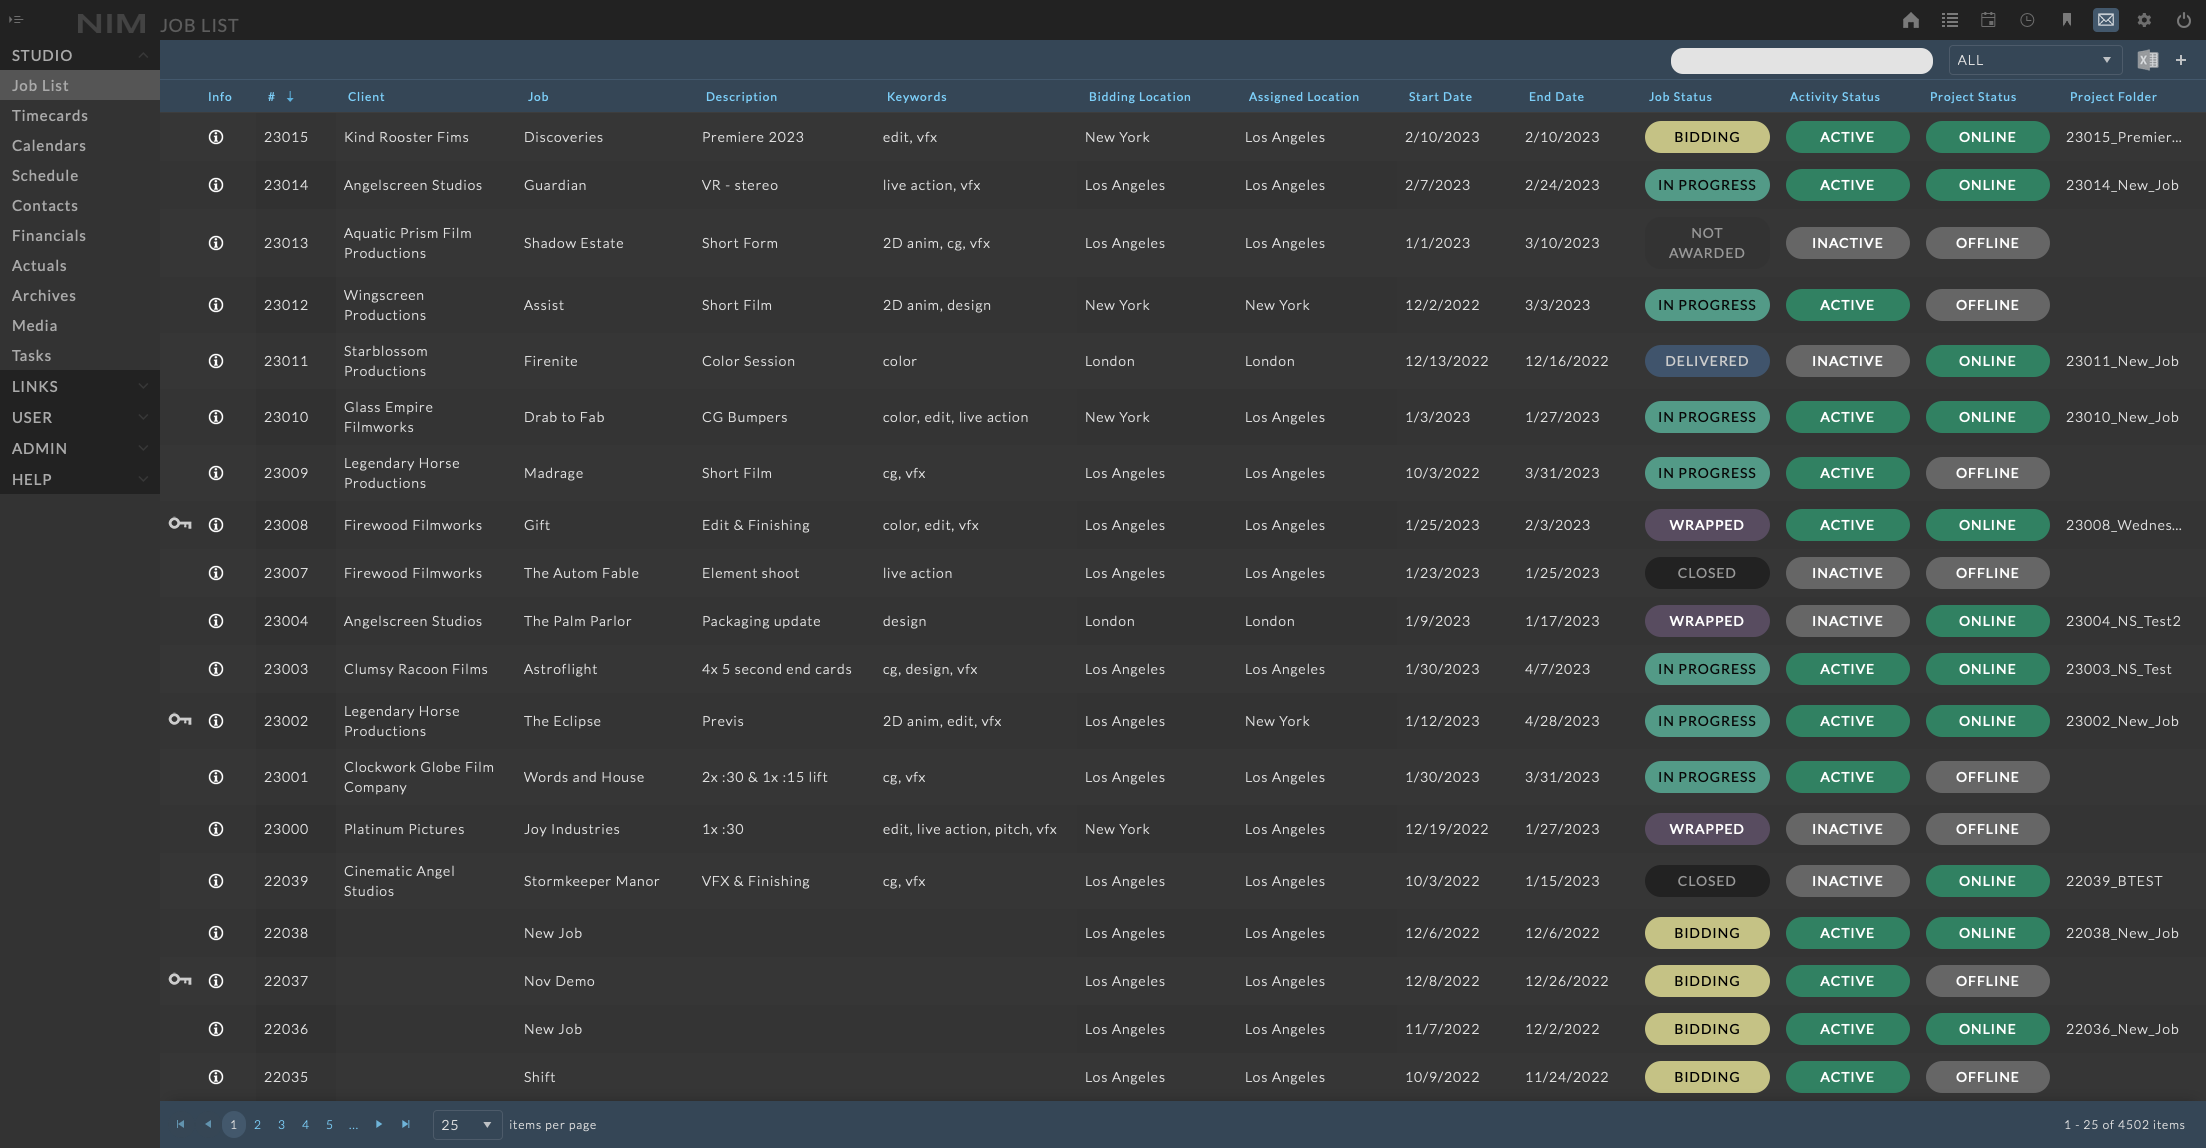
The full list of jobs is available via Studio > Job List from the Main Menu or press the  button from the NIM toolbar.
Working with Grids
Grids are a powerful tool for managing and working with large amounts of data. The grid UI offers various features to help you manage your data more effectively. For more details on working with grids, please refer to the Working with Grids section of the documentation..
Filters
The job list supports search and filter panel filtering.
Search
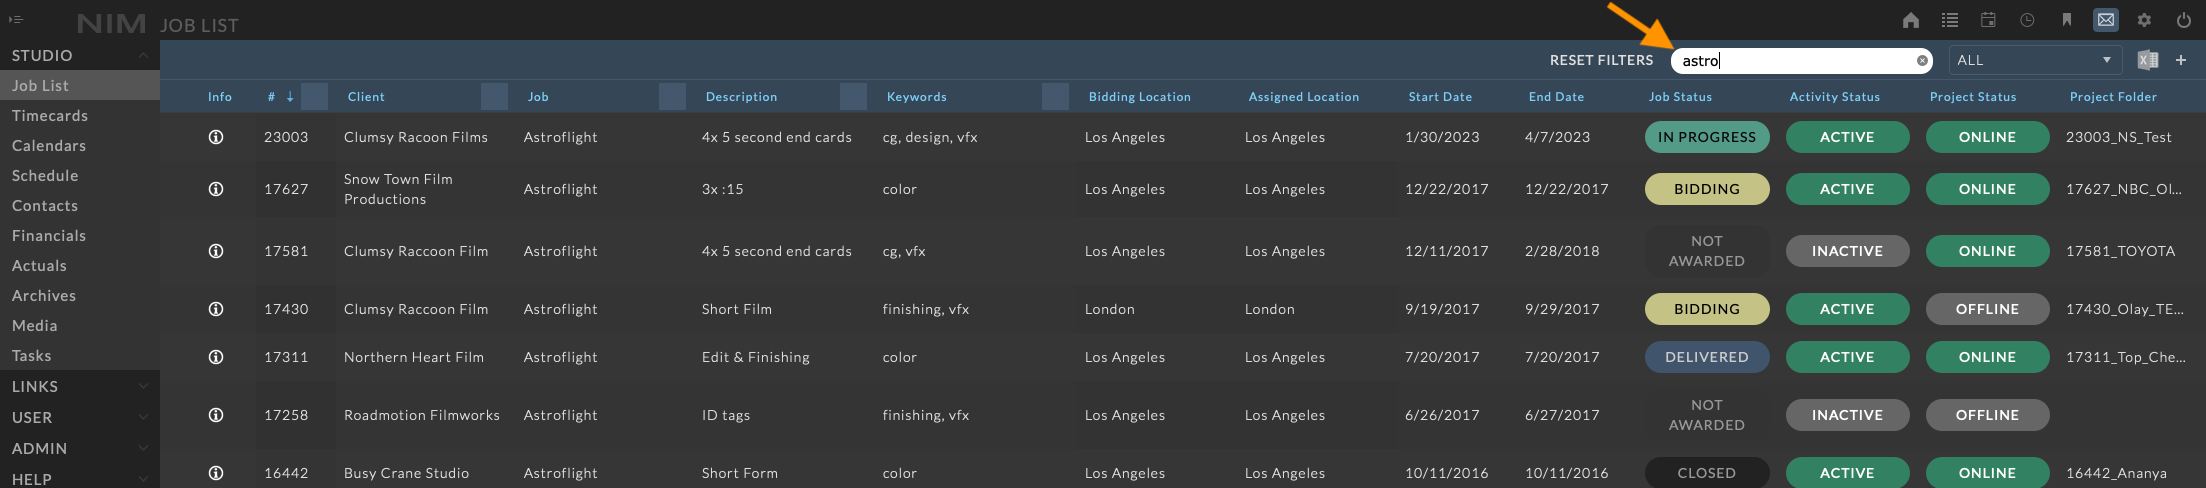
Using the search input, you can quickly search by job number, name, client, description, and keywords.
To search for a job, type the search criteria into the search bubble at the right of the job list toolbar.
Filter Panel

The filter panel allows you to filter the job list by various criteria, enabling the ability to create complex filter structures and save and share them for future use.
To open the filter panel, click the Filter button at the right of the job list toolbar.
For more information on working with the filter panel, please refer to the Filter Panel section of the documentation.
Active / Inactive Jobs

Jobs have an activity settings that can be set as Active or Inactive. The job list can be filtered to show only active jobs, inactive jobs, or all jobs. This is useful for keeping the job list clean and organized.
Export to Excel
The job grid can be exported to Excel using the Export to Excel ellipsis menu option. Any filters that have been applied to the grid will be respected in the export.
Add a Job

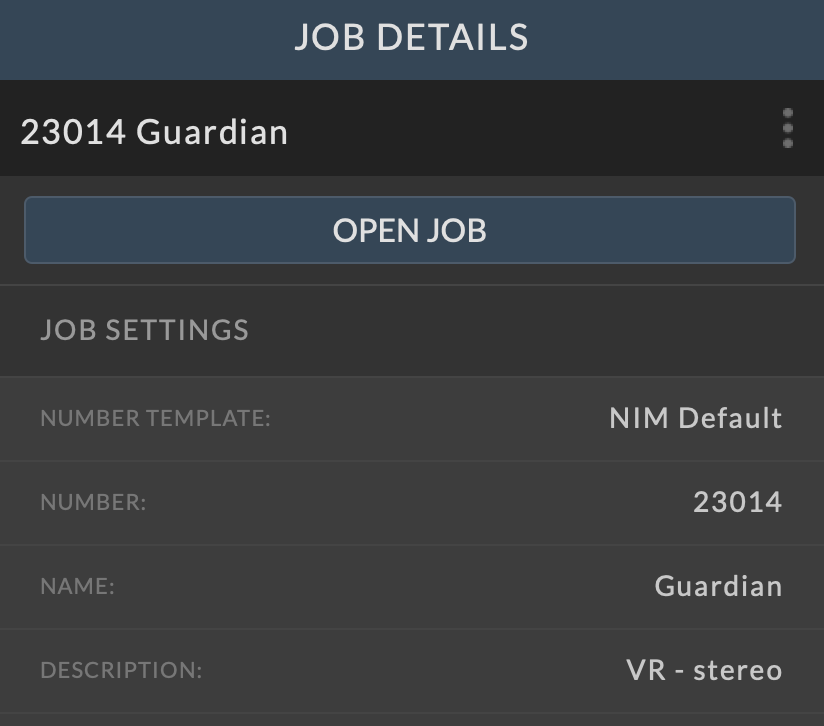
To create a new job, click the  button at the top right of the job list window to add a new job. The job will be added to the job list and the job info panel will open. You can now enter information for the new job.
A new job number is automatically generated for each job using the selected job number template.
The default job number template is automatically applied but a new template can be selected.
You can manually override the job number in the job info panel or in the job configuration.
Job information can be filled out here in the job info panel, or after the job is created from the job overview.
When done click the Save button at the bottom of the info panel to save your changes.
When adding a new job, it is immediately created to reserve the job number. If you wish to cancel the creation, click the Cancel button and then click the ellipsis menu and select Delete. You will be prompted to confirm deletion of the job.
Note
When deleting a job, the job and all of its related items are not immediately deleted. Instead they are moved to a “Deleted” section in Admin > Jobs, where all of the job information can be recovered at a later time. Deleted jobs can also be permanently deleted from the Admin view.
Available options include:
Number Template |
Select the job number template to be used for the job |
Number |
This is the automatically generated job number per the selected number template pattern. The job number can be manually overridden, however any manual entry will need to adhere to the selected number template pattern. |
Name |
The name of the job. This name appears throughout NIM whenever a job is referenced and in the NIM connectors. |
Description |
A brief description of the job. |
Color |
Color used for associated events on the scheduler when Job Colors is selected. |
Job Status |
Sets the current status of the job. Job statuses are defined via the Admin > Jobs - Status panel. |
Activity Status |
The job activity status can be set as Active or Inactive, either linked or independent of the job status. If the job activity status is set to Inactive, the job will be removed as an available option in various areas of the NIM UI and Connectors. Additionally, the job list can be filtered to show only active jobs. This is useful for keeping the job list clean and organized. |
Keywords |
Multiple job keywords can be added as a tag on a job. The job keywords are defined in the Admin > Jobs - Keywords panel. |
Security Groups |
You can add multiple security groups to a job. Only users who are in these security groups will have access to this job. Security groups are defined in the Admin > Security > Security Groups panel. |
Bidding Location |
In facilities where one location / department may be bidding a job and another doing the actual work, NIM offers a way to define this. The bidding location is the location that bid the job, based on the list of locations available in Admin > Locations. |
Assigned Location |
The location assigned to do the work based on the list of locations available in Admin > Locations. The assigned location is used when allocating job actuals to a specific location in the studio actualizations. |
Start Date |
The start date of the job. This value is used to filter information when looking at calendars, schedules, task gantt charts, projections, and actualizations. This will not limit the data but will create a reference starting point. |
End Date |
The end date of the job. This value is used to filter information when looking at calendars, schedules, task gantt charts, projections, and actualizations. This will not limit the data but will create a reference ending point. |
Currency |
The currency of the job. This will determine the default currency for bids, expenses, and invoices created within the job, and the job actuals will be displayed in this currency. |
Client Contacts |
Jobs can have multiple contacts linked to the job. This field displays the list of linked contacts. |
Client Details |
Additional client detail information for the job. |
Job Detail Fields |
In addition to the fields listed above, jobs include a number of optional fields to track job information without needing to add custom fields. For more information on job default fields please refer to the Job Options section of the documentation. |
Custom Fields |
If custom job fields have been defined, they will appear at the bottom of the job info panel. For more information on job custom fields please refer to the Custom Job Fields section of the documentation. |
Edit a Job
To edit a job, click on the info button in the row you wish to edit to open the job info panel. Click on the ellipsis menu in the job info panel and choose Edit. Make the necessary changes and click the Save button at the bottom of the info panel to save your changes. Click the Cancel button to return to the view mode without saving changes.

Note
Job information can also be edited within the job on the Job Overview page. For more information, please refer to the Job Overview section of the documentation.
Deleting/Restoring Jobs
Delete a job entry by selecting the job from the grid, clicking the ellipsis menu in the job panel, and selecting Delete. You will be prompted to confirm deletion of the job.
Important
Deleting a job is not permanent! Jobs can be undeleted from the Admin > Jobs - Deleted tab. This allows jobs to retain all of their connected information in case a job was deleted in error. Permanently deleting a job will additionally remove all associated job item data. For more information, please refer to the Deleted Jobs section of the documentation.
Opening Jobs
Jobs can be accessed two ways from the job list.
To enter the job directly from the grid, click on the row of the job. This will take you directly to the job menu and the job overview.
Alternatively, if the job info panel is open, click on the OPEN JOB button at the top of the job info panel.